Difference between revisions of "Mobile/iDMSS IP Setup"
(→Step by Step Instructions) |
|||
| Line 9: | Line 9: | ||
<embedvideo service="youtube">https://youtu.be/MKwhORfZj54</embedvideo> | <embedvideo service="youtube">https://youtu.be/MKwhORfZj54</embedvideo> | ||
===Step by Step Instructions=== | ===Step by Step Instructions=== | ||
| − | + | 1. From Main Menu select "Device Manager" | |
[[File:domaindmss1.png|300px]] | [[File:domaindmss1.png|300px]] | ||
| − | + | 2. Select Plus Icon to add device. | |
[[File:domaindmss3.png|300px]] | [[File:domaindmss3.png|300px]] | ||
| − | + | 3. Select IP/Domain. | |
[[File:domaindmss4.png|300px]] | [[File:domaindmss4.png|300px]] | ||
| − | + | 4. Name the device Note: Name on picture is an example. | |
[[File:domaindmss6.png|300px]] | [[File:domaindmss6.png|300px]] | ||
Revision as of 00:04, 9 November 2017
Contents
How to Access System Using IP/Domain via Mobile Application
Description
This allows you to access Camera/NVRs using IP address.
Prerequisites
- Smartphone
- Cameras/NVR/DVRs to log in
- iDMSS/gDMSS
Video Instructions
Step by Step Instructions
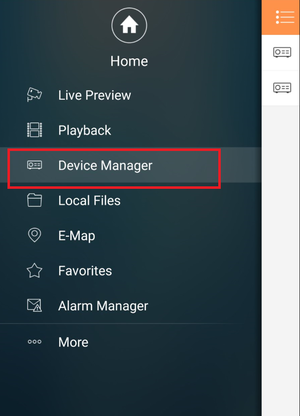
1. From Main Menu select "Device Manager"
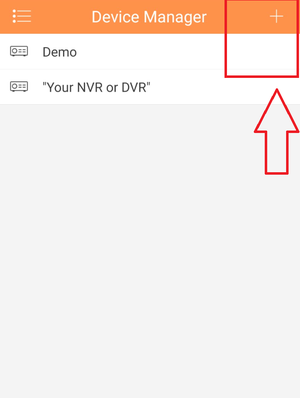
2. Select Plus Icon to add device.
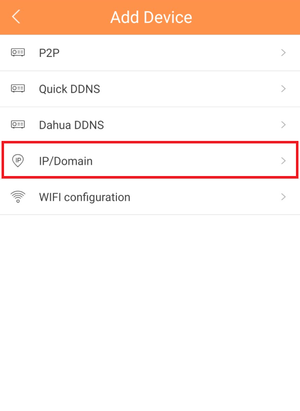
3. Select IP/Domain.
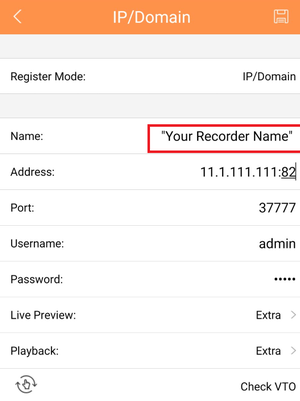
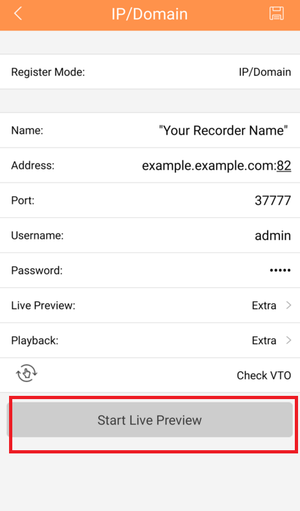
4. Name the device Note: Name on picture is an example.
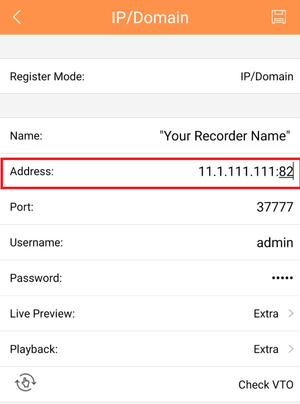
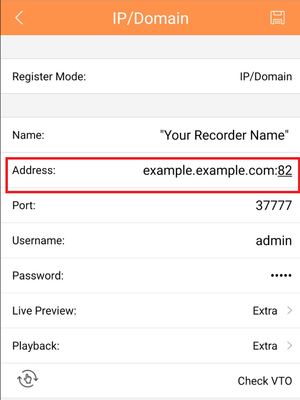
Step 5.For Address, Input either IP address or Domain name. Note: IP address and domain are examples. Do not copy.
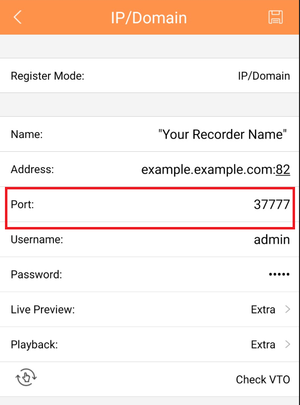
Step 7. Input TCP port number. Note: it is defaulted at 37777
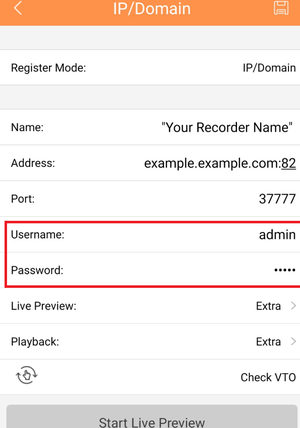
Step 8. Input User Name and Password.
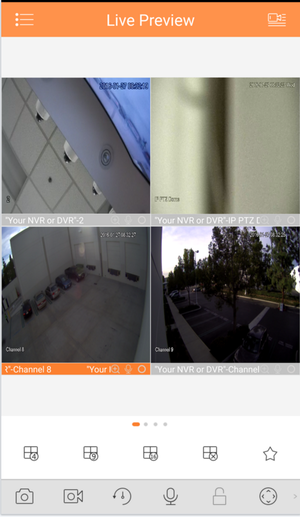
Step 9.Select "Live Preview"
