Difference between revisions of ":Scene Change"
(→IVS Best Practices) |
(→IVS Best Practices) |
||
| Line 14: | Line 14: | ||
===IVS Best Practices=== | ===IVS Best Practices=== | ||
To assess issues with IVS compatibility between the camera and NVR, please update both devices to the most current firmware and factory reset the NVR, and use the hard reset button to reset the camera. | To assess issues with IVS compatibility between the camera and NVR, please update both devices to the most current firmware and factory reset the NVR, and use the hard reset button to reset the camera. | ||
| + | |||
| + | ==Instructions== | ||
| + | <div class="toccolours mw-collapsible mw-collapsed"> | ||
| + | [[File:Icon_for_type_SystemUI_Old.png|250px]]<span style="font-size:180%;">'''SystemUI Old'''</span> | ||
| + | <div class="mw-collapsible-content">{{Template:IVS_Scene_Change_SystemUI_OldGUI}}</div> | ||
| + | </div> | ||
| + | |||
| + | <div class="toccolours mw-collapsible mw-collapsed"> | ||
| + | [[File:Icon_for_type_SystemUI_New.png|250px]]<span style="font-size:180%;">'''SystemUI New'''</span> | ||
| + | <div class="mw-collapsible-content">{{Template:IVS_Scene_Change_SystemUI_NewGUI}}</div> | ||
| + | </div> | ||
| + | |||
| + | <div class="toccolours mw-collapsible mw-collapsed"> | ||
| + | [[File:Icon_for_type_WebUI_Old.png|250px]]<span style="font-size:180%;">'''WebUI Old'''</span> | ||
| + | <div class="mw-collapsible-content">{{Template:IVS_Scene_Change_WebUI_Old}}</div> | ||
| + | </div> | ||
| + | |||
| + | <div class="toccolours mw-collapsible mw-collapsed"> | ||
| + | [[File:Icon_for_type_WebUI_New.png|250px]]<span style="font-size:180%;">'''WebUI New'''</span> | ||
| + | <div class="mw-collapsible-content">{{Template:IVS_Scene_Change_WebUI_New}}</div> | ||
| + | </div> | ||
| + | |||
| + | <div class="toccolours mw-collapsible mw-collapsed"> | ||
| + | [[File:Icon_for_type_SmartPSS.png|250px]]<span style="font-size:180%;">'''SmartPSS'''</span> | ||
| + | <div class="mw-collapsible-content">{{Template:IVS_Scene_Change__SmartPSS}}</div> | ||
| + | </div> | ||
| + | |||
| + | <div class="toccolours mw-collapsible mw-collapsed"> | ||
| + | [[File:Icon_for_type_DSS_Express_S.png|250px]]<span style="font-size:180%;">'''DSS Express S'''</span> | ||
| + | <div class="mw-collapsible-content">{{Template:IVS_Scene_Change_DSS_Express}}</div> | ||
| + | </div> | ||
===Video Instructions=== | ===Video Instructions=== | ||
Revision as of 15:47, 9 December 2019
Contents
- 1 Scene Change
- 2 Instructions
- 2.1 Prerequisites
- 2.2 Video Instructions
- 2.3 Step By Step Instructions
- 2.4 Prerequisites
- 2.5 Video Instructions
- 2.6 Step By Step Instructions
- 2.7 Prerequisites
- 2.8 Video Instructions
- 2.9 Step By Step Instructions
- 2.10 Prerequisites
- 2.11 Video Instructions
- 2.12 Step By Step Instructions
- 2.13 Description
- 2.14 Prerequisites
- 2.15 Video Instructions
- 2.16 Description
- 2.17 Prerequisites
- 2.18 Video Instructions
- 2.19 Video Instructions
- 2.20 Step by Step Instructions
- 2.21 System Interface Setup
- 2.22 SmartPSS Setup
- 2.23 Video Instructions
Scene Change
Description
Video scene change function is used to detect if the camera is covered or moved and other abnormalities of monitoring scene change.
The intelligence base will compare the images before and after being covered or turned to judge if there is any similarity; if not it will generate an alarm.
Prerequisites
- Intelligent Network Camera.
- A HDCVI Camera that is connected to a HDCVI DVR that has intelligent features.
- Updated firmware that supports intelligent features.
- Internet Explorer.
IVS Best Practices
To assess issues with IVS compatibility between the camera and NVR, please update both devices to the most current firmware and factory reset the NVR, and use the hard reset button to reset the camera.
Instructions
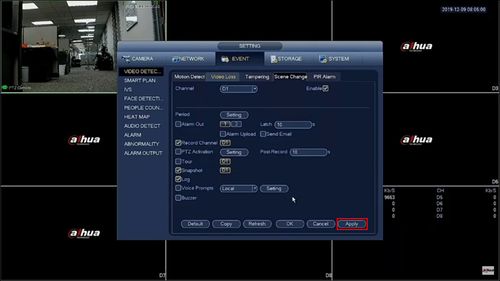
This guide will show how to setup the Scene Change IVS feature at the SystemUI with OldGUI
Prerequisites
- Dahua device with Scene Change IVS feature
Video Instructions
Step By Step Instructions
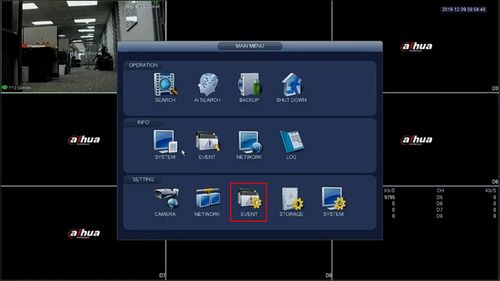
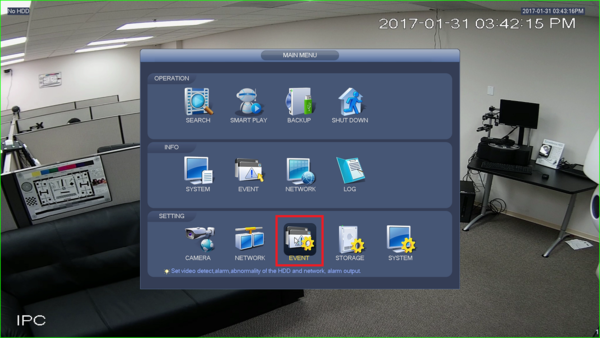
1. From the Main Menu
Click Event
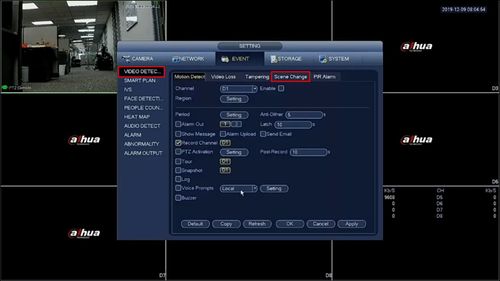
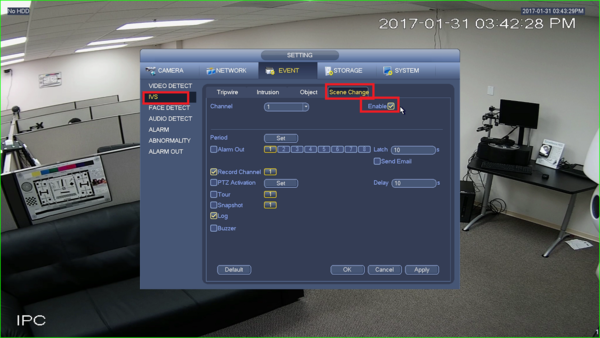
2. Under Video Detection
Click Scene Change
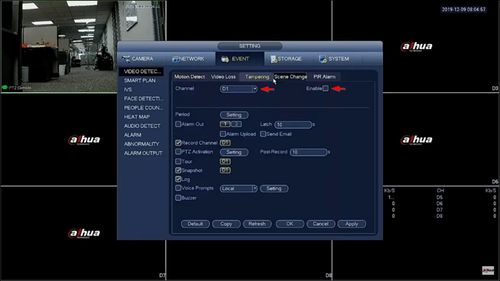
3. Use the dropdown box to select the channel
Check the box to enable the Scene Change feature
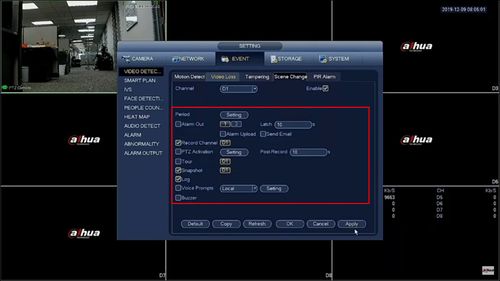
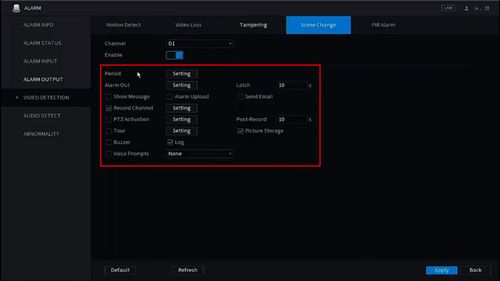
4. Configure the desired parameters for alarm triggers (actions when the IVS rule is triggered)
5. Click Apply to save all settings
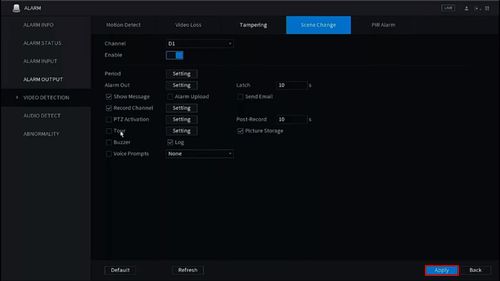
This guide will show how to setup the Scene Change IVS feature at the SystemUI with NewGUI
Prerequisites
- Dahua device with Scene Change IVS feature
Video Instructions
Step By Step Instructions
1. From the Main Menu
Click Event
2. Click Video Detection
3. Click Scene Change
4. Use the dropdown box to select the Channel
Click the Enable setting to enable the IVS feature
5. Configure the desired parameters for alarm triggers (actions when the IVS rule is triggered)
6. Click Apply to save all settings
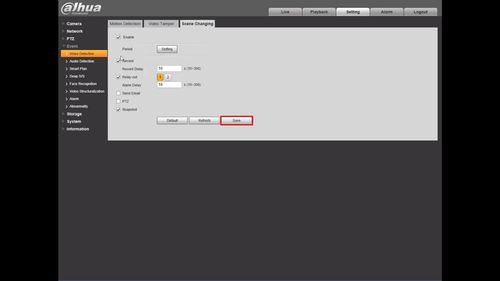
This guide will show how to setup the Scene Change IVS feature at the WebUI with OldGUI
Prerequisites
- Dahua device with Scene Change IVS feature
Video Instructions
Step By Step Instructions
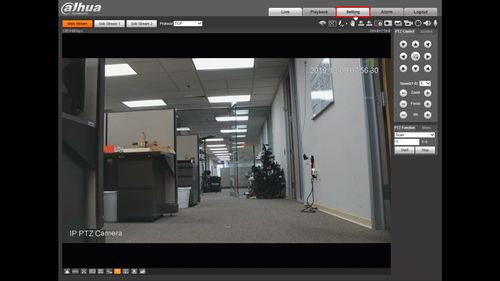
1. From the Main Page of the WebUI
Click Setting
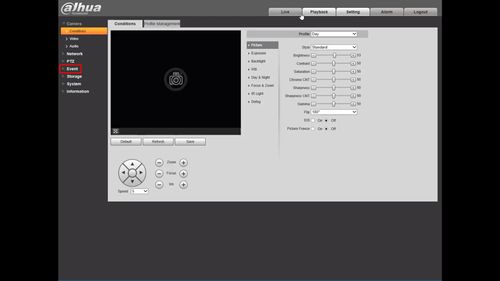
2. Click Event
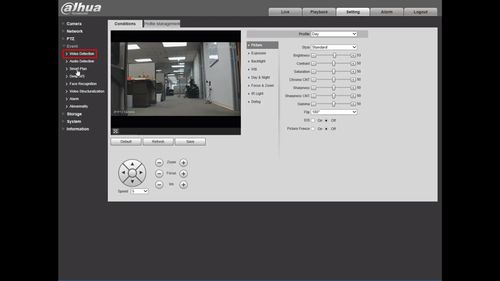
3. Click Video Detection
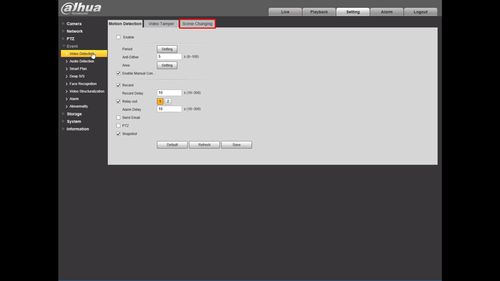
4. Click Scene Changing
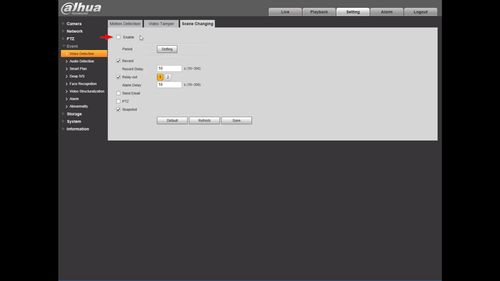
5. Check the box to enable the IVS feature
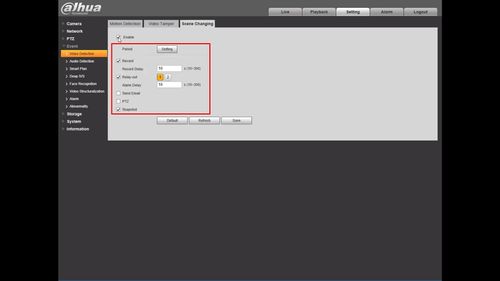
6. Configure the desired parameters for alarm triggers (actions when the IVS rule is triggered)
7. Click Save to save all settings
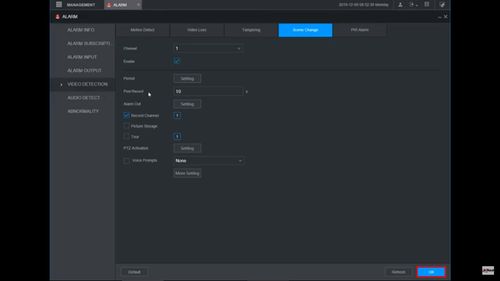
This guide will show how to setup the Scene Change IVS feature at the WebUI with NewGUI
Prerequisites
- Dahua device with Scene Change IVS feature
Video Instructions
Step By Step Instructions
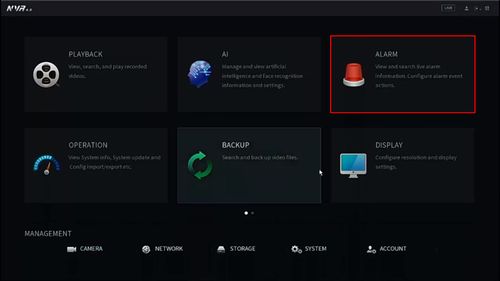
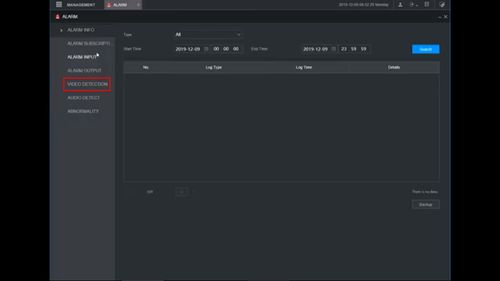
1. From the Main Menu
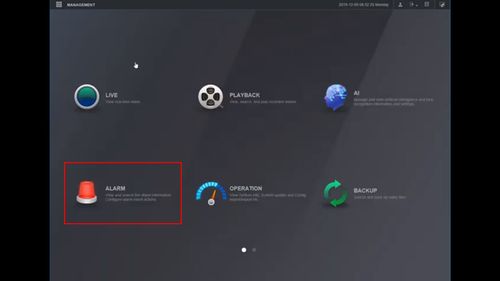
Click Alarm
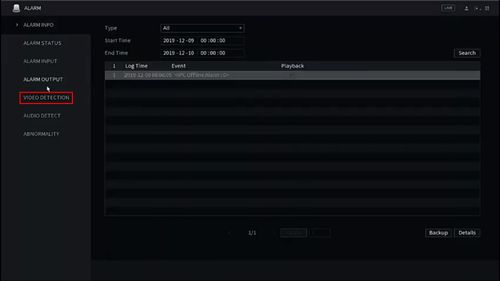
2. Click Video Detection
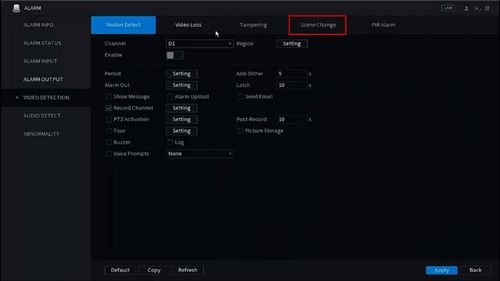
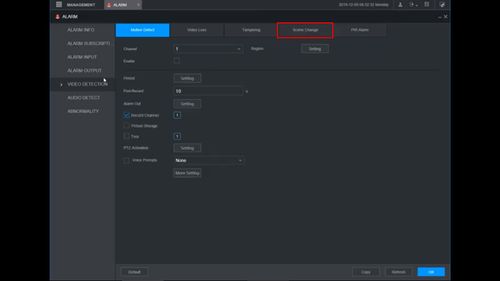
3. Click Scene Change
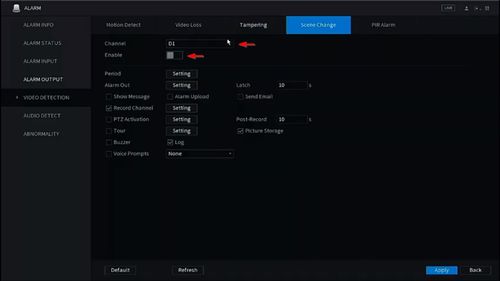
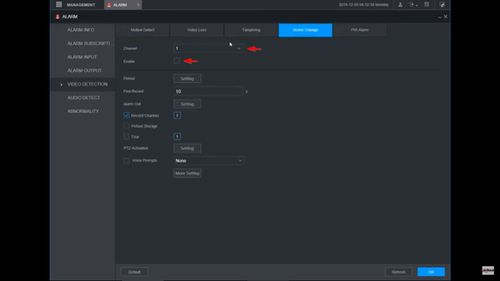
4. Use the dropdown box to select the Channel
Click the Enable setting to enable the IVS feature
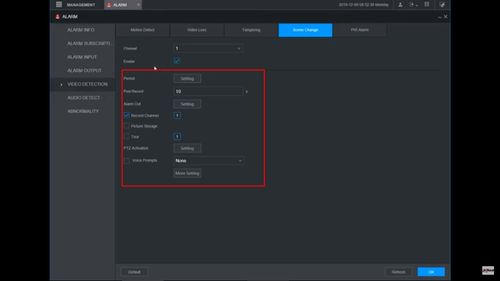
5. Configure the desired parameters for alarm triggers (actions when the IVS rule is triggered)
6. Click OK to save all settings
Video Instructions
Step by Step Instructions
1.Click “Enable”.
2.Working period setup, default is all day.
3.Support alarm activation setup: record, relay-out, send email and snapshot. Click "Save" to save settings.
System Interface Setup
Prerequisites
- Intelligent Network Camera
- Intelligent NVR
or
- HDCVI Camera that is connected to a HDCVI DVR that has intelligent features
Video Instructions
Step by Step Instructions
1. Click on Event.
2. Enable Scene Change under IVS.
3. Click on Apply.
SmartPSS Setup
Video Instructions
Prerequisites
- SmartPSS
- IVS capable device
- Upgraded devices to latest firmware
Step by Step Instructions
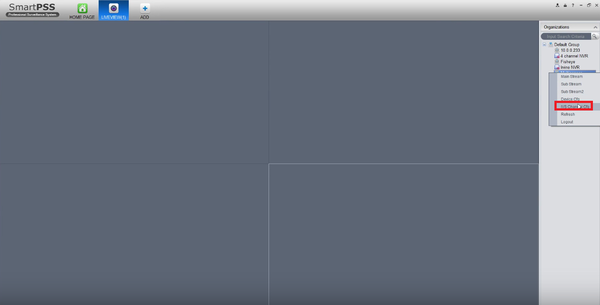
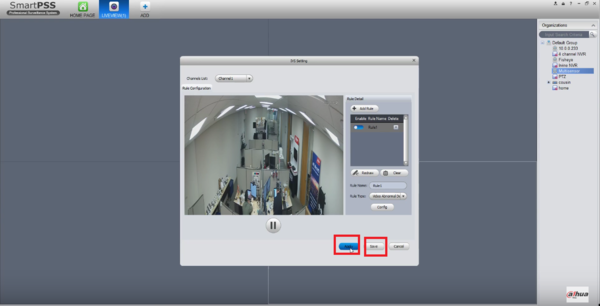
1. Right click on device and select IVS channel config.
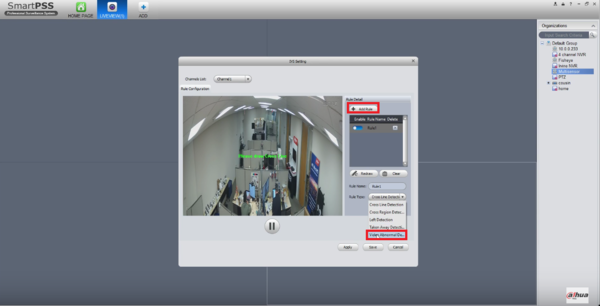
2. Add rule and select video abnormal detection.
3. Hit Apply and save.
