Difference between revisions of "CMS/DSS/Add Account Role"
(→How to Add an Account Role) |
(→Step by Step Instructions) |
||
| Line 19: | Line 19: | ||
===Step by Step Instructions=== | ===Step by Step Instructions=== | ||
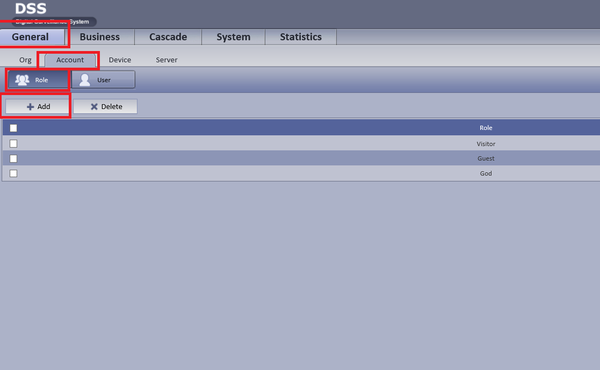
| − | + | 1. From the main menu Select the General Tab ➞ Account ➞ Role ➞ Add | |
| − | |||
[[File:dssaccountrole2.png|600px]] | [[File:dssaccountrole2.png|600px]] | ||
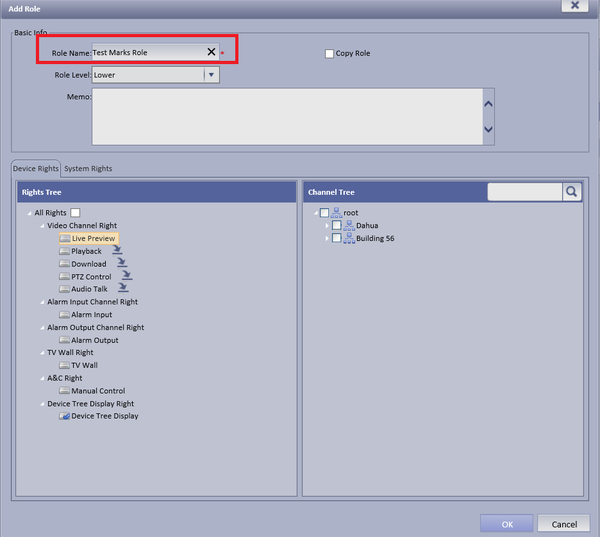
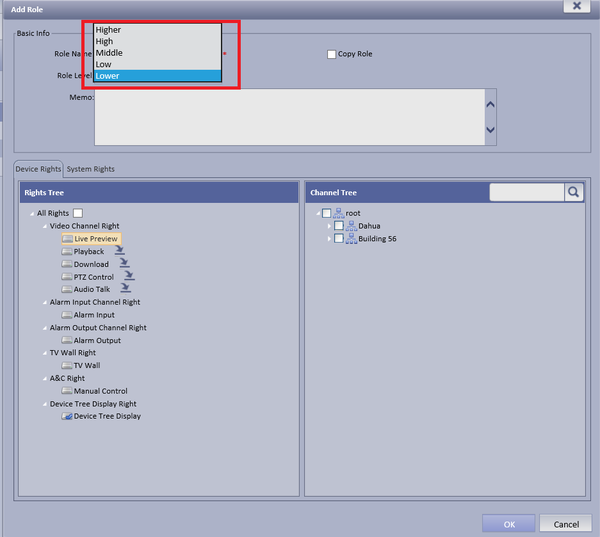
| − | + | 2. Add user Name to Role Name ➞ Choose level of role | |
[[File:dssaccountrole3.png|600px]] | [[File:dssaccountrole3.png|600px]] | ||
| Line 32: | Line 31: | ||
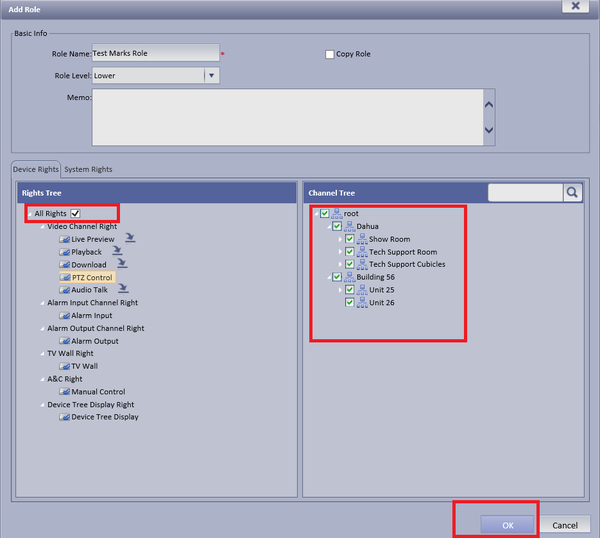
| − | + | 3. Check Mark the rights of operation this role is able to access ➞ Select OK to save. | |
[[File:dssaccountrole5.png|600px]] | [[File:dssaccountrole5.png|600px]] | ||
Revision as of 15:57, 20 September 2016
Contents
How to Add an Account Role
Prerequisites
- A Connection to the DSS Server
- An Internet Connection
- DSS server IP address
Windows:
- Microsoft Windows XP SP3, Microsoft Windows 7 or above
- Core 2 dual-core 3.0Ghz or above
- At least 10GB free hard disk space or above
- directX 9.0c or above
- 2GB Memory or above
- 1024×768 resolution or above
- Internet explorer 7 or above
Video Instructions
Step by Step Instructions
1. From the main menu Select the General Tab ➞ Account ➞ Role ➞ Add
2. Add user Name to Role Name ➞ Choose level of role
3. Check Mark the rights of operation this role is able to access ➞ Select OK to save.


