Difference between revisions of "IPCSetStatic"
| (4 intermediate revisions by 3 users not shown) | |||
| Line 1: | Line 1: | ||
===How to Set IP Camera to Static=== | ===How to Set IP Camera to Static=== | ||
Note: If your IP Camera is connected to the back of an NVR, these instructions will not apply. Please see, "[[ConnectIPCtoNVR|How to Connect IP Camera to NVR]]" | Note: If your IP Camera is connected to the back of an NVR, these instructions will not apply. Please see, "[[ConnectIPCtoNVR|How to Connect IP Camera to NVR]]" | ||
| − | |||
| − | 1. | + | 1. Open a web browser and input the camera's IP address |
| − | |||
| − | |||
| − | |||
| − | |||
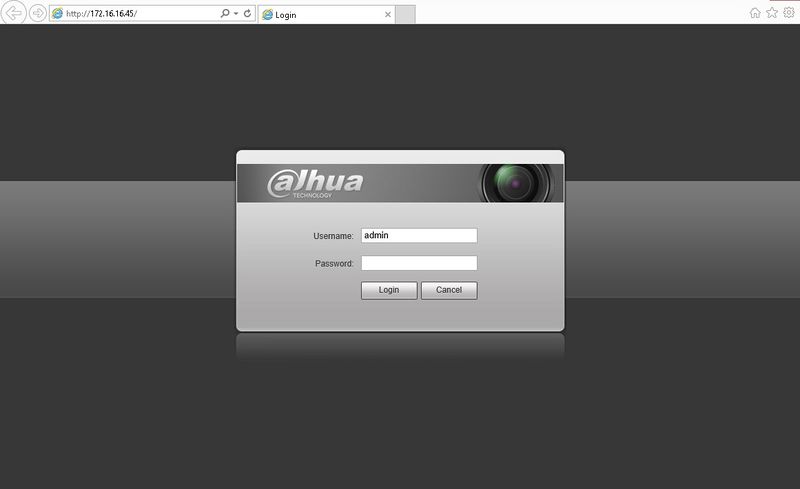
[[file:IPCLoginPage.jpg|800px]] | [[file:IPCLoginPage.jpg|800px]] | ||
| − | 4. Login | + | 4. Login to the camera's web interface |
| − | |||
| − | |||
5. Click, "Setup" | 5. Click, "Setup" | ||
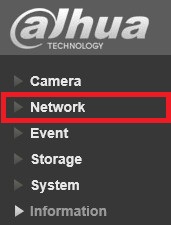
6. Click, "Network" | 6. Click, "Network" | ||
| − | [[file:IPCSidebarNetwork.jpg | + | |
| + | [[file:IPCSidebarNetwork.jpg]] | ||
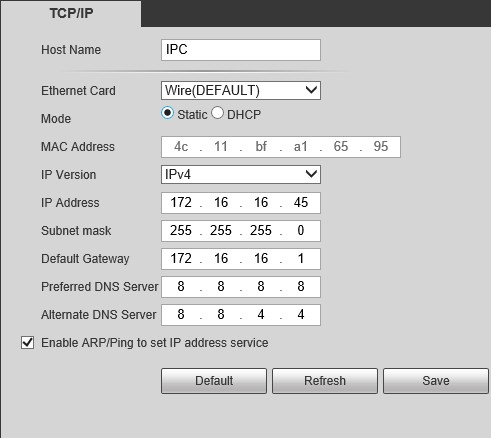
7. Click, "TCP/IP" | 7. Click, "TCP/IP" | ||
| Line 25: | Line 19: | ||
9. Input the IP address, subnet mask, Default Gateway, and primary and alternate DNS server. | 9. Input the IP address, subnet mask, Default Gateway, and primary and alternate DNS server. | ||
| + | |||
[[file:IPCNetworkTCPIP.jpg]] | [[file:IPCNetworkTCPIP.jpg]] | ||
| + | |||
10. Click, "Save" | 10. Click, "Save" | ||
| + | |||
| + | |||
| + | |||
| + | |||
| + | |||
| + | |||
| + | [[Category:IP Camera]] | ||
| + | [[Category:ConfigTool]] | ||
| + | [[Category:How To]] | ||
Latest revision as of 21:43, 26 June 2023
How to Set IP Camera to Static
Note: If your IP Camera is connected to the back of an NVR, these instructions will not apply. Please see, "How to Connect IP Camera to NVR"
1. Open a web browser and input the camera's IP address
4. Login to the camera's web interface
5. Click, "Setup"
6. Click, "Network"
7. Click, "TCP/IP"
8. Change Mode from, "DHCP" to "Static"
9. Input the IP address, subnet mask, Default Gateway, and primary and alternate DNS server.
10. Click, "Save"


