Difference between revisions of "New GUI/Instructions/Alarm Record"
| (One intermediate revision by the same user not shown) | |||
| Line 9: | Line 9: | ||
==Video Instructions== | ==Video Instructions== | ||
| − | + | <embedvideo service="youtube">https://youtu.be/0QeIEgyv9P8</embedvideo> | |
| − | <embedvideo service="youtube">https:// | ||
==Step by Step Instructions== | ==Step by Step Instructions== | ||
Latest revision as of 19:13, 31 August 2023
Contents
Alarm Record Setup
Description
This article is to show you how to setup alarm recording thru new Web GUI.
Note: please refer to product spec sheet for alarm input/output availability. Not all Dahua Recorder support alarm input/output.
Prerequisites
Video Instructions
Step by Step Instructions
Setup Alarm Input
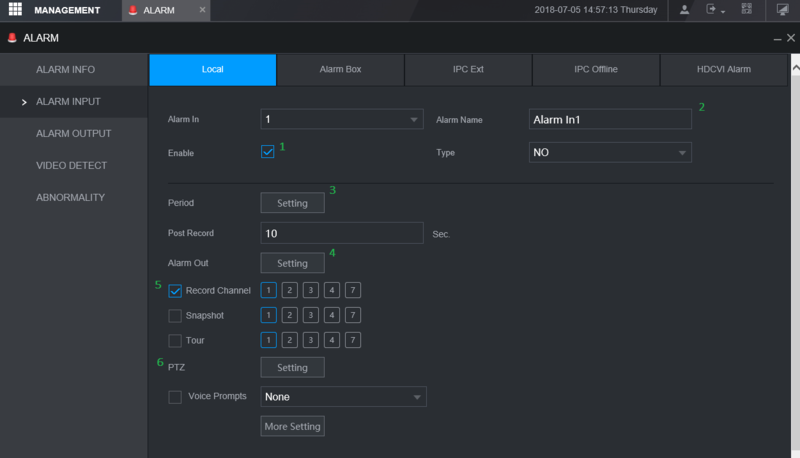
From main menu, click on Alarm. Click on Alarm input. We are using XVR 72 series for this example. The Alarm Input page will launch as shown below:
Select the Alarm input number that you like to use. This number is correspond to the alarm port on the back of recorder.
1. Click Enable to enable the alarm input.
2. Enter Alarm Name. By default is set to AlarmIn#
3. Period is to schedule your Alarm when you want to be enable.
4. With the alarm input, you can trigger recorder's alarm output.
5. This to select which channel you want recorder to start recording when alarm is triggered.
6. You can call basic PTZ action Preset, Tour, or Pattern when alarm is triggered.
Setup Alarm Recording Schedule
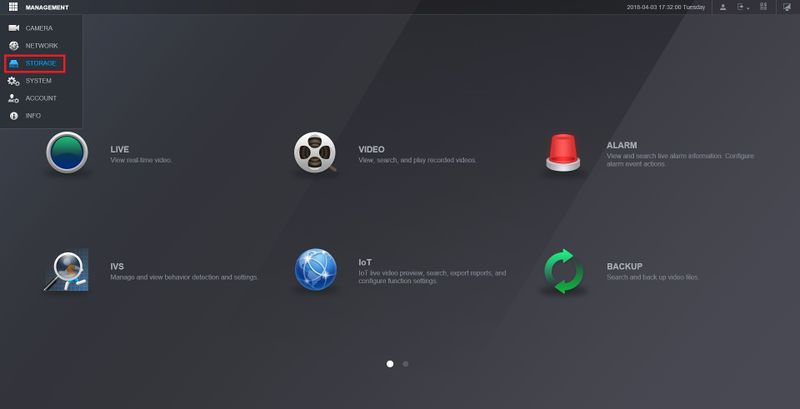
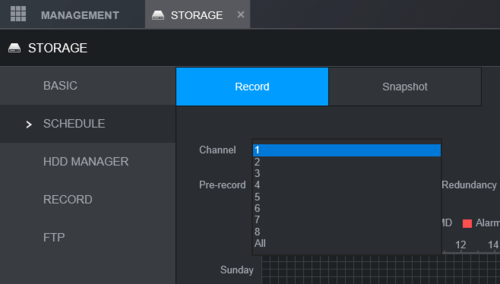
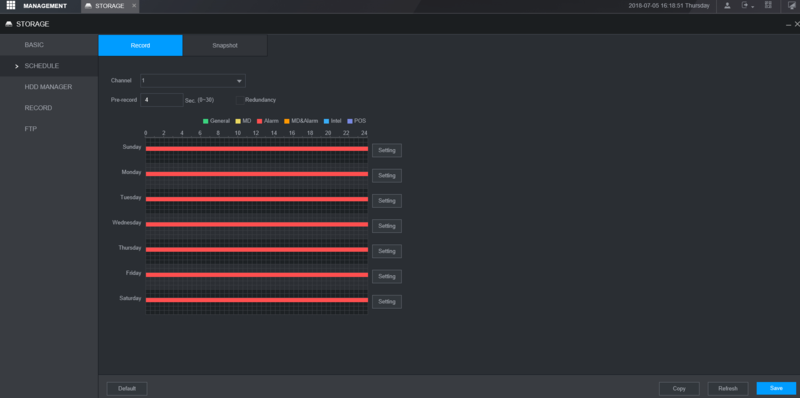
1. From the main menu, click on Management > Storage > Schedule.
2. Select the channel you like to setup.
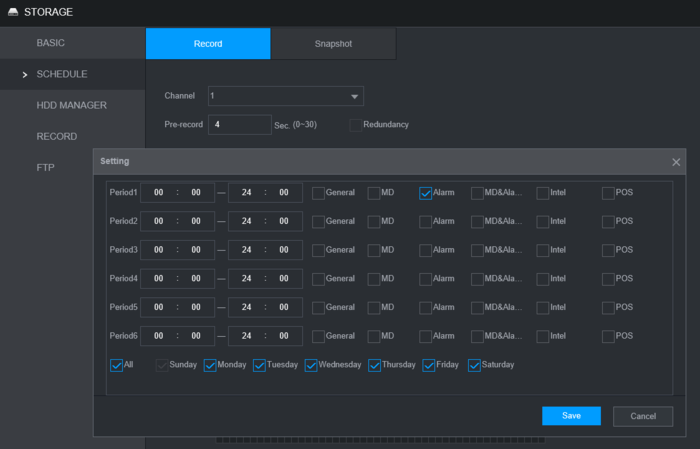
3. To enable Alarm recording, Click on Setting next to the timeline bar.
4. Set your duration (By default is 24 hour, 00-24). Then select Alarm.
You can select all days to copy the schedule to all week. Click Save.
5. Click Save.
