Notice: Firmware Links Under Maintenance We are currently undergoing maintenance on all firmware links. If any links are inaccessible, please email or contact Tech Support for the firmware. We appreciate your patience during the maintenance, thank you for your understanding.
Difference between revisions of "NVR/Recording Setup/Snapshot"
| Line 28: | Line 28: | ||
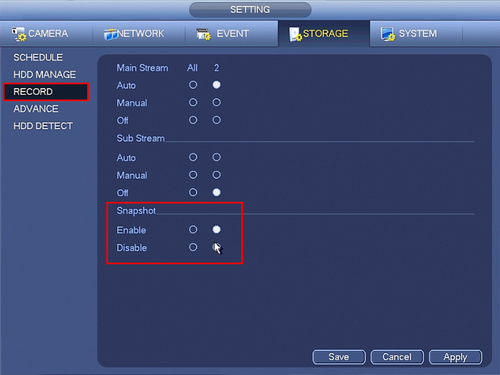
8. On the left, click, "Record" and ensure the, "Enabled" box is filled in for each channel you wish to enable snapshot on. | 8. On the left, click, "Record" and ensure the, "Enabled" box is filled in for each channel you wish to enable snapshot on. | ||
| − | [[Snapshot5.png|500px]] | + | [[file:Snapshot5.png|500px]] |
Revision as of 22:19, 26 October 2015
Snapshot Setup
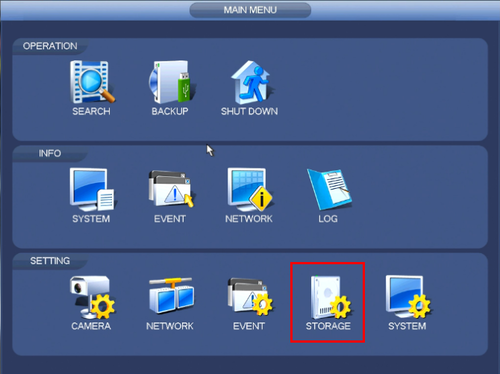
1. From the Main Menu click, "Storage" under, "Settings"
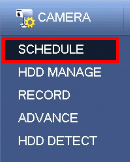
2. Click, "Schedule" on the left hand side.
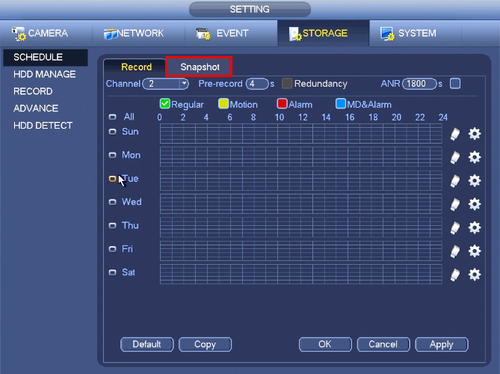
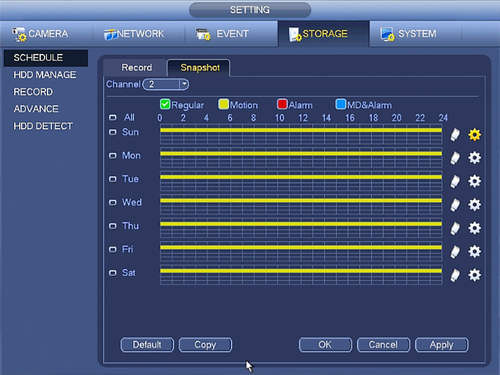
3. Click, "Snapshot"
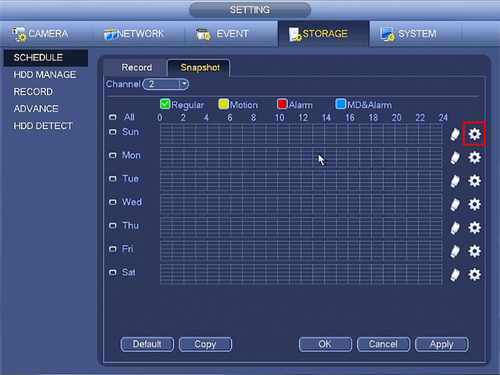
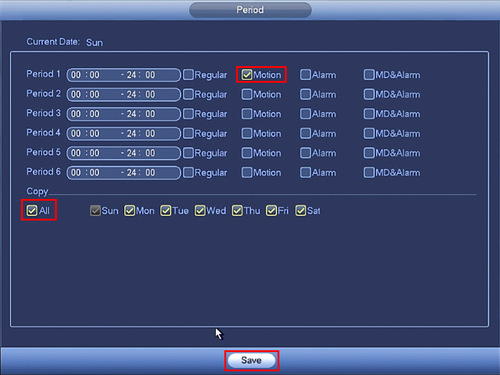
4. Click the Gear icon to the right of any of the graphs.
5. Check the box for, "Motion" then click the, "All" box below, "Copy"
6. Click, "Save" This will return you to the previous screen which should look like this.
7. Click, "Apply" and then, "OK"
8. On the left, click, "Record" and ensure the, "Enabled" box is filled in for each channel you wish to enable snapshot on.
