Difference between revisions of "CMS/DSS/IVS/IVS M Setup"
(→Step By Step Instructions) |
(→Step By Step Instructions) |
||
| Line 49: | Line 49: | ||
[[FIle:ivs_m7.png|500px]] | [[FIle:ivs_m7.png|500px]] | ||
| + | |||
| + | |||
| + | 6. Select Stream Type | ||
| + | |||
| + | [[File:ivs_m8.png|500px]] | ||
| + | |||
| + | |||
| + | 7. Input Name -> If using a fisheye select fisheye function otherwise leave blank. | ||
| + | |||
| + | [[file:ivs_m9.png|500px]] | ||
| + | |||
| + | |||
| + | 8. Select Device -> Input SN (Serial Number) -> and select OK to save settings | ||
| + | |||
| + | [[file:ivs_m10.png|500px]] | ||
| + | |||
Revision as of 15:18, 19 October 2016
Contents
How to Setup IVS-M(Master/Slave Tracking)
Prerequisites
- DSS
- Connected network
- Decoder
- A Connection to the DSS Server
- An Internet Connection
- DSS server IP address
- IVS Capable IP Camera
- IVS Capable NVR
Windows:
- Microsoft Windows XP SP3, Microsoft Windows 7 or above
- Core 2 dual-core 3.0Ghz or above
- At least 10GB free hard disk space or above
- directX 9.0c or above
- 2GB Memory or above
- 1024×768 resolution or above
- Internet explorer 7 or above
Video Instructions
Step By Step Instructions
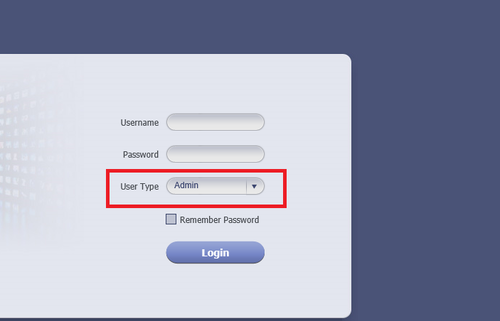
1. Input User Name, Password and Login as an Admin.
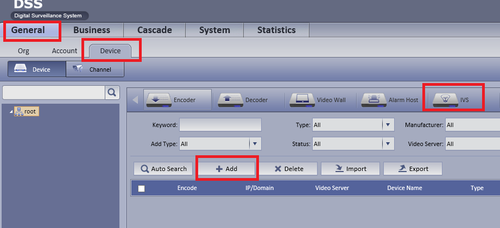
2. Select General --> Device --> IVS --> Add.
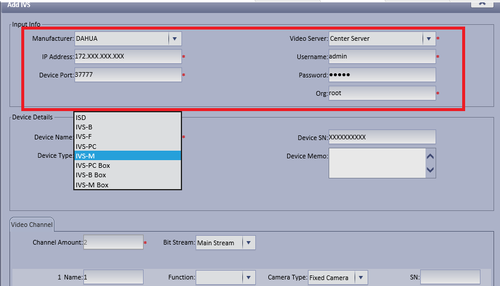
3. Input Manufacturer, IP address of added device, Port, Video Server, Username , Password and ORG.
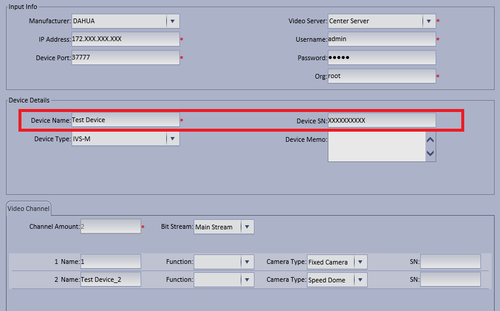
4. Input Device name and Device SN (Serial Number)
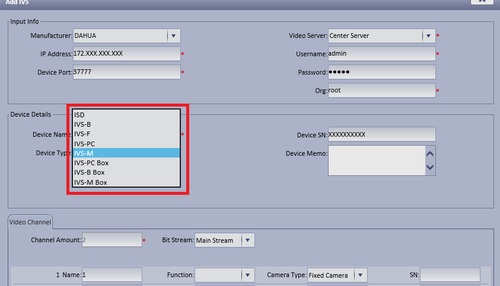
5. Input Device Type. In this case it will be IVS-M.
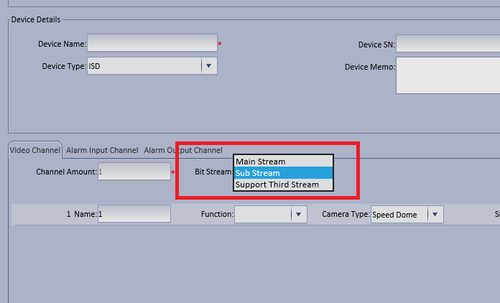
6. Select Stream Type
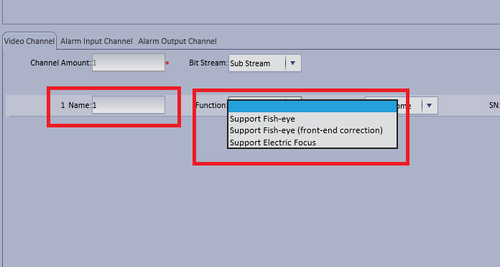
7. Input Name -> If using a fisheye select fisheye function otherwise leave blank.
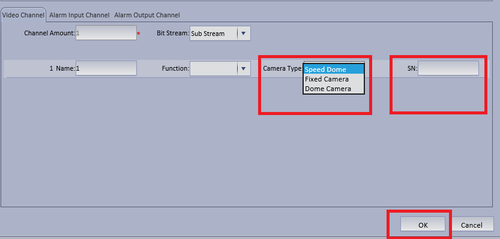
8. Select Device -> Input SN (Serial Number) -> and select OK to save settings
