Difference between revisions of "SmartPSS/Backup SPSS2"
| Line 34: | Line 34: | ||
[[File:Smatpss2playback5.png|600px]] | [[File:Smatpss2playback5.png|600px]] | ||
| + | 6. Choose a time frame and click on time clip. | ||
| + | [[File:SPSS2Backup6.png|600px]] | ||
| − | + | 7. Choose the beginning and end of time clip you want to backup. | |
| − | [[File: | + | [[File:SPSS2Backup7.png|600px]] |
| + | 8. Click on time clip again and select the folder to back up to and select the exported file type. | ||
| + | [[File:SPSS2Backup8.png|600px]] | ||
| − | + | 9. Click ok | |
| − | [[File: | + | [[File:SPSS2Backup9.png|600px]] |
| + | 10. It should start downloading the back. | ||
| + | [[File:SPSS2Backup10.png|600px]] | ||
| − | + | 11. You should now have the file backed up at the specified folder. | |
| − | [[File: | + | [[File:SPSS2Backup11.png|600px]] |
| + | [[Category:Backup]] | ||
| − | + | [[Category:SmartPSS]] | |
| − | |||
| − | |||
| − | |||
| − | |||
| − | |||
| − | |||
| − | |||
| − | |||
| − | |||
| − | |||
| − | |||
| − | |||
| − | |||
| − | |||
| − | |||
| − | |||
| − | |||
| − | |||
| − | |||
| − | |||
| − | |||
| − | |||
| − | |||
| − | |||
| − | |||
| − | |||
| − | |||
| − | |||
| − | |||
| − | |||
| − | |||
| − | |||
| − | |||
| − | |||
| − | |||
| − | |||
| − | |||
| − | |||
| − | |||
Revision as of 21:37, 3 May 2017
Contents
Backup via SmartPSS2
Description
This allows you to back up videos on SmartPSS2.
Prerequisites
- SmartPSS installed on a Windows or Mac computer
- Dahua NVR with a stored recording
- Established network connection with the NVR
- The NVR added to SmartPSS
- Enough drive space for the video backup
Video Instructions
Step by Step Instructions
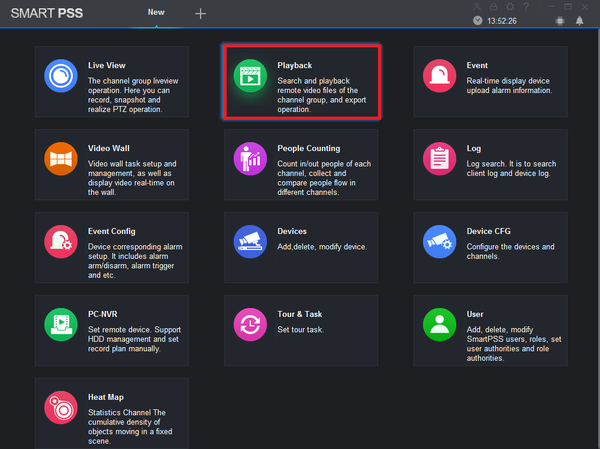
1. From the home menu select "Playback".
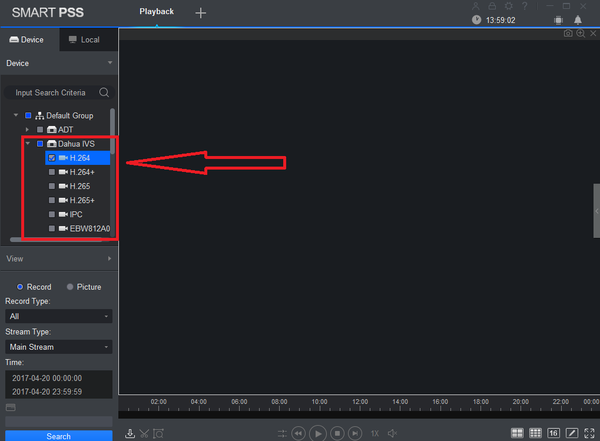
2. From the left hand side select device -> camera or cameras. More than one maybe selected.
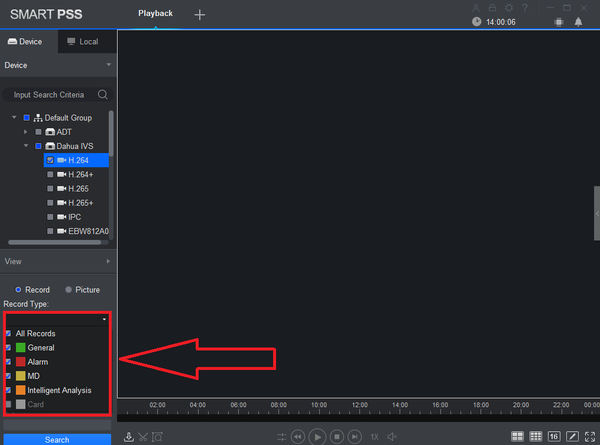
3. Select Record type. Drop down menu allows to select All Records, General, Alarm, MD (Motion Detection), and Intelligent Analysis.
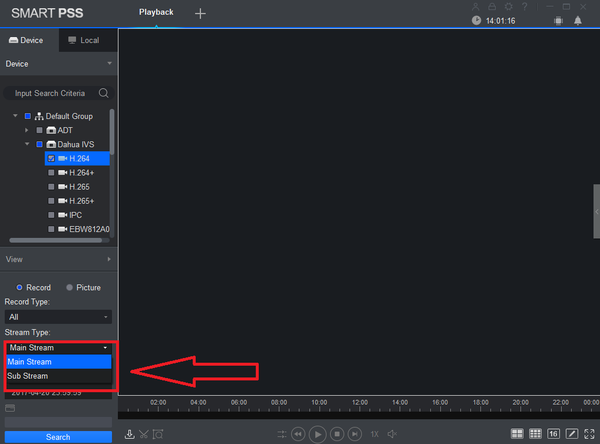
4. Select Stream Type (Main Stream or Sub Stream).
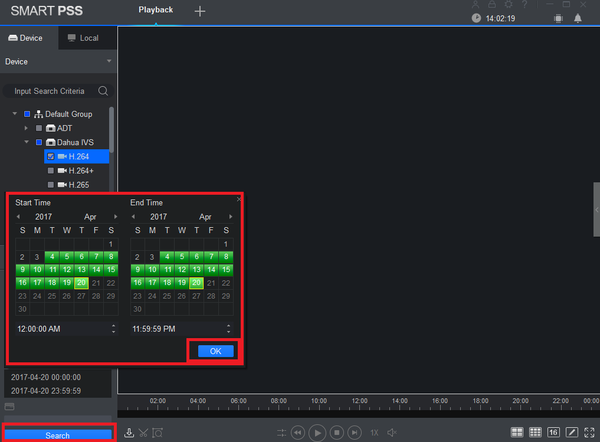
5. Select Date and time -> Select OK -> Select Search.
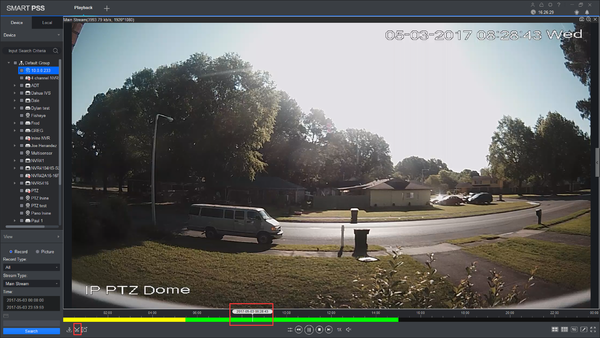
6. Choose a time frame and click on time clip.
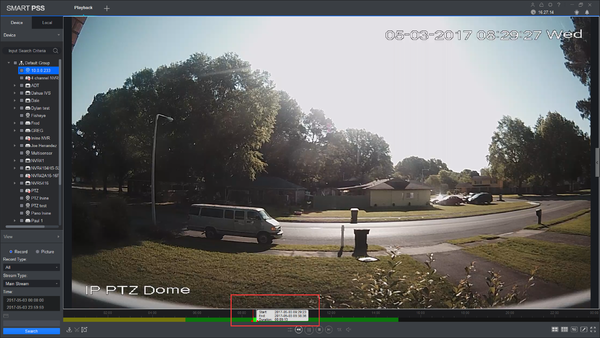
7. Choose the beginning and end of time clip you want to backup.
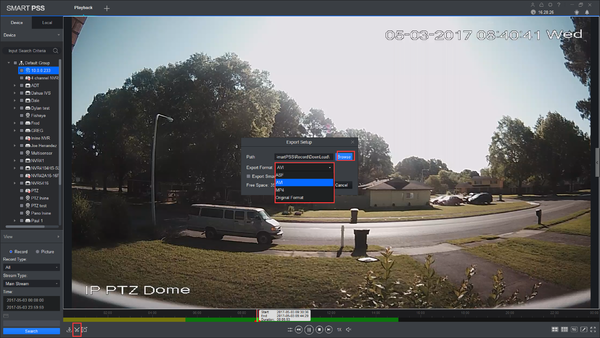
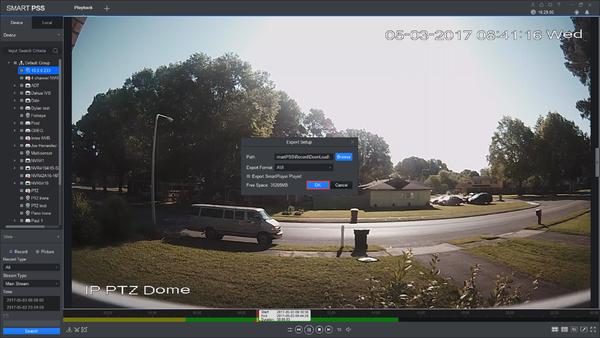
8. Click on time clip again and select the folder to back up to and select the exported file type.
9. Click ok
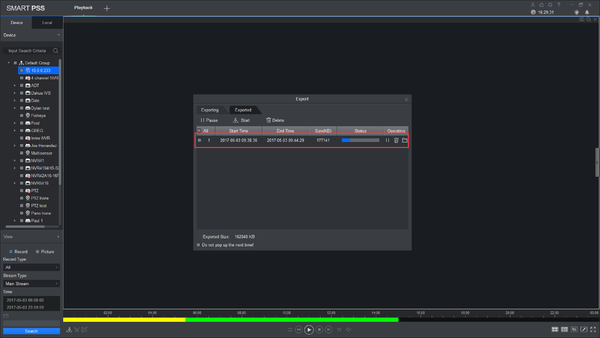
10. It should start downloading the back.
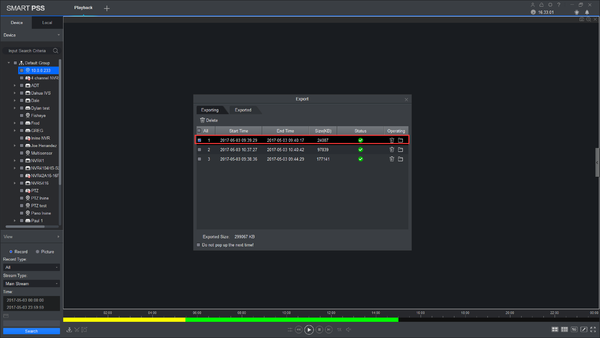
11. You should now have the file backed up at the specified folder.
