Difference between revisions of "Accessories/Other/PFM820/Physical Setup"
(→Step by Step Instructions) |
|||
| Line 11: | Line 11: | ||
<embedvideo service="youtube">https://www.youtube.com/watch?v=xxx</embedvideo> | <embedvideo service="youtube">https://www.youtube.com/watch?v=xxx</embedvideo> | ||
===Step by Step Instructions=== | ===Step by Step Instructions=== | ||
| + | 1. Locate the camera's BNC connection and disconnect the BNC cable. | ||
| + | |||
| + | [[filePFM820_Physical_Setup1.JPG|400px]] => [[file:PFM820_Physical_Setup3.JPG|400px]] | ||
| + | |||
| + | 2. Attach the PFM820 to the cameras BNC connection. | ||
| + | |||
| + | [[file:PFM820_Physical_Setup4.JPG|800px]] | ||
| + | |||
| + | 3. Attach the BNC cable from your recorder to the other end of the PFM820. | ||
| + | |||
| + | [[file:PFM820_Physical_Setup6.JPG|800px]] | ||
Revision as of 19:51, 3 July 2017
Contents
PFM820 Physical Setup
Description
These instructions will show you how to physically connect the PFM820 to an HD-CVI camera to either access the OSD or change the video output mode.
Prerequisites
- HD-CVI Camera
- PFM820
- HD-CVI Camera Power Supply
- BNC Cable
- HD-CVI Recorder
Video Instructions
Step by Step Instructions
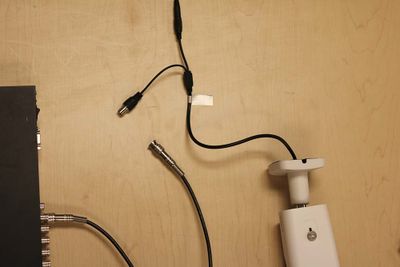
1. Locate the camera's BNC connection and disconnect the BNC cable.
400px => 
2. Attach the PFM820 to the cameras BNC connection.
3. Attach the BNC cable from your recorder to the other end of the PFM820.

