Difference between revisions of "Template:RS485 WebUI Old"
| Line 1: | Line 1: | ||
==Prerequisites== | ==Prerequisites== | ||
| + | * Dahua recorder with RS485 port | ||
| + | * Network connection for recorder | ||
==Video Instructions== | ==Video Instructions== | ||
<embedvideo service="youtube">https://youtu.be/_KalldgOVYM</embedvideo> | <embedvideo service="youtube">https://youtu.be/_KalldgOVYM</embedvideo> | ||
==Step by Step Instructions== | ==Step by Step Instructions== | ||
| + | 1. Enter the IP of the device into a browser | ||
| + | |||
| + | At the Web Login | ||
| + | |||
| + | Enter the Username and Password | ||
| + | |||
| + | Click Login | ||
| + | |||
| + | [[File:RS485_-_WebUI_Old_-_1.jpg|600px]] | ||
| + | |||
| + | 2. Click Setup | ||
| + | |||
| + | [[File:RS485_-_WebUI_Old_-_2.jpg|600px]] | ||
| + | |||
| + | 3. Click System > PTZ | ||
| + | |||
| + | [[File:RS485_-_WebUI_Old_-_3.jpg|600px]] | ||
| + | |||
| + | 4. Use the dropdown box to select the Channel | ||
| + | |||
| + | [[File:RS485_-_WebUI_Old_-_4.jpg|600px]] | ||
| + | |||
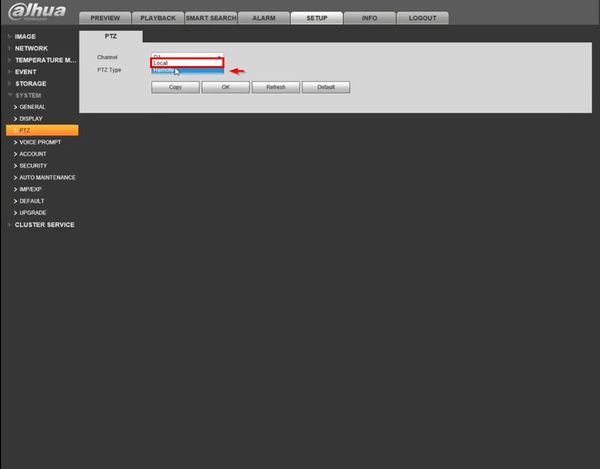
| + | 5. Use the dropdown box next to PTZ Type to select Local | ||
| + | |||
| + | [[File:RS485_-_WebUI_Old_-_5.jpg|600px]] | ||
| + | |||
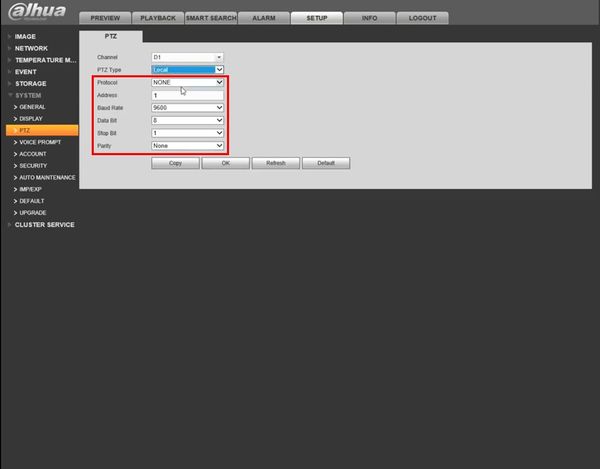
| + | 6. Enter the desired settings for the RS485 communication | ||
| + | |||
| + | * Protocol | ||
| + | * Address | ||
| + | * Baud Rate | ||
| + | * Data Bit | ||
| + | * Stop Bit | ||
| + | * Parity | ||
| + | |||
| + | [[File:RS485_-_WebUI_Old_-_6.jpg|600px]] | ||
| + | |||
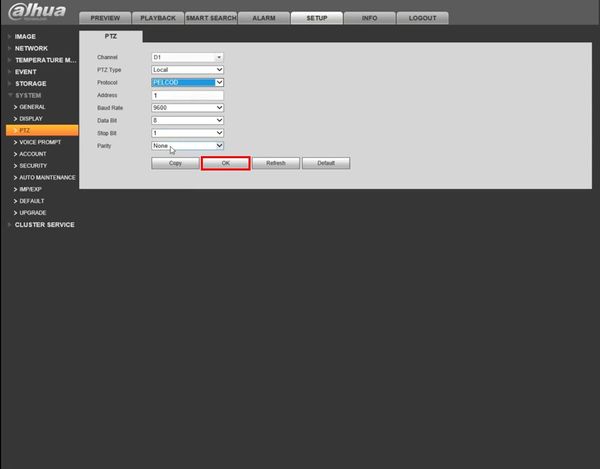
| + | 7. Click OK to save settings | ||
| + | |||
| + | [[File:RS485_-_WebUI_Old_-_7.jpg|600px]] | ||
Latest revision as of 19:52, 24 January 2020
Prerequisites
- Dahua recorder with RS485 port
- Network connection for recorder
Video Instructions
Step by Step Instructions
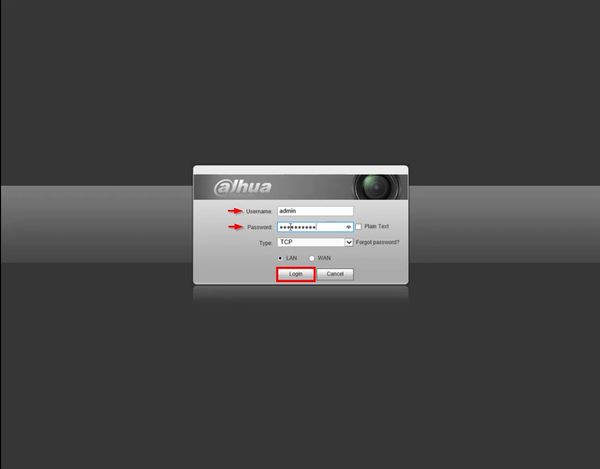
1. Enter the IP of the device into a browser
At the Web Login
Enter the Username and Password
Click Login
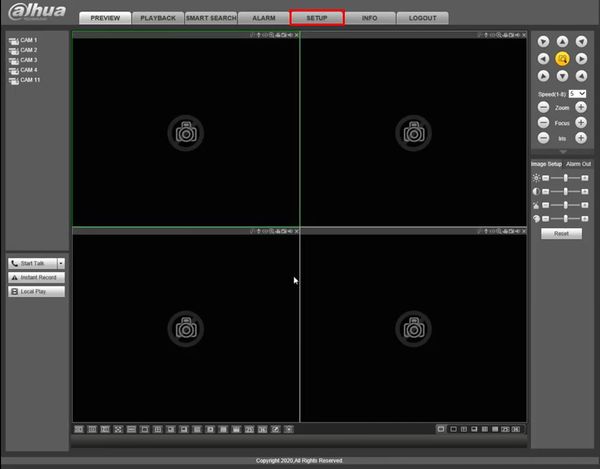
2. Click Setup
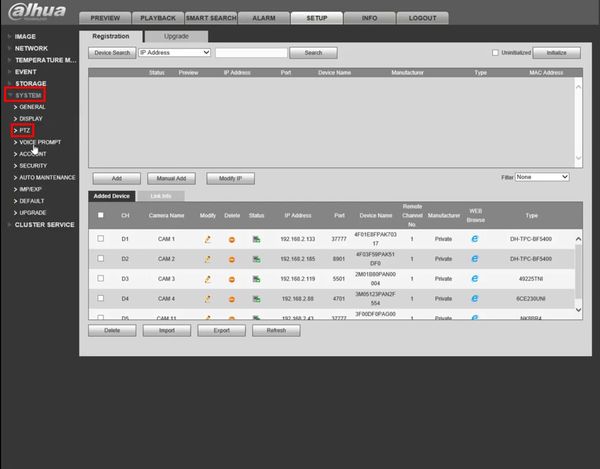
3. Click System > PTZ
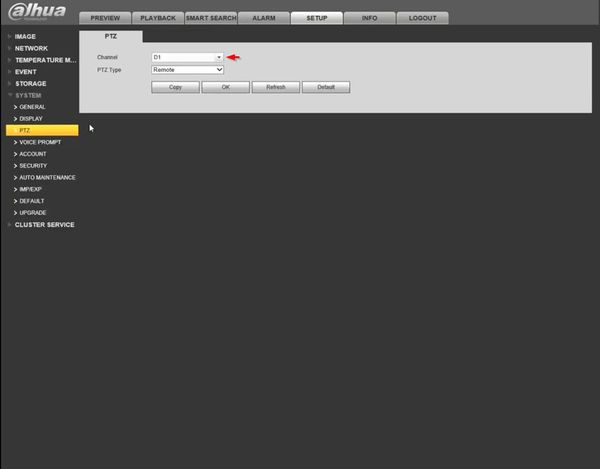
4. Use the dropdown box to select the Channel
5. Use the dropdown box next to PTZ Type to select Local
6. Enter the desired settings for the RS485 communication
- Protocol
- Address
- Baud Rate
- Data Bit
- Stop Bit
- Parity
7. Click OK to save settings
