Notice: Firmware Links Under Maintenance We are currently undergoing maintenance on all firmware links. If any links are inaccessible, please email or contact Tech Support for the firmware. We appreciate your patience during the maintenance, thank you for your understanding.
Difference between revisions of "Template:Temperature Monitoring Physical Setup"
(→Step by Step Instructions) |
|||
| Line 21: | Line 21: | ||
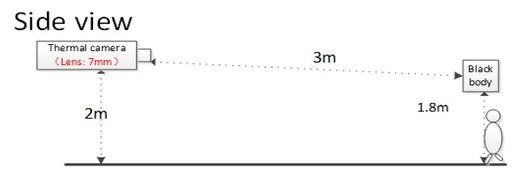
====Suggested Physical Layout==== | ====Suggested Physical Layout==== | ||
| + | <gallery mode="packed-hover"> | ||
| + | File:Temperature_Monitoring_-_Physical_Setup_-_Physical_Layout_Side_View_Diagram.jpg|Side view diagram | ||
| + | File:Temperature_Monitoring_-_Physical_Setup_-_Physical_Layout_Top_View_Diagram.jpg|Top view diagram | ||
| + | </gallery> | ||
<gallery> | <gallery> | ||
File:Temperature_Monitoring_-_Physical_Setup_-_Physical_Layout_Camera_Height.jpg|'''Camera height:''' 2m (6.56 ft) | File:Temperature_Monitoring_-_Physical_Setup_-_Physical_Layout_Camera_Height.jpg|'''Camera height:''' 2m (6.56 ft) | ||
Revision as of 23:51, 1 April 2020
Contents
Video Instructions
Step by Step Instructions
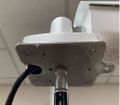
Mounting Adapter Plates
The mounting brackets/plates must be installed to both the camera and black body device
To attach the tripod:


