Notice: Firmware Links Under Maintenance We are currently undergoing maintenance on all firmware links. If any links are inaccessible, please email or contact Tech Support for the firmware. We appreciate your patience during the maintenance, thank you for your understanding.
Difference between revisions of "Email/Email Notifications Setup GMail"
(→How to Setup Email Notifications via Gmail) |
(→How to Setup Email Notifications via Gmail) |
||
| Line 16: | Line 16: | ||
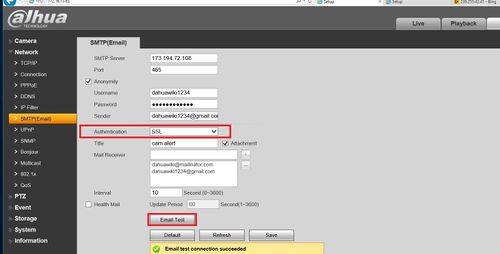
4. The port number for gmail is 465, and enter the email information that you will be sending the notification from into the username/password/sender. Sender is the full email information. | 4. The port number for gmail is 465, and enter the email information that you will be sending the notification from into the username/password/sender. Sender is the full email information. | ||
| − | [[File:GmailNotification4.jpg| | + | [[File:GmailNotification4.jpg|500px]] |
5. Enter a subject for the email notification and enter a receiver by entering and pressing the plus sign, you may have multiple receiver. | 5. Enter a subject for the email notification and enter a receiver by entering and pressing the plus sign, you may have multiple receiver. | ||
Revision as of 17:45, 1 March 2016
How to Setup Email Notifications via Gmail
To get email notification for an NVR on gmail:
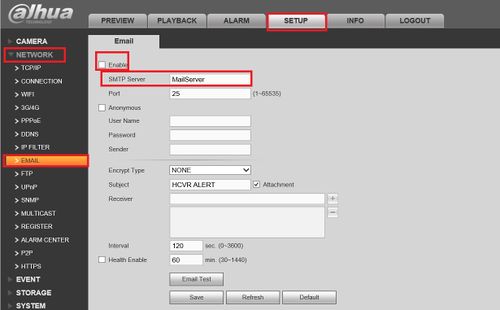
1. Log in to an NVR, go to Setup -> Network -> Email and check Enable in the check box then enter the SMTP Server.
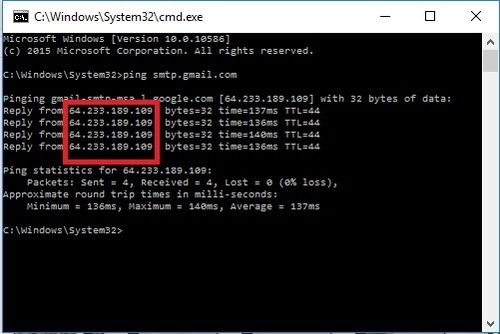
2. To get the SMTP Server, open up command prompt by typing cmd on the windows search bar and type ping smtp.gmail.com to get the IP address.
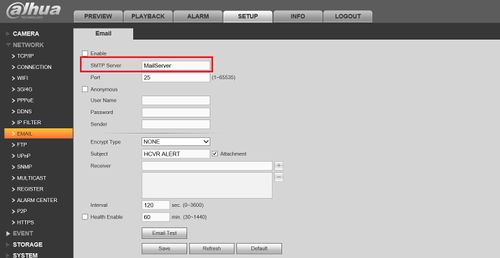
3. Enter the IP address into the SMTP server.
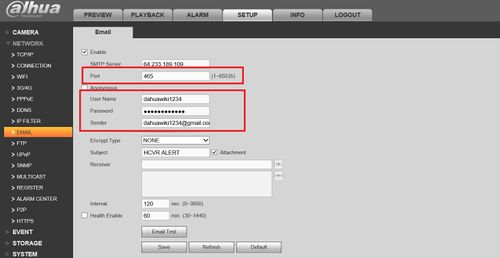
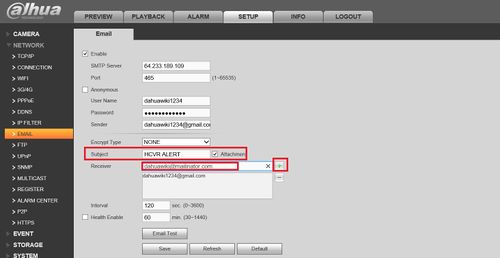
4. The port number for gmail is 465, and enter the email information that you will be sending the notification from into the username/password/sender. Sender is the full email information.
5. Enter a subject for the email notification and enter a receiver by entering and pressing the plus sign, you may have multiple receiver.
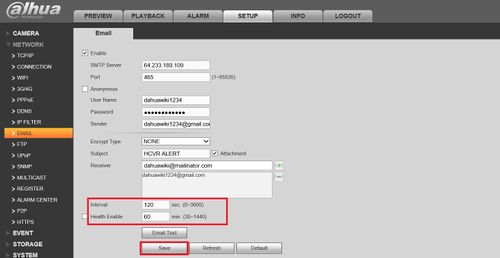
6. Enter a time interval for the frequency of the email if you wish and click save.
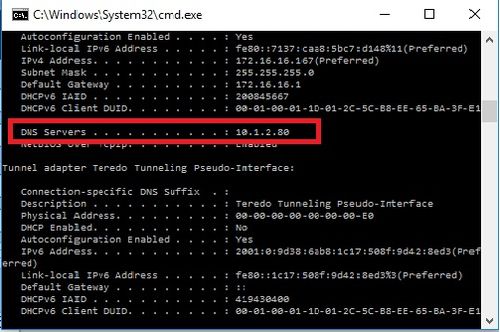
7. Go back to the command prompt and enter ipconfig /all and get the DNS Server.
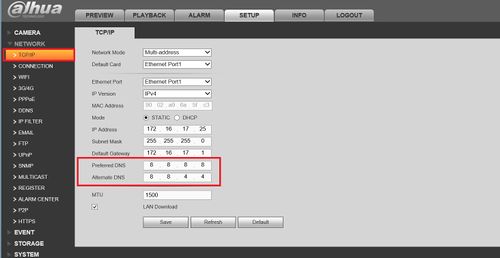
8. On the NVR go to TCP/IP and enter the information on DNS.
9. Go back to the SMTP menu and make sure the authentication is on SSL, save and press email Test and you should see it on your email.
