Difference between revisions of "IVSS/IVSS Intial Setup"
| Line 6: | Line 6: | ||
==Prerequisites== | ==Prerequisites== | ||
*A Dahua IVSS Recorder | *A Dahua IVSS Recorder | ||
| + | |||
| + | ==Video Instructions== | ||
| + | <embedvideo service="youtube">https://www.youtube.com/watch?v=MUTiWcGkbso</embedvideo> | ||
==Step by Step Instructions== | ==Step by Step Instructions== | ||
Latest revision as of 16:23, 30 June 2022
Contents
IVSS Initial Setup
Description
This article will cover the initial setup of an IVSS Recorder.
Prerequisites
- A Dahua IVSS Recorder
Video Instructions
Step by Step Instructions
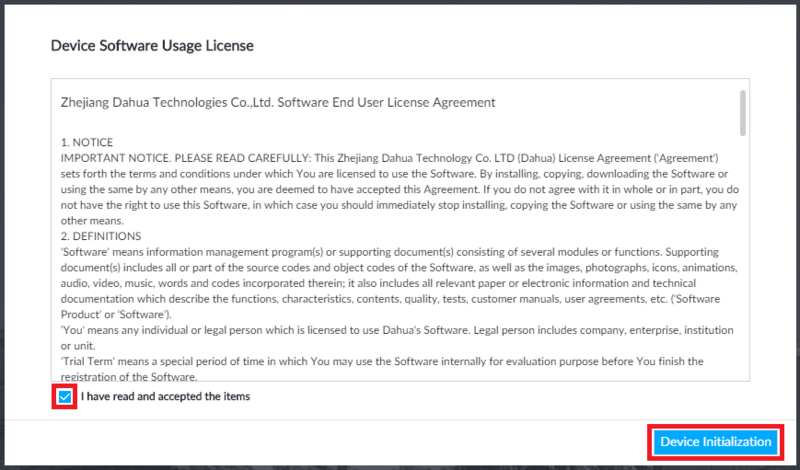
1. Start up your IVSS for the first time. Read through the Device Software Usage License Agreement.
When you are done reading through the License Agreement, check the box next to "I have read and accepted the items".
Then select "Device Initialization".
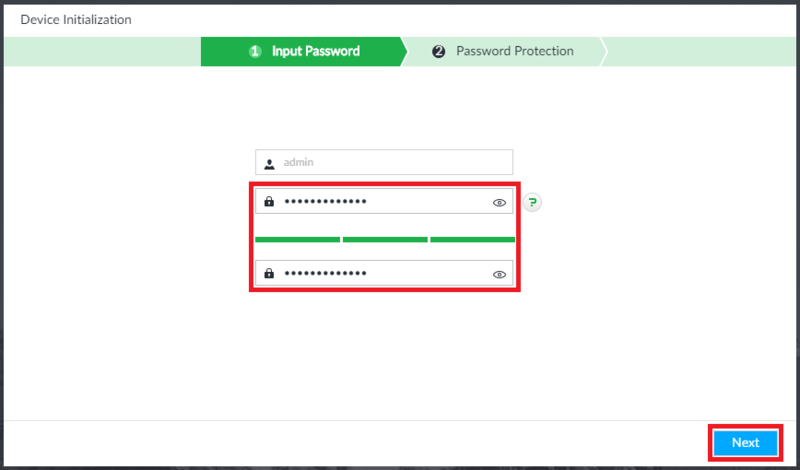
2. Enter a password for the administrator account in the password field.
Make sure the password meets the minumum requirements:
- At least 8 characters long
- At least one lower case letter : a
- At least one upper case letter : A
- At least one number : 1
- At least one symbol : !
Example: HIgh91!?
Confirm the password by re-entering it in the second password field.
Then select "Next".
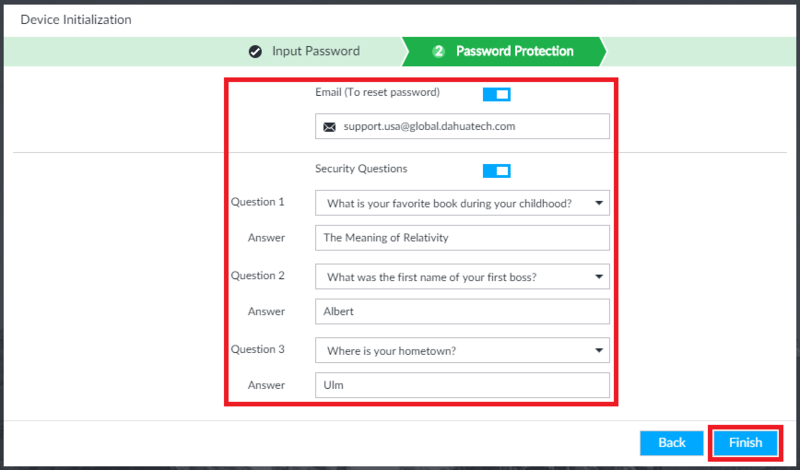
3. If you want to set up a recovery email address that can be used if you forget your password, toggle on the switch next to "Email (To reset password)" and enter your email address in the field below.
If you want to set up security questions that can be used to recover your password if you forget it, toggle on the switch next to "Security Questions" and fill out the 3 security question. You can change the questions by selecting each one and choosing another from the drop-down.
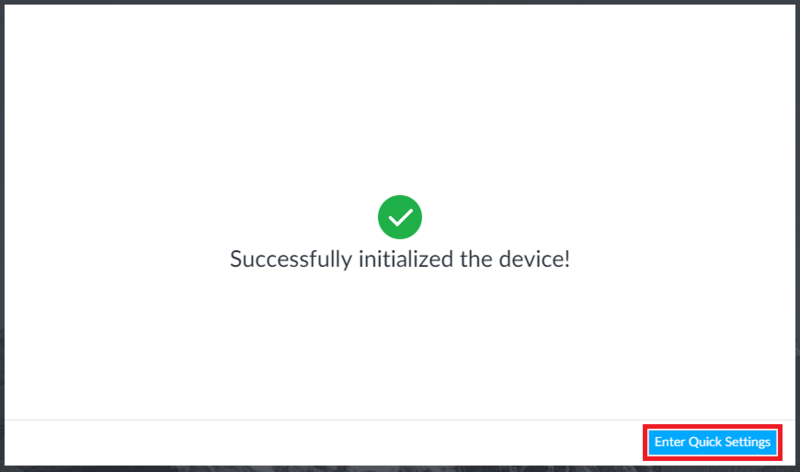
4. This screen will notify you that you have finished the initial steps of setting up the IVSS.
Select "Enter Quick Settings" to continue the setup process.
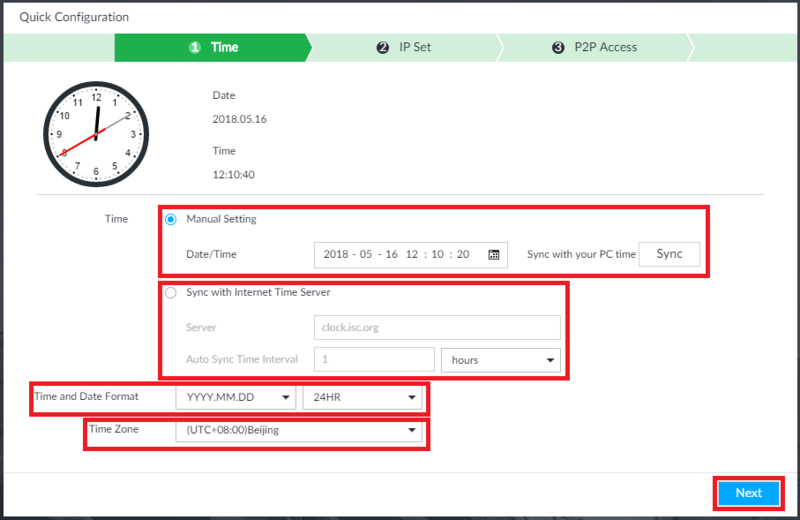
5. To set the date and time, either select "Manual Setting" to set the time manually or select "Sync with Internet Time Server" to have an external time server sync the time for you.
If you want to manually set the time selet the field next to "Date/Time" and type in the date and time or select the calendar icon next to it to choose the date and time from a calendar menu.
You can also select "Sync with your PC Time" if you are setting up your IVSS from a PC.
If you want to automatically sync the time with a time server, type in the url of the server in the "Server" field. Then type in the interval of how often the time syncs in the "Auto Sync Time Interval" field.
You can change the format of how both the date and time are displayed by choosing options from the drop-down menus next to "Time and Date Format".
Set the time zone you are in from the drop-down menu next to "Time Zone".
Select "Next".
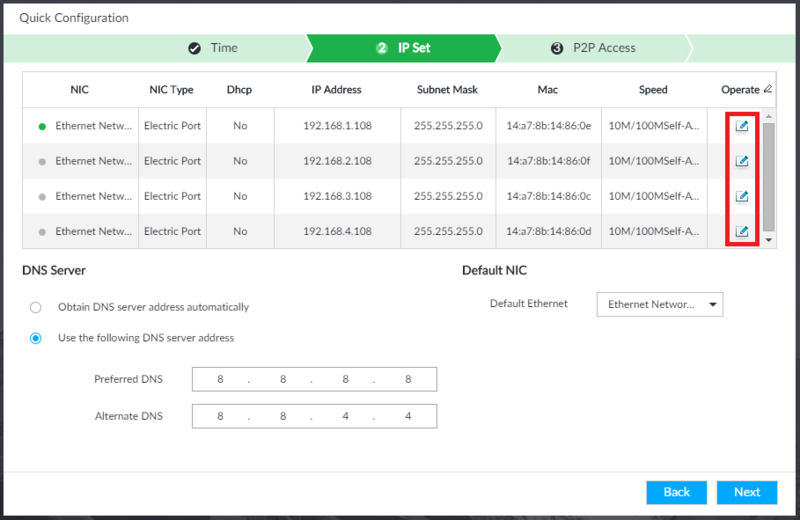
6. Use this menu to modify the network settings on the IVSS. If you want to modify the TCP/IP information on any or all of the network ports of the IVSS, select the edit button, under "Operate", next the port listed.
If the TCP/IP settings are already set to your desired settings, skip to Step 8.
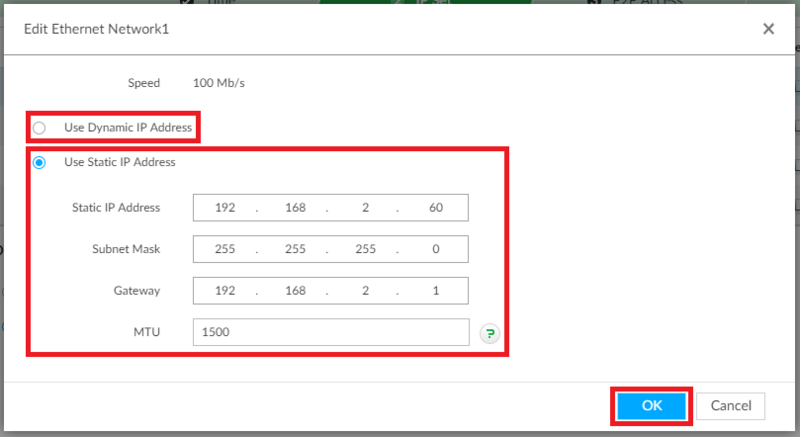
7. Either select "Use Dynamic IP Address" to have the router/modem choose the IP address for the network card on the IVSS, or select "Use Static IP Address" to manually modify the TCP/IP settings.
If you selected "Use Static IP Address", type in the IP Address, Subnet Mask, Gateway, and MTU as desired.
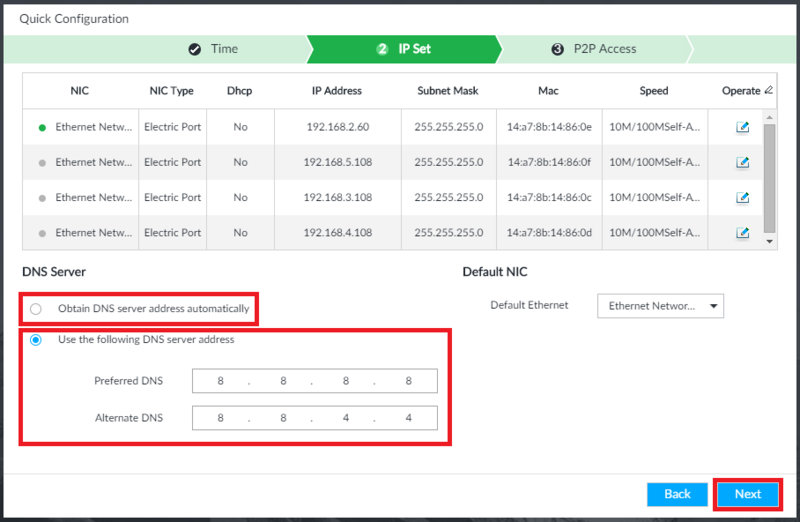
8. Repeat Steps 6 & 7 for as many network cards on the IVSS as you would like.
Either select "Obtain DNS server address automatically" to have the router/modem choose the DNS server or select "Use the following DNS server address" to manually change the DNS server addresses.
If you selected "Use the following DNS server address", type in the prefered DNS server address and the alternate DNS server address.
Select "Next".
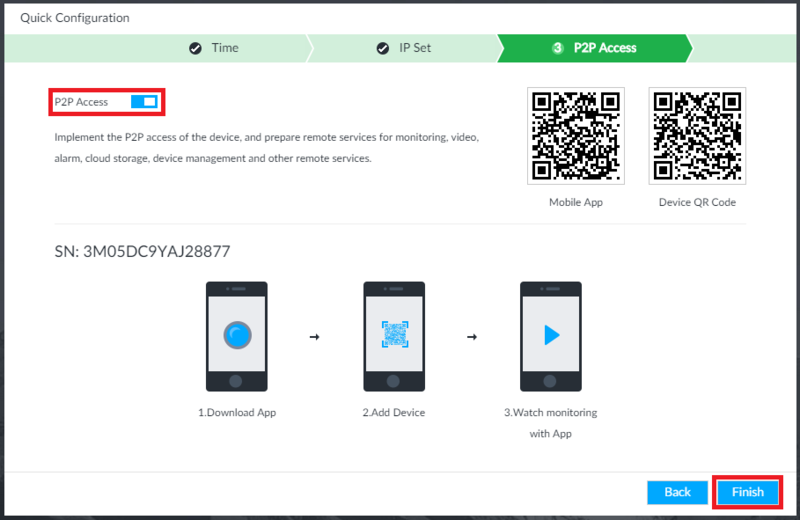
9. If you would like to use the P2P server for remote access of the IVSS without having to use port forwarding, toggle on the button next to "P2P Access".
You can scan the left QR code on your mobile device to download the mobile application. Then once the app is downloaded and installed, you can use the app to scan the right QR code to add the IVSS.
Select "Finish" to finish the setup of the IVSS.
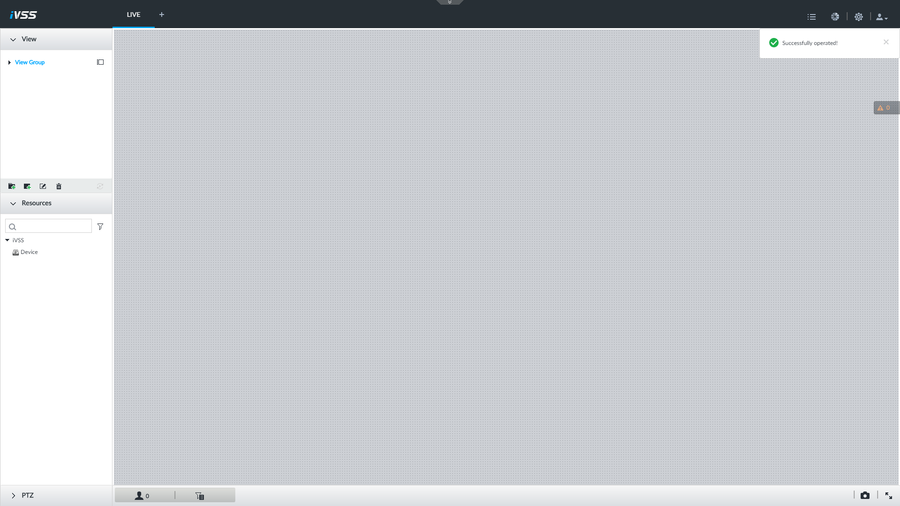
10. You have successfully setup your IVSS.
