Difference between revisions of "IPCStorageSchedule"
(→Storage Schedule) |
(→Storage Schedule) |
||
| Line 22: | Line 22: | ||
4. In record schedule interface, click on OK. System prompts it is successfully saved. | 4. In record schedule interface, click on OK. System prompts it is successfully saved. | ||
| − | |||
5.In snapshot interface, click on OK. System prompts it is successfully saved. | 5.In snapshot interface, click on OK. System prompts it is successfully saved. | ||
Revision as of 23:52, 13 October 2015
Storage Schedule
Before schedule setup, user must set record mode is auto or manual. Note:If record mode in record control is off, then device will not snapshot according to schedule.
Record schedule steps:
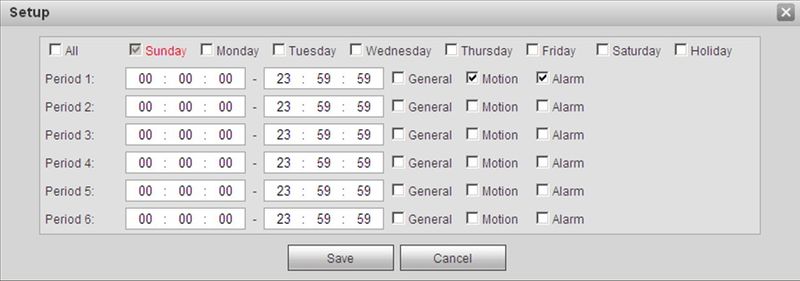
1. Click on Record Schedule. [[file: 2. From Monday to Sunday select record time, click on setup on the right.
- Set period according to actual need. There are six periods available each day.
- By checking or unchecking, you can add or delete three types of record schedule: General, Motion, and Alarm.
Note:Period setup can be done by dragging in record schedule interface while not releasing left mouse.
3. Click on OK, return to record schedule interface.
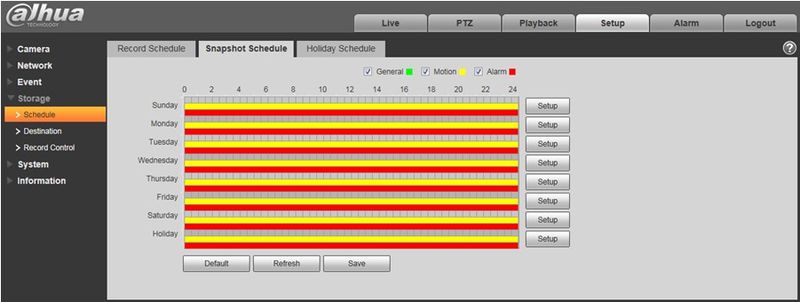
- Green color stands for the general record/snapshot.
- Yellow color stands for the motion detect record/snapshot.
- Red color stands for the alarm record/snapshot.
4. In record schedule interface, click on OK. System prompts it is successfully saved.
5.In snapshot interface, click on OK. System prompts it is successfully saved.
Snapshot Schedule
1. Click on Snapshot Schedule tab.
 2. From Monday to Sunday select snapshot time, click on setup on the right.
- Set snapshot period according to actual need. There are six periods available each day.
- By checking or unchecking, user can add or delete three types of snapshot schedule: General, Motion and Alarm.
Note: Period setup can be done by dragging in snapshot schedule interface while not releasing left mouse.
