FLIR/P2P Migration/Remote Access DDNS
Contents
Remote Access: DDNS Set up
Description
In this example we will be setting up a FLIR DVR/NVR with DDNS service for Remote Access.
Prerequisites
1. A Windows PC.
2. Internet Access.
3. Ports are forwarded. Click here for How to do Port Forwarding
4. Access to FLIR recorder.
Step by Step Instruction
Below instruction is for FLIR model: D320, D330, DNR Series, IP Camera, and MPX.
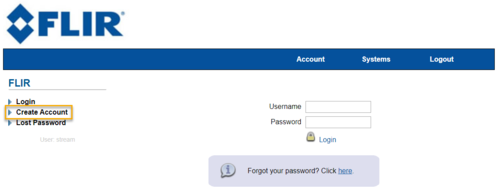
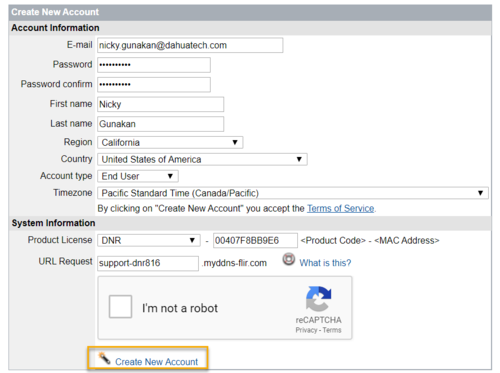
1. Access your web browser, and go to http://ddns.myddns-flir.com. Click on Create Account.
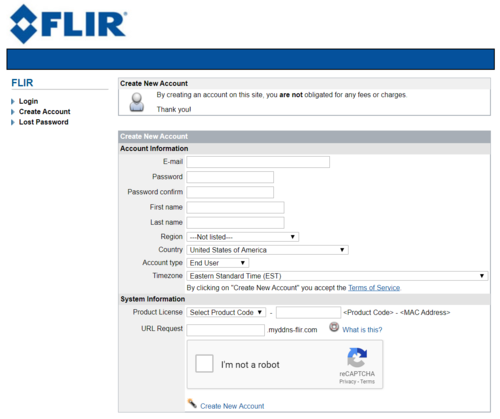
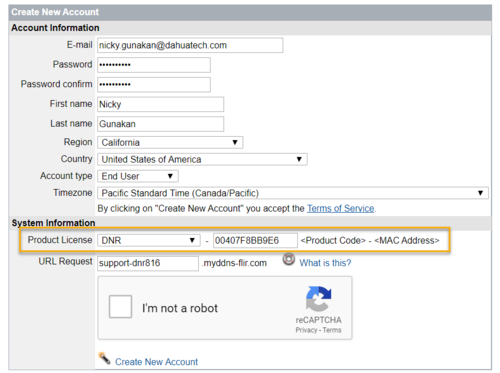
2. Enter all information needed.
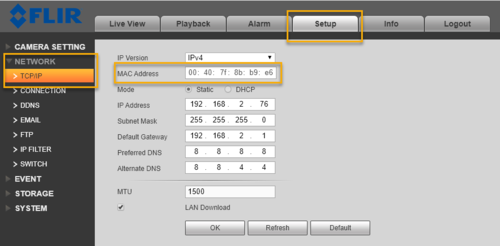
3. You can locate device MAC address by login in to your FLIR recorder. Go to Setup > Network > TCP/IP. You must remove the : when entering MAC address on DDNS submission.
4. Click Create New Account.
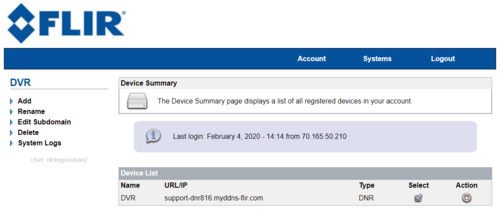
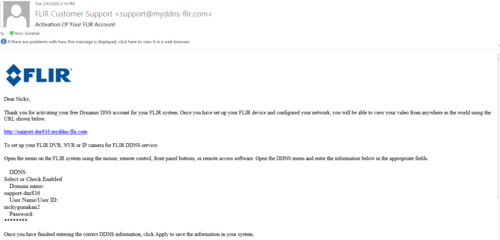
5. You will see a URL when Domain Name is successfully created. You will also receive email notification with your username.
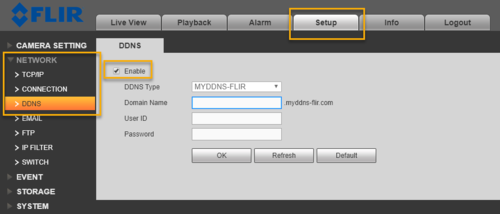
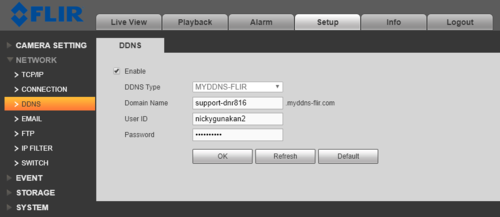
6. Access the NVR DDNS setup page. Click check-mark for Enable.
7. Enter the domain name, User ID, and Password.
8. Click OK.
9. Your DDNS is now setup for your FLIR Recorder.
For instruction on how to add FLIR device to your mobile app using DDNS, please click here.
