SmartPSS/PC NVR Setup
Contents
How to Configure SmartPSS to Record IP Camera Feed / PC-NVR Setup
Prerequisites
- SmartPSS
- PC-NVR
- Computer with storage
- Internet
- Camera online and connected
Video Instructions
Step by Step Instructions
Note: Please be sure you have completed the, "Install SmartPSS Guide" before proceeding with these instructions.
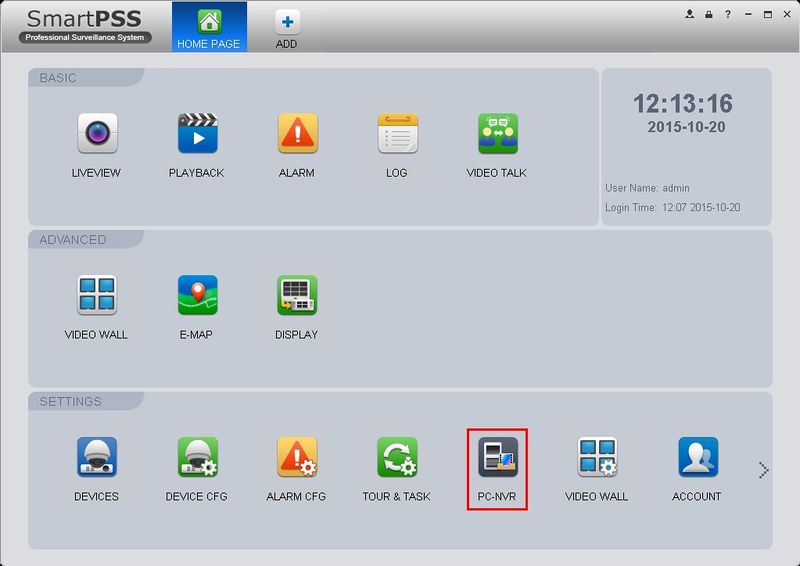
1. Launch SmartPSS and click, "PC-NVR"
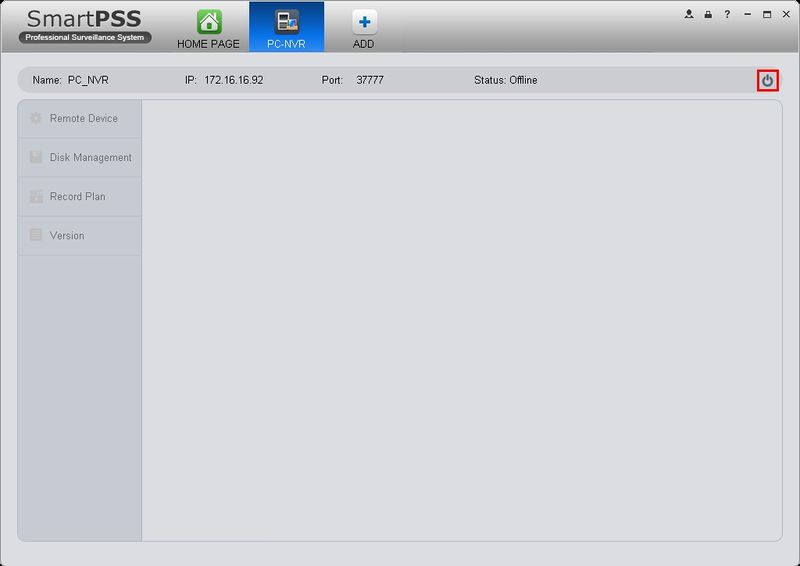
2. Click the power button on the right to turn PC-NVR on.
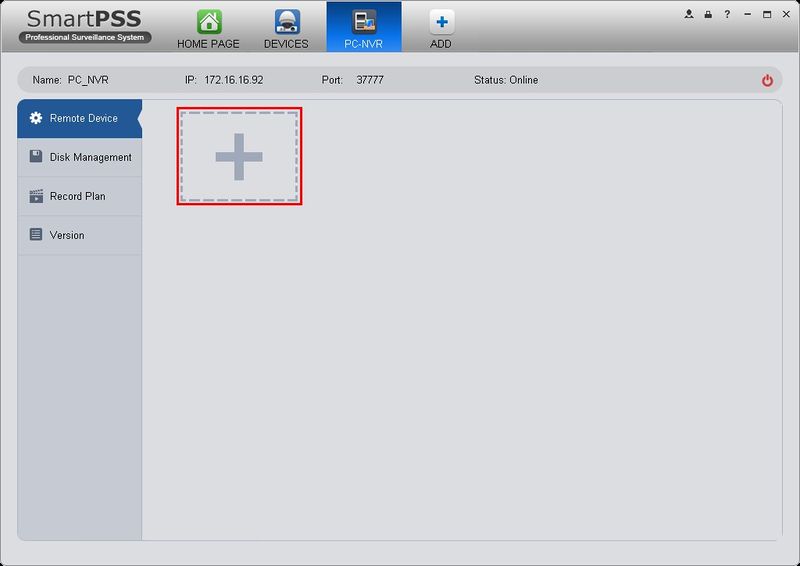
3. Click the plus sign.
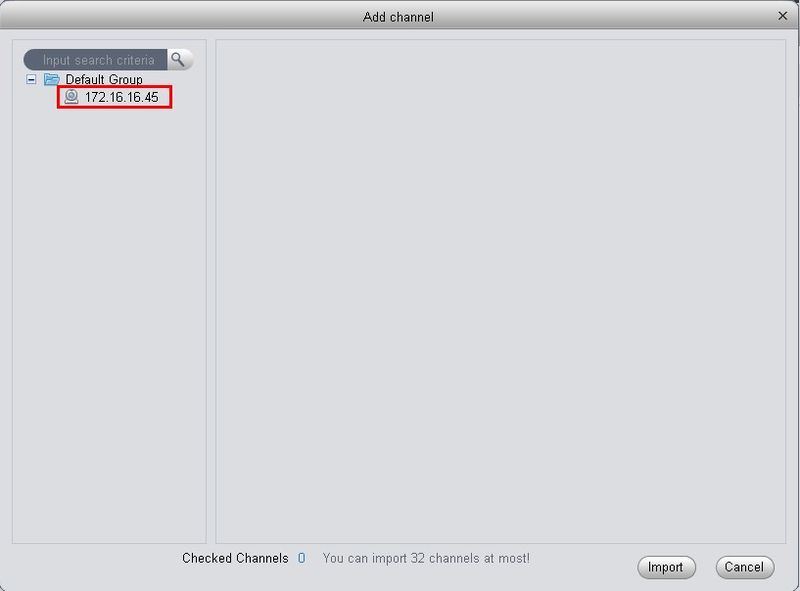
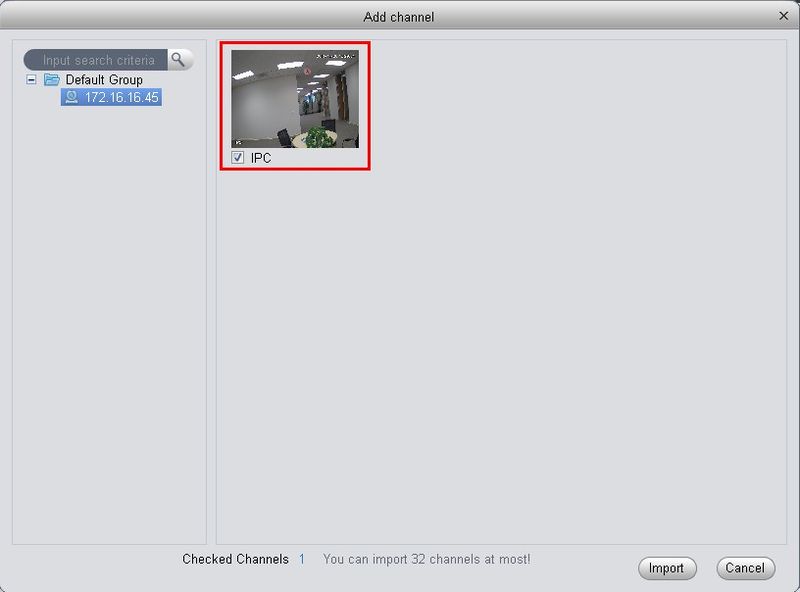
4. Click the device you wish to setup to record.
5. Click on the check box below the image.
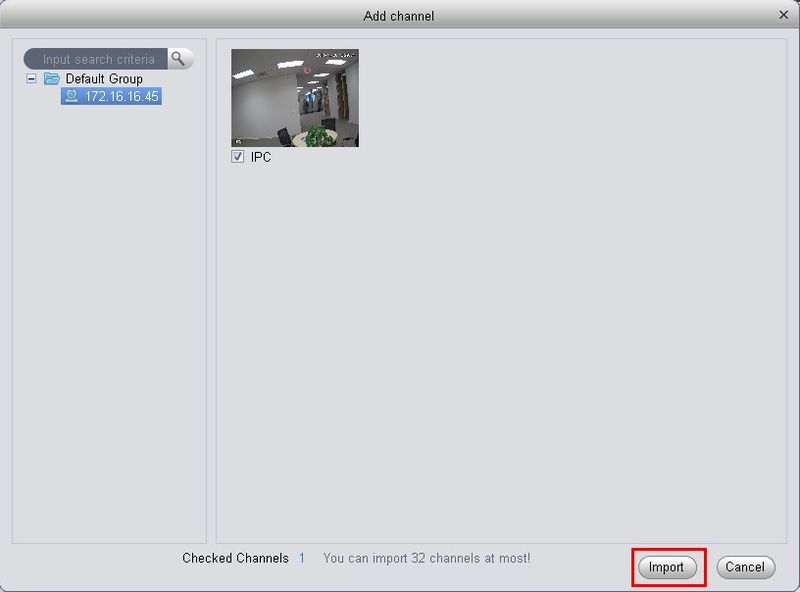
6. Click, "Import"
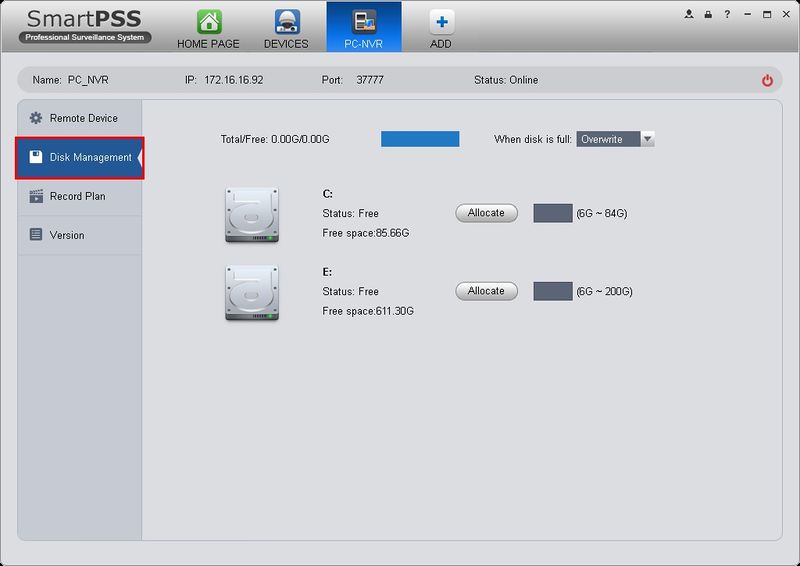
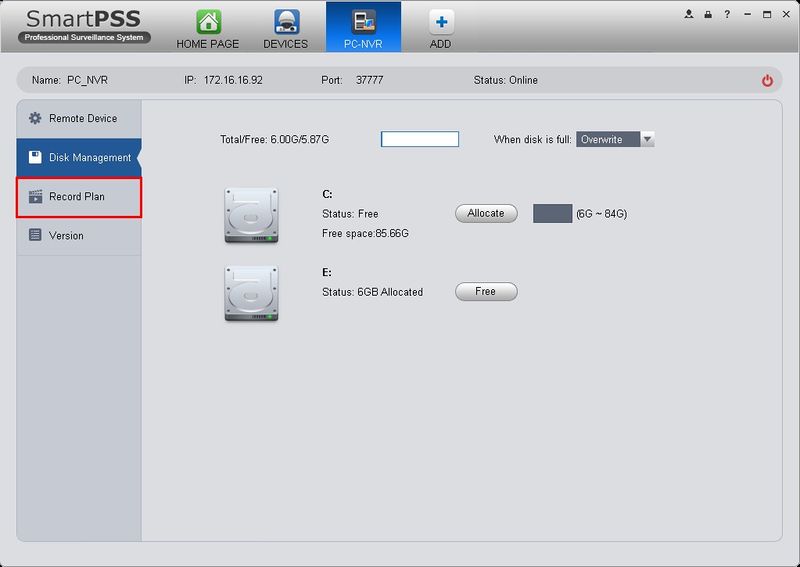
7. Click, "Disk Management" on the left hand side. In this section, you can allocate a specific portion of your computer's hard drive to be used for recording video directly from your device.
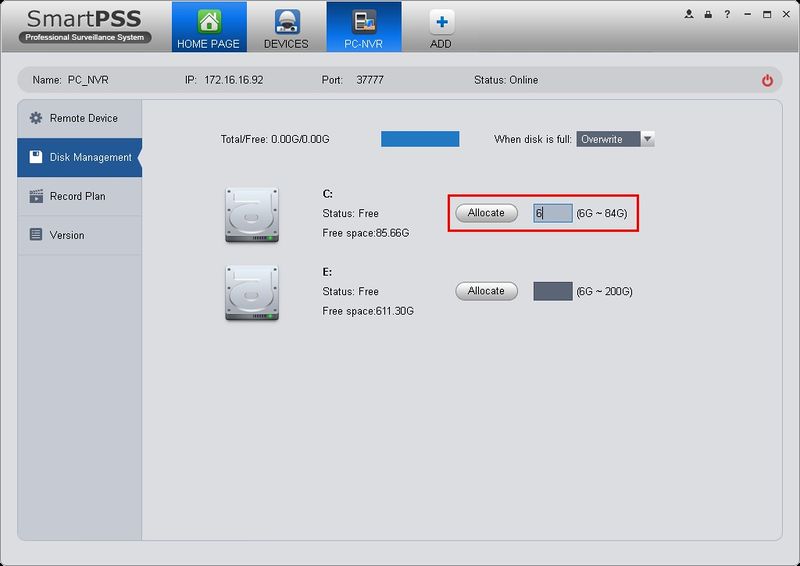
8. Input the amount of space that you wish to allocate in gigabytes, and click "Allocate" After a brief moment PC-NVR will restart.
9. Verify that the, "Status" is displaying as, "Online"
10. Click, "Record Plan" on the left hand side.
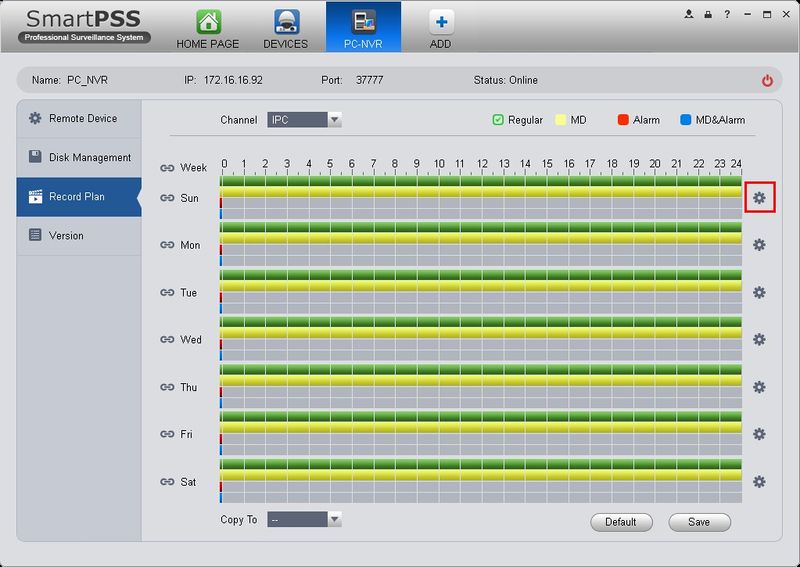
11. On this page you can configure the recording schedule for your device. In this example, the device is configured to record every day of the week all day long on Schedule and Motion recording.
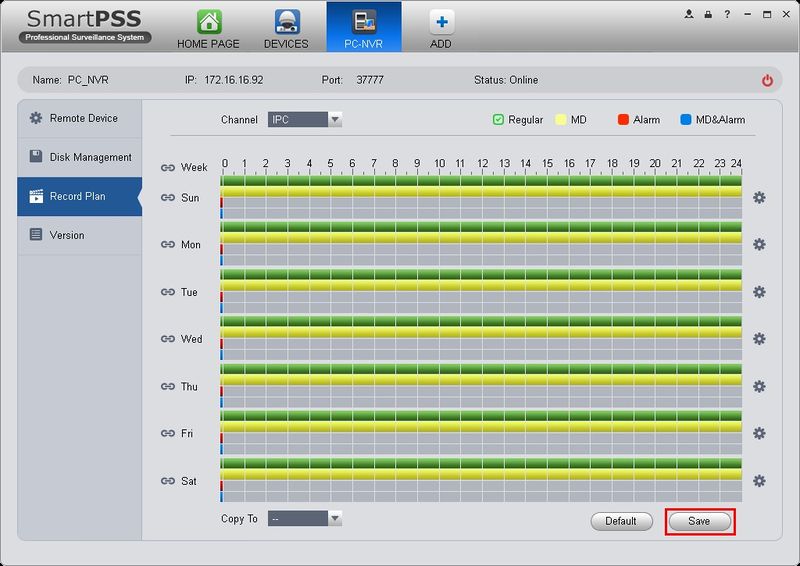
12. Once complete, click, "Save" at the bottom of this page.
