3rd Party VMS/Exacq/Add Dahua Camera via ONVIF
Contents
Add Dahua Camera to ExacqVision via ONVIF
Description
These instructions will guide a user through setting up a Dahua camera via ONVIF with ExacqVision Professional version 8.4.2.111542_x64.
Prerequisites
- Functional network
- ExacqVision Professional version 8.4.2.111542_x64 installed on Windows PC
- The ExacqVision Windows PC on the network
- Dahua camera running on the network
Video Instructions
Step by Step Instructions
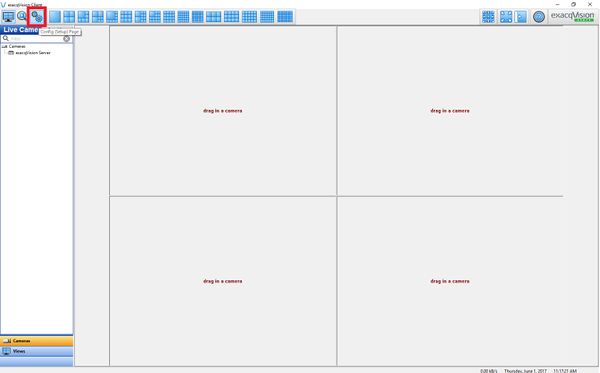
1. Begin by launching the exacqVision Client.
2. After the client has started, please select the gear icon in the top left corner to access the configuration page.
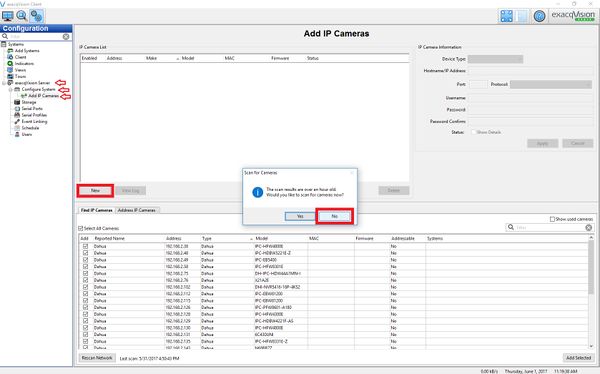
3. Under the Configuration tree select exacqVision Server -> Configure System -> Add IP Cameras. The prompt will ask to scan for cameras, select no. Now select New.
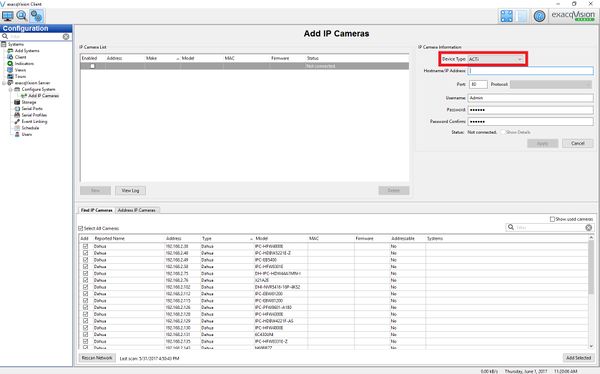
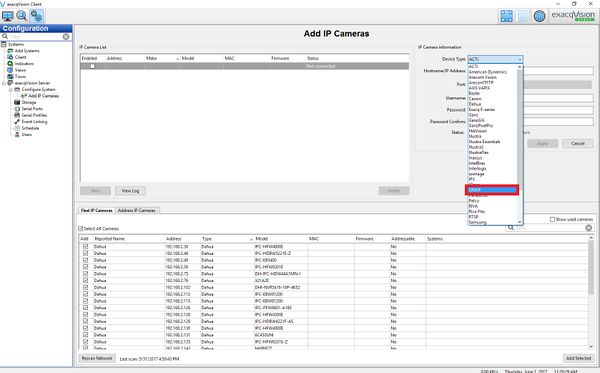
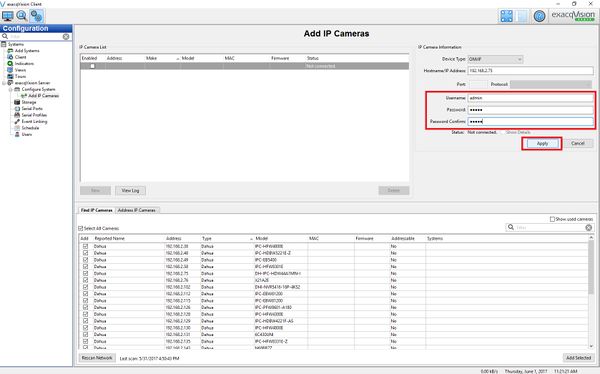
4. Under IP Camera Information select the Device Type drop down menu and find and select ONVIF.
5. Enter in the ONVIF accessible username and password for the device (default is admin / admin), then select Apply.
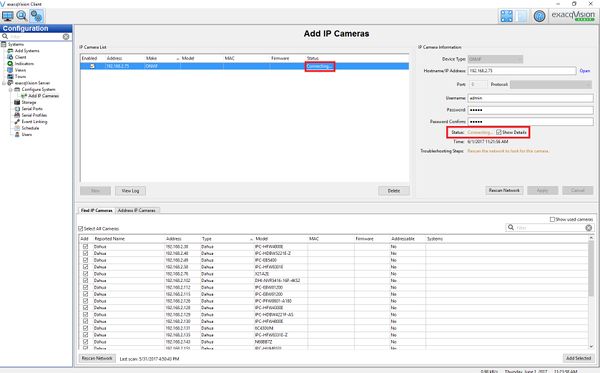
6. The device should now attempt to connect please be patient as this can take up to 3 minutes.
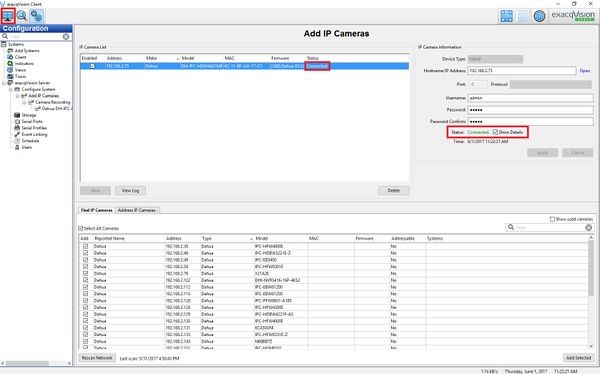
7. Once the device has connected you will see more information about the camera populate on the IP Cameras List. Make sure you have a Status of Connected before attempting to access the live view in the top left corner.
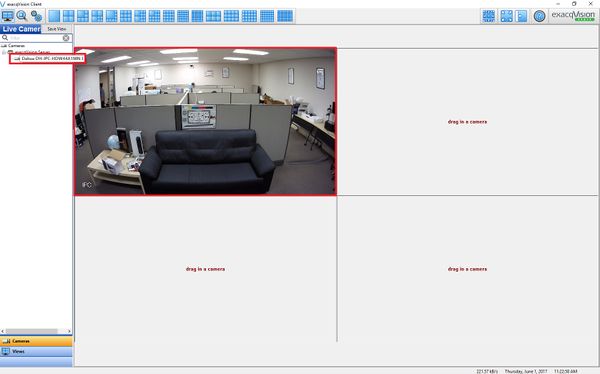
8. In the Live Camera tree double click the appropriate camera and enjoy watching a Dahua camera integration with ExacqVision Professional.

