FLIR/P2P Migration/Remote Access DDNS
Remote Access: DDNS Set up
Refer customer to go to www.lorex.com/DDNS
In this example we will be setting up a DVR up to use a DDNS service.
Requirements
1. A Windows PC
2. Internet Access
3. Login information for network router
4. Admin login for the system to be set up with DDNS
Step by Step
1. Set the DVR to DHCP and allow it to pull an address. Make note of the address used as it will be needed in later steps. Make note of the MAC address of the unit as well.
2. At the computer, open the command prompt by opening the start menu and typing CMD into the search and double-click on the program to run.
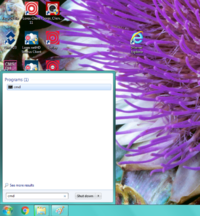
3. Once open, enter ipconfig and press enter. Several line will be shown, look for Default Gateway and take note of the number displayed; this will be the IP address of the router.
4. Open a browser window and in the address bar enter the address of the router; once the page loads use the router login information to login.
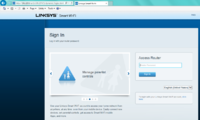
5. In this example a DHCP Reservation will be used, the alternative if this is not an option is to use a static address. Check the router to see which option is available.
6. Under the DHCP Reservation option add a new device and set the name to easily identify it. Manually add a device and enter the IP of the system as well as the MAC address associated with the device and save the changes.
7. Once changes have been saved, confirm that the DVR can be reached at the address given.
8. At the router, locate the port forwarding option ports will be required to be opened in order to access the system with the DDNS. The required ports for remote access are the HTTP and TCP ports. The defaults are 80 and 35000 respectively, check the system Network settings > Connection to confirm port values.
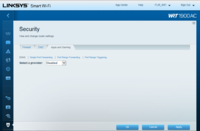
9. When setting up the port forwarding, the required ports will need to be forwarded to the IP address of the DVR. The protocol should be set up for both UDP and TCP protocols.
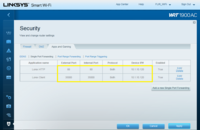
10. Once port forwarding has been set up, check the port status using yougetsignal.com an open port means the forwarding is working. Confirm all ports working before proceeding.
- DDNS Setup 10.png
11. Login to the Lorex Account to be used for the DDNS set up. Go to the DDNS tab to set up the DDNS. Fill in the required information and hit Add Device to save the set up. The information for your DDNS will be displayed afterwards.
12. Now, at the DVR, under Setup > Network > DDNS enter the information provided for the DDNS.
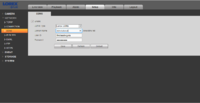
13. The unit should now be available under the new DDNS address.
