Difference between revisions of "FLIR/Add A FLIR IP Camera To gDMSS via IP"
(→Step by Step Instructions) |
|||
| Line 13: | Line 13: | ||
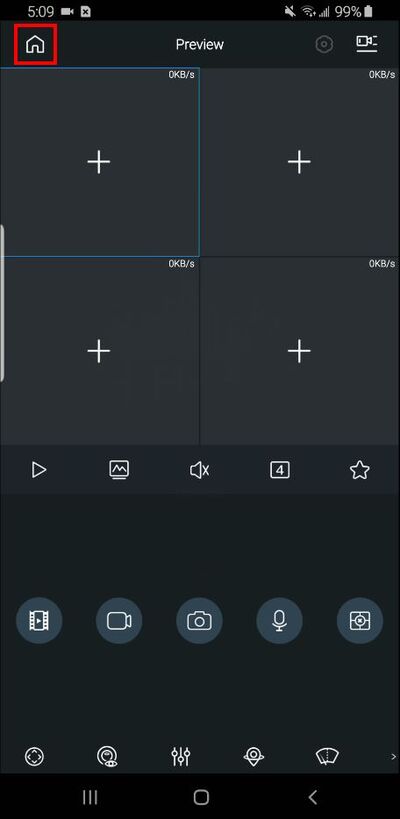
From the Preview window press the Home icon | From the Preview window press the Home icon | ||
| + | |||
| + | [[File:gDMSS_-_FLIR_IPC_-_IP_-_1.jpg|400px]] | ||
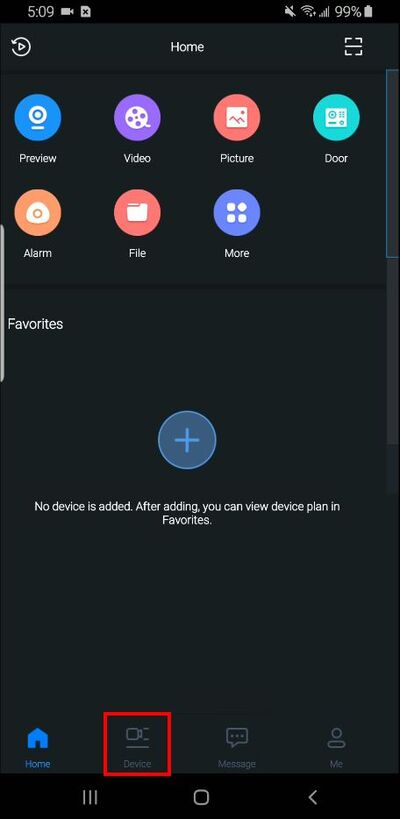
2. Select Device | 2. Select Device | ||
| − | [[File:gDMSS_-_FLIR_IPC_-_IP_- | + | [[File:gDMSS_-_FLIR_IPC_-_IP_-_2.jpg|400px]] |
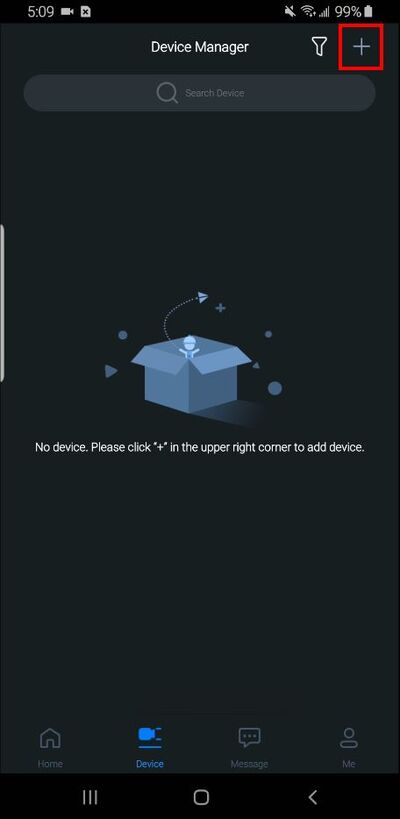
3. Press the '+' to add a device | 3. Press the '+' to add a device | ||
| − | [[File:gDMSS_-_FLIR_IPC_-_IP_- | + | [[File:gDMSS_-_FLIR_IPC_-_IP_-_3.jpg|400px]] |
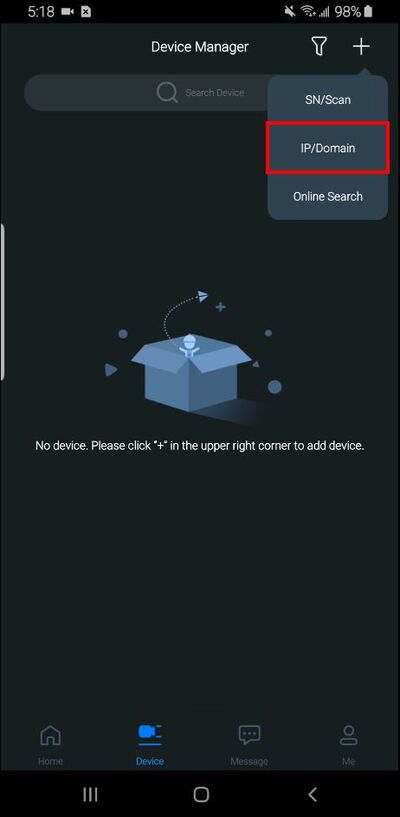
4. Select 'IP/Domain' from the pop-up | 4. Select 'IP/Domain' from the pop-up | ||
| − | [[File:gDMSS_-_FLIR_IPC_-_IP_- | + | [[File:gDMSS_-_FLIR_IPC_-_IP_-_4.jpg|400px]] |
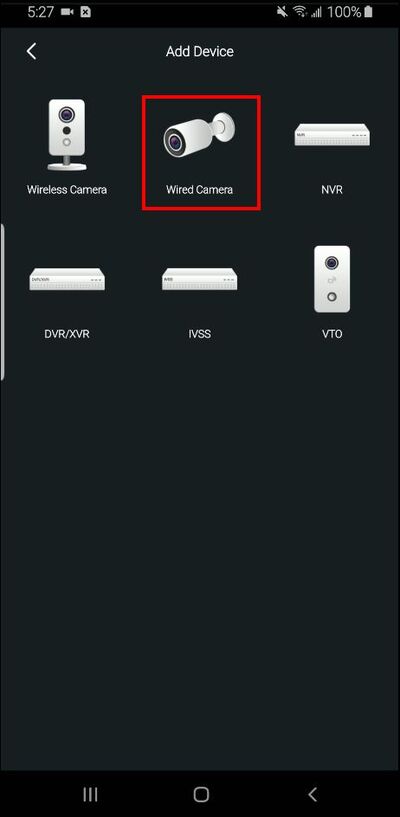
5. Select 'Wired Camera' | 5. Select 'Wired Camera' | ||
| − | [[File:gDMSS_-_FLIR_IPC_-_IP_- | + | [[File:gDMSS_-_FLIR_IPC_-_IP_-_5.jpg|400px]] |
| + | |||
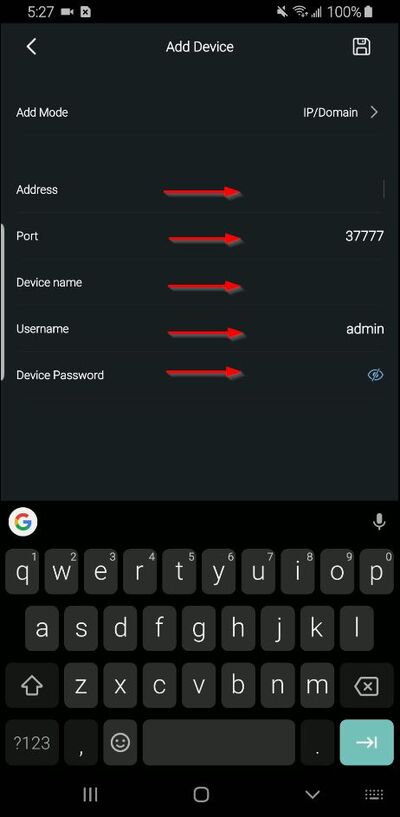
| + | 6. Enter all information for the device: | ||
| − | + | *Address - IP address of recorder | |
| + | *Port - HTTP Port of recorder | ||
| + | *Device name - nickname for device in app | ||
| + | *Username - username | ||
| + | *Device Password - password | ||
[[File:gDMSS_-_FLIR_IPC_-_IP_-_6.jpg|400px]] | [[File:gDMSS_-_FLIR_IPC_-_IP_-_6.jpg|400px]] | ||
| + | |||
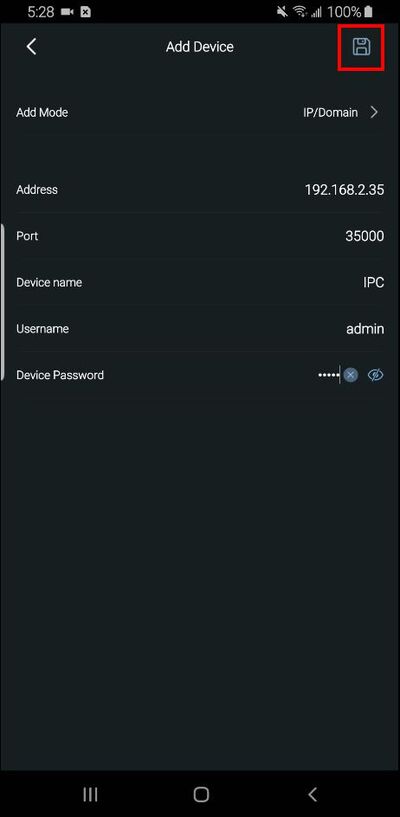
| + | 7. Once all information has been entered, press the Save icon in the top right of the screen | ||
[[File:gDMSS_-_FLIR_IPC_-_IP_-_7.jpg|400px]] | [[File:gDMSS_-_FLIR_IPC_-_IP_-_7.jpg|400px]] | ||
| + | |||
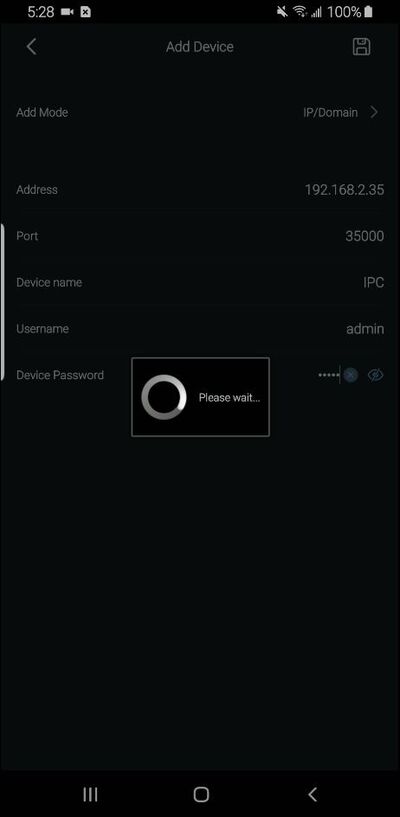
| + | 8. The app will begin to connect to the device | ||
[[File:gDMSS_-_FLIR_IPC_-_IP_-_8.jpg|400px]] | [[File:gDMSS_-_FLIR_IPC_-_IP_-_8.jpg|400px]] | ||
| + | |||
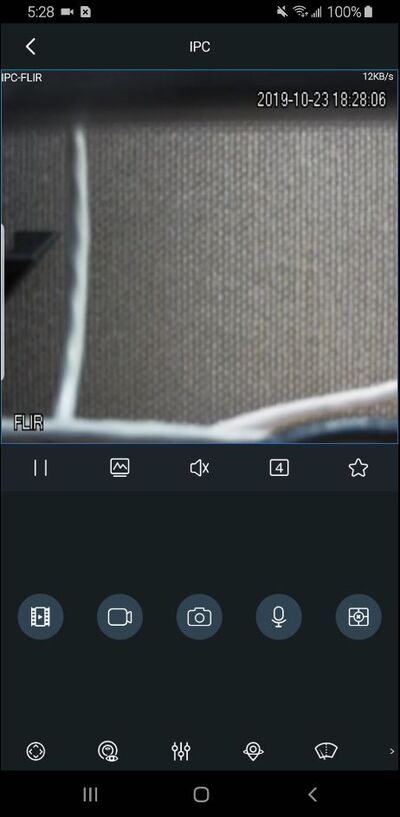
| + | 9. Once the device has been successfully connected it will load into Live Preview | ||
[[File:gDMSS_-_FLIR_IPC_-_IP_-_9.jpg|400px]] | [[File:gDMSS_-_FLIR_IPC_-_IP_-_9.jpg|400px]] | ||
Revision as of 17:15, 24 October 2019
Contents
How to Add A FLIR IP Camera to gDMSS via IP
Description
This guide will show how to add a FLIR IP Camerato the gDMSS mobile app via IP
Prerequisites
- gDMSS installed on the mobile device
- FLIR IP Camera, connected to network
- FLIR IP Camera network information - (IP, HTTP Port)
- Username/password for FLIR Recorder
Video Instructions
Step by Step Instructions
1. Open gDMSS
From the Preview window press the Home icon
2. Select Device
3. Press the '+' to add a device
4. Select 'IP/Domain' from the pop-up
5. Select 'Wired Camera'
6. Enter all information for the device:
- Address - IP address of recorder
- Port - HTTP Port of recorder
- Device name - nickname for device in app
- Username - username
- Device Password - password
7. Once all information has been entered, press the Save icon in the top right of the screen
8. The app will begin to connect to the device
9. Once the device has been successfully connected it will load into Live Preview
