Difference between revisions of "Transmission Display Control/Adding Recorders or Cameras On NVD via WebGUI"
(Created page with "testing") |
|||
| Line 1: | Line 1: | ||
| − | + | =How to Configure Video Wall in NVD via WebGUI= | |
| + | |||
| + | ==Description== | ||
| + | This article will go over how to setup video wall in NVD via webgui | ||
| + | |||
| + | ==Pre-requisites== | ||
| + | * Log into the webgui of NVD | ||
| + | * HDMI monitor(s) connected to NVD | ||
| + | * Adding recorders or cameras to NVD: https://dahuawiki.com/Transmission_Display_Control/Adding_Recorders_or_Cameras_On_NVD_via_WebGUI | ||
| + | |||
| + | ==Video Instructions== | ||
| + | N/A | ||
| + | |||
| + | ==Step by Step Instructions== | ||
| + | |||
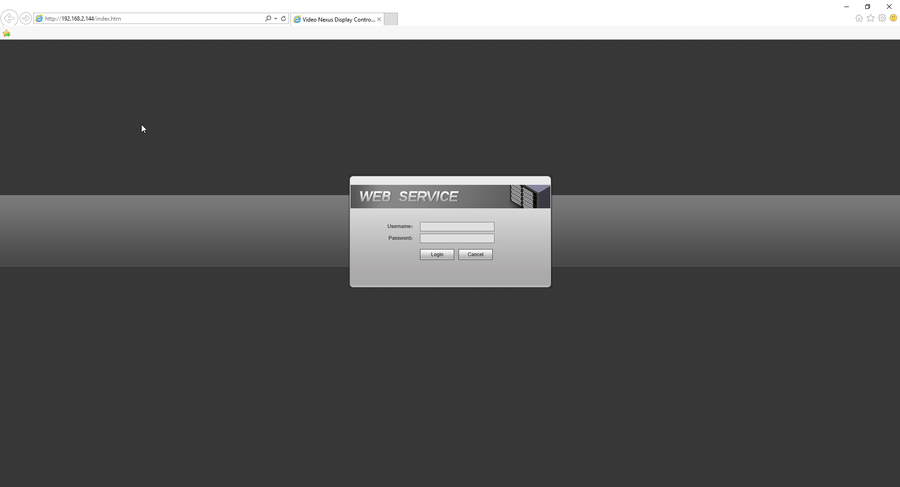
| + | 1. Login to the webGUI of NVD. | ||
| + | |||
| + | [[File:1._Login_to_NVD_WebGUI.png|900px]] | ||
| + | |||
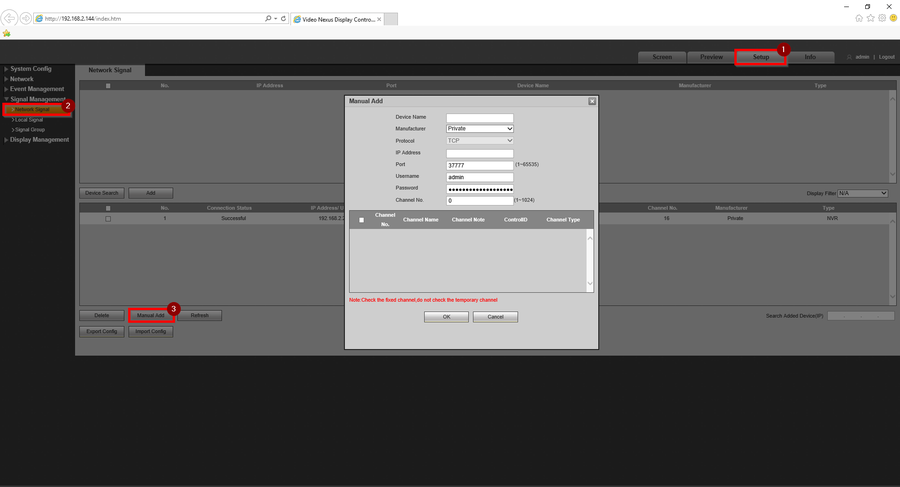
| + | 2. Click "Setup" > Network Signal > Manual Add <br> | ||
| + | <span style=color:red;font-style:italic;font-weight:bold>* All information such as "Device Name, IP Address, Password, Channel No." must be filled accordingly.</span><br> | ||
| + | |||
| + | [[File:2._NVD_-_Adding_Recorder_or_Camera.png|900px]] | ||
| + | |||
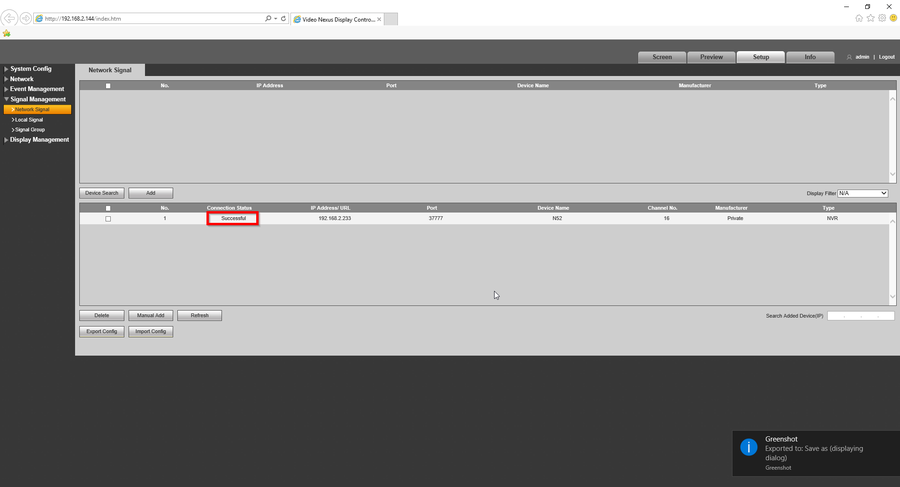
| + | 3. Once the device is added successfully, the status will show as "Successful". | ||
| + | |||
| + | [[File:3._Successful_Status_After_Adding.png|900px]] | ||
| + | |||
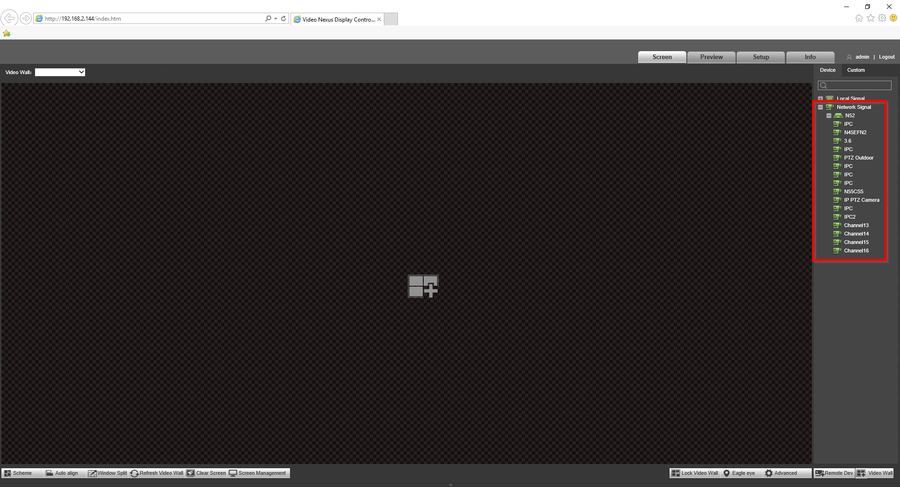
| + | 4. On "Screen", the devices added will be displayed here as well to be deployed at a later time. | ||
| + | |||
| + | [[File:4._Devices_Show_Up_in_Screen.png|900px]] | ||
| + | |||
| + | <div style="float: right;"> [[#top|[Return To Top]]]</div> | ||
Revision as of 23:28, 6 September 2022
Contents
How to Configure Video Wall in NVD via WebGUI
Description
This article will go over how to setup video wall in NVD via webgui
Pre-requisites
- Log into the webgui of NVD
- HDMI monitor(s) connected to NVD
- Adding recorders or cameras to NVD: https://dahuawiki.com/Transmission_Display_Control/Adding_Recorders_or_Cameras_On_NVD_via_WebGUI
Video Instructions
N/A
Step by Step Instructions
1. Login to the webGUI of NVD.
2. Click "Setup" > Network Signal > Manual Add
* All information such as "Device Name, IP Address, Password, Channel No." must be filled accordingly.
3. Once the device is added successfully, the status will show as "Successful".
4. On "Screen", the devices added will be displayed here as well to be deployed at a later time.


