Difference between revisions of "Video Intercom/Adding VTO to NVR"
(Created page with "=How to Add a VTO to an NVR= ==Description== This article will cover how add a VTO Video Intercom Doorstation to an NVR ==Prerequisites== * Video Intercom VTO Doorstation *...") |
|||
| Line 15: | Line 15: | ||
<br>Then select '''Camera''' from the drop down | <br>Then select '''Camera''' from the drop down | ||
| − | [[File:AddingVTOtoNVR1.png| | + | [[File:AddingVTOtoNVR1.png|1000px]] |
2. Select '''Camera List''' from the list on the left and then select the '''Camera List''' tab at the top. | 2. Select '''Camera List''' from the list on the left and then select the '''Camera List''' tab at the top. | ||
| Line 21: | Line 21: | ||
<br>Then select '''Add''' | <br>Then select '''Add''' | ||
| − | [[File:AddingVTOtoNVR2.png| | + | [[File:AddingVTOtoNVR2.png|1000px]] |
3. Select the Pencil icon under '''Edit''' next to the VTO you just added | 3. Select the Pencil icon under '''Edit''' next to the VTO you just added | ||
| − | [[File:AddingVTOtoNVR3.png| | + | [[File:AddingVTOtoNVR3.png|1000px]] |
4. Input the correct login information for the VTO in the '''Username''' and '''Password''' fields. | 4. Input the correct login information for the VTO in the '''Username''' and '''Password''' fields. | ||
<br>Then select '''OK''' at the bottom | <br>Then select '''OK''' at the bottom | ||
| − | [[File:AddingVTOtoNVR4.png| | + | [[File:AddingVTOtoNVR4.png|500px]] |
5. Once the changes are saved it will say "Operation succeeded" at the top. | 5. Once the changes are saved it will say "Operation succeeded" at the top. | ||
<br>Then once the camera has successfully connected to the NVR, the Satus symbol for the VTO will turn Green | <br>Then once the camera has successfully connected to the NVR, the Satus symbol for the VTO will turn Green | ||
| − | [[File:AddingVTOtoNVR5.png| | + | [[File:AddingVTOtoNVR5.png|1000px]] |
6. Select the Main Menu icon at the top right to go back to the Main Menu. | 6. Select the Main Menu icon at the top right to go back to the Main Menu. | ||
<br>Then select '''Live''' | <br>Then select '''Live''' | ||
| − | [[File:AddingVTOtoNVR6.png| | + | [[File:AddingVTOtoNVR6.png|1000px]] |
7. Select the VTO from the list on the left and you will see the live view | 7. Select the VTO from the list on the left and you will see the live view | ||
| − | [[File:AddingVTOtoNVR7.png| | + | [[File:AddingVTOtoNVR7.png|1000px]] |
Revision as of 22:26, 22 August 2022
Contents
How to Add a VTO to an NVR
Description
This article will cover how add a VTO Video Intercom Doorstation to an NVR
Prerequisites
- Video Intercom VTO Doorstation
- Dahua NVR
Video Instructions
Step by Step Instructions
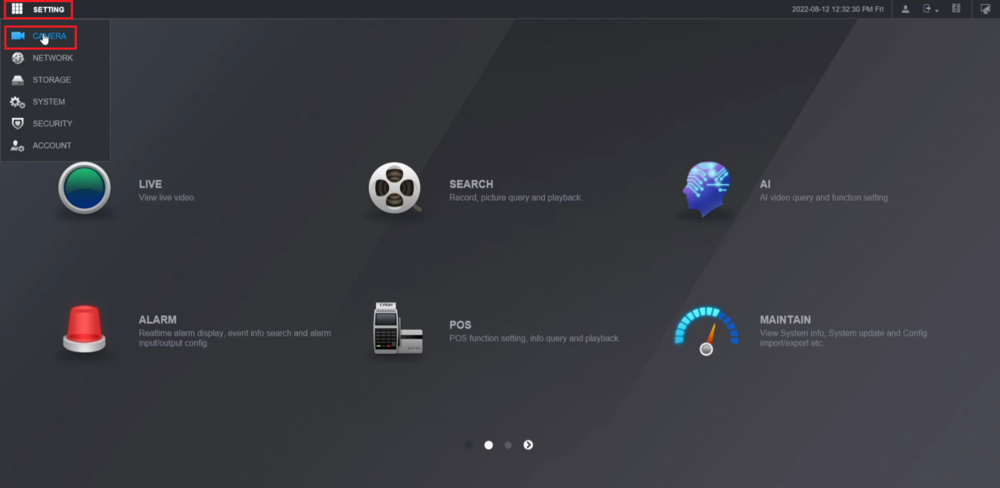
1. From the Main Menu of the NVR, select Setting at the top left.
Then select Camera from the drop down
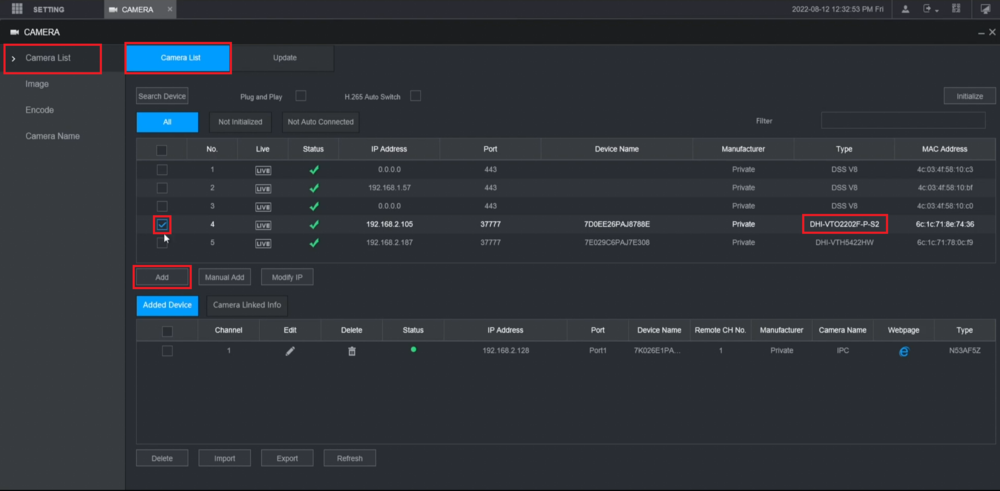
2. Select Camera List from the list on the left and then select the Camera List tab at the top.
Look for the VTO in the list at the top and check the box next to it.
Then select Add
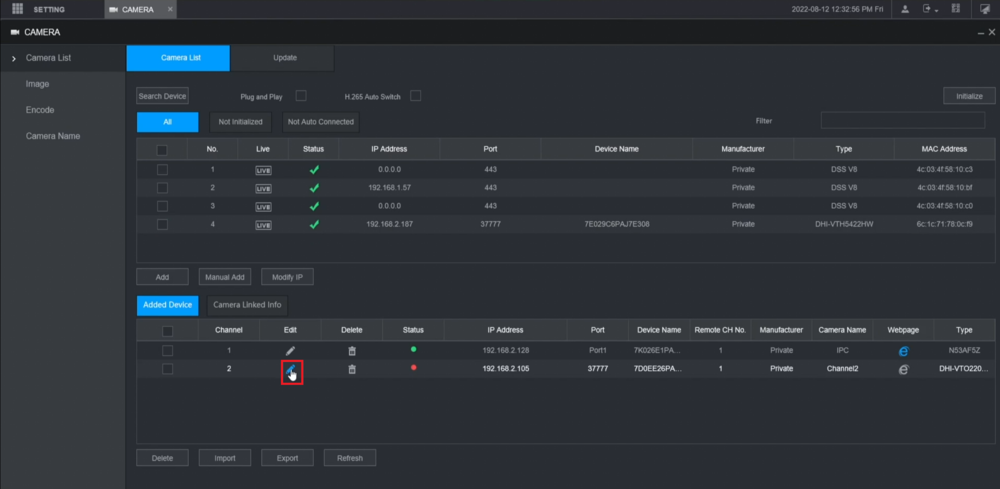
3. Select the Pencil icon under Edit next to the VTO you just added
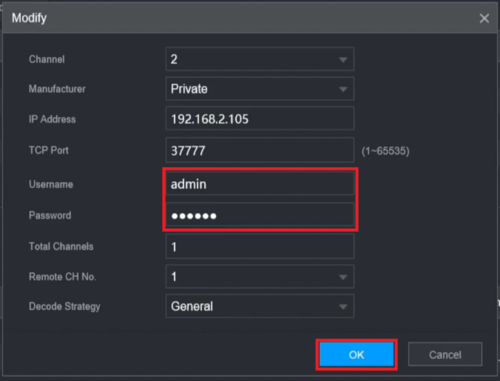
4. Input the correct login information for the VTO in the Username and Password fields.
Then select OK at the bottom
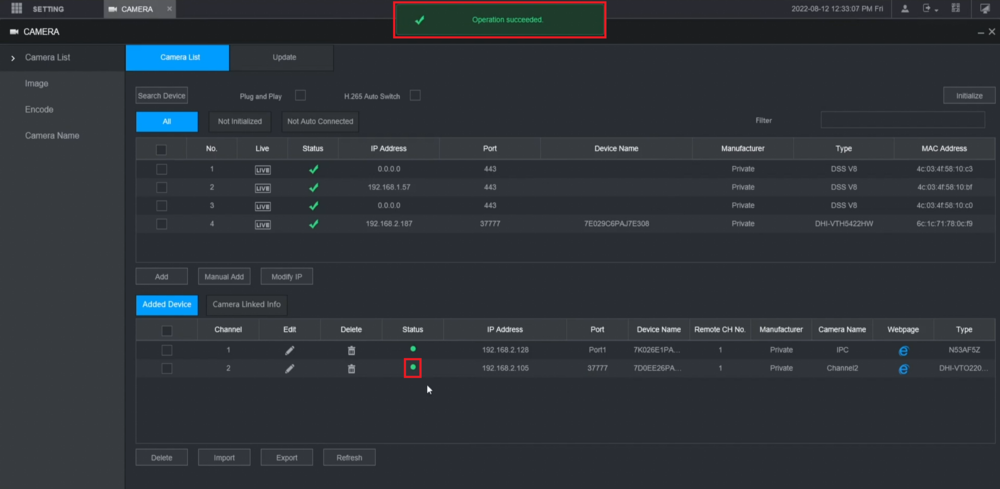
5. Once the changes are saved it will say "Operation succeeded" at the top.
Then once the camera has successfully connected to the NVR, the Satus symbol for the VTO will turn Green
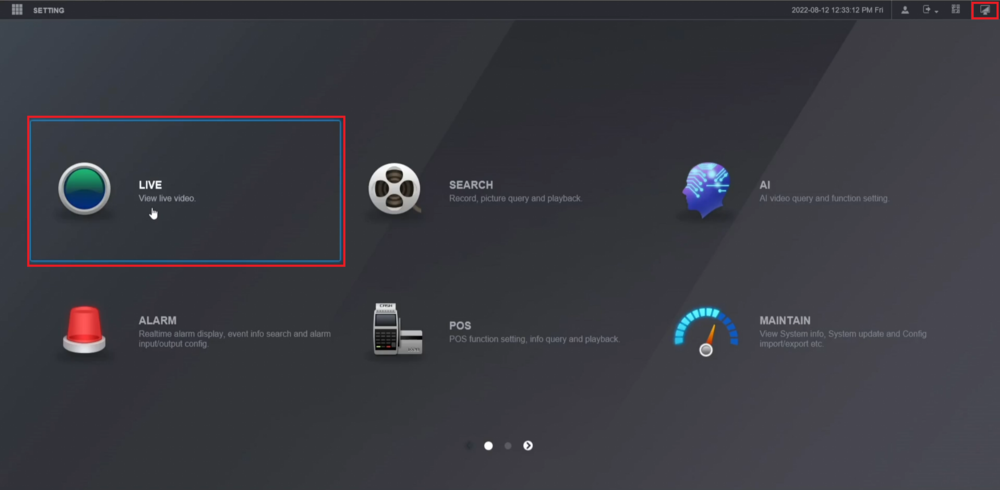
6. Select the Main Menu icon at the top right to go back to the Main Menu.
Then select Live
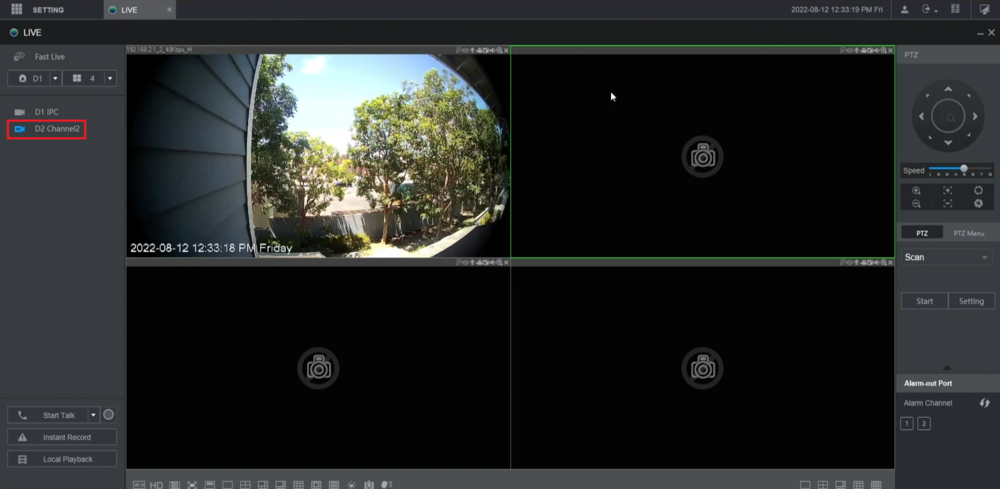
7. Select the VTO from the list on the left and you will see the live view
