Difference between revisions of "SmartPSS/Fisheye Dewarp Playback SmartPSS2"
| Line 18: | Line 18: | ||
[[File:Smatpss2playback2.png|600px]] | [[File:Smatpss2playback2.png|600px]] | ||
| − | 3. Select | + | 3. Select Record Type -> Time -> Search. |
| − | [[ | + | [[File:SPSS2FisheyePlayback3.png|550px]] |
| − | 4. | + | 4. Choose Time Frame, play and pause if you wish. |
| − | [[ | + | [[File:SPSS2FisheyePlayback4.png|550px]] |
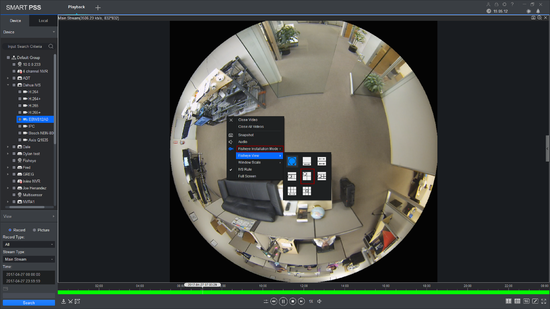
5. Right-click and select the installation mode and select the fisheye view. | 5. Right-click and select the installation mode and select the fisheye view. | ||
| − | [[ | + | [[File:SPSS2FisheyePlayback5.png|550px]] |
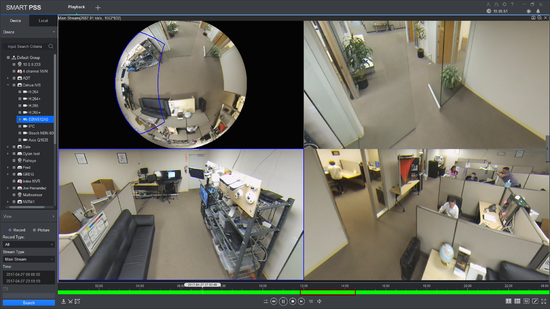
6. You may now see the playback in fisheye dewarp. Select a time if you wish. | 6. You may now see the playback in fisheye dewarp. Select a time if you wish. | ||
| − | [[ | + | [[File:SPSS2FisheyePlayback6.png|550px]] |
Revision as of 21:47, 27 April 2017
Contents
How to Dewarp a Fisheye Camera's Recorded Video via SmartPSS 2
Prerequisites
- SmartPSS2.
- Fisheye Camera.
- NVR connected to Fisheye with HDD installed.
Video Instructions
Step by Step Instructions
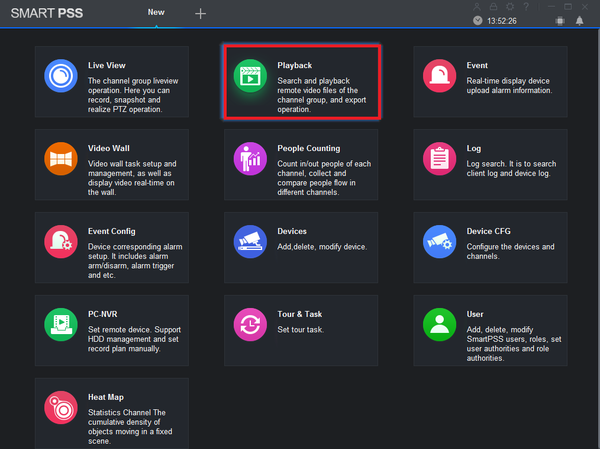
1. Select Playback.
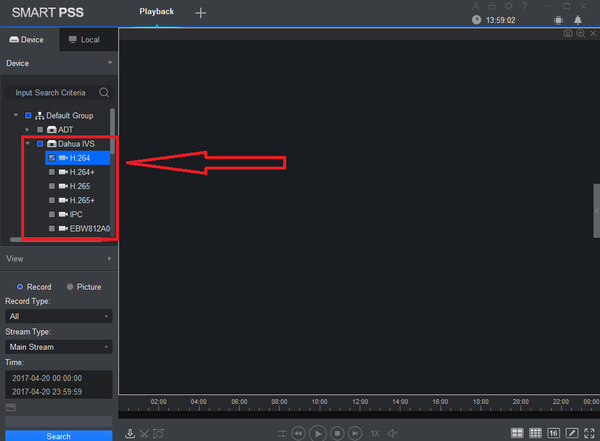
2. Select a Fisheye under an NVR that has a harddrive for playback.
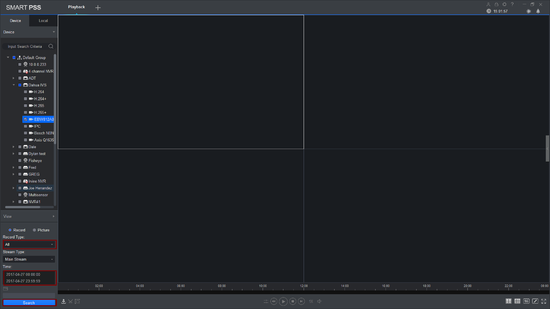
3. Select Record Type -> Time -> Search.
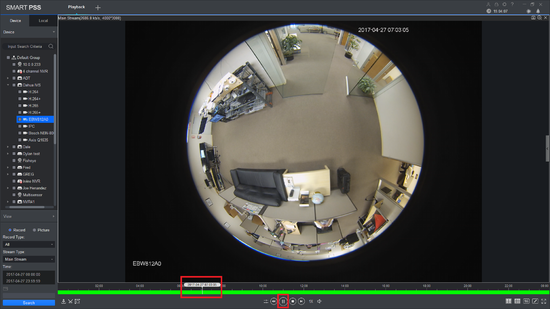
4. Choose Time Frame, play and pause if you wish.
5. Right-click and select the installation mode and select the fisheye view.
6. You may now see the playback in fisheye dewarp. Select a time if you wish.
