Notice: Firmware Links Under Maintenance We are currently undergoing maintenance on all firmware links. If any links are inaccessible, please email or contact Tech Support for the firmware. We appreciate your patience during the maintenance, thank you for your understanding.
Video Intercom/SIP 2.0/Multiple VTH and VTO One-Key Config Setup
Contents
How to Setup One Key Config
Description
This article will go over the new One Key Config setup.
Prerequisites
- VTH with the One Key Config feature
- VTOs with SIP 2.0 Firmware
Video Instructions
Step by Step Instructions
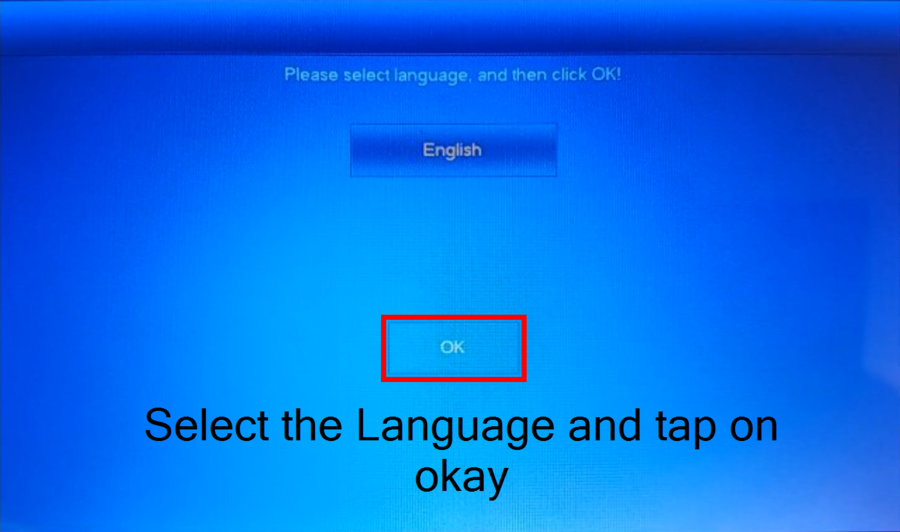
1. Select the Language and tap on OK
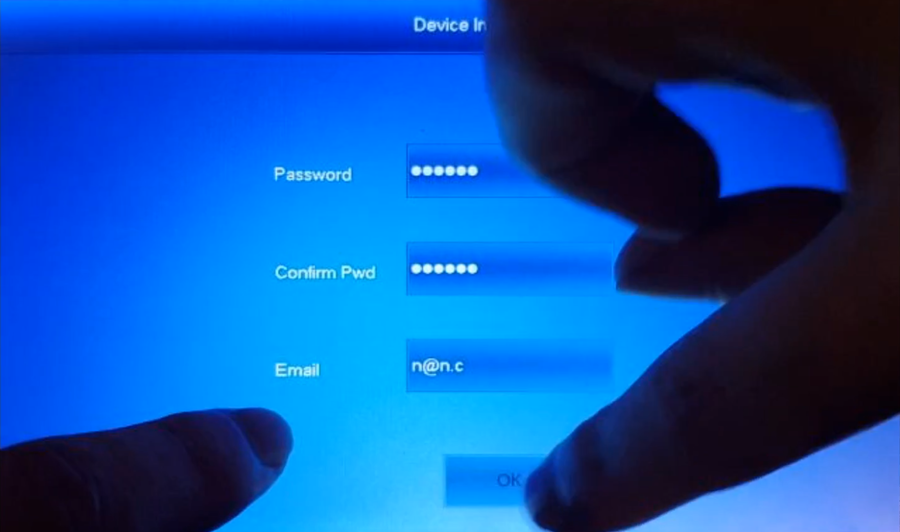
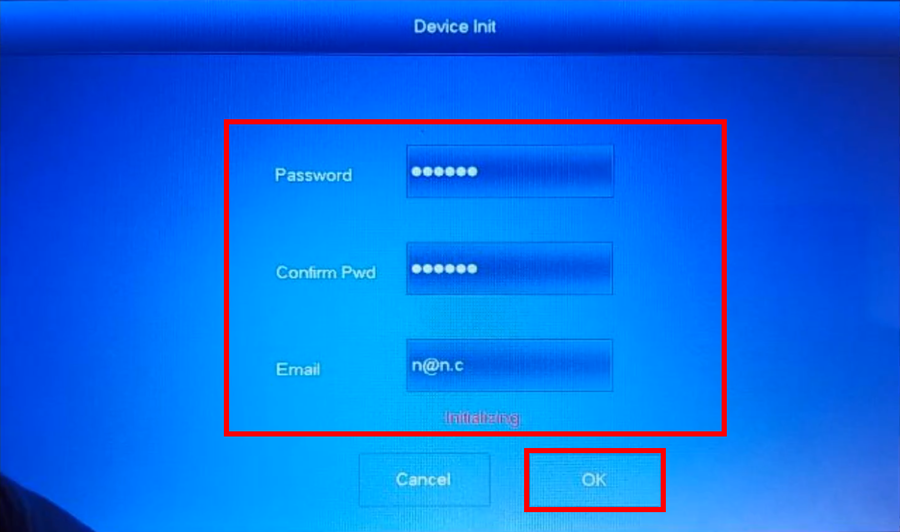
2. Initialize the VTH we will be using as the Main. Enter the password and E-mail
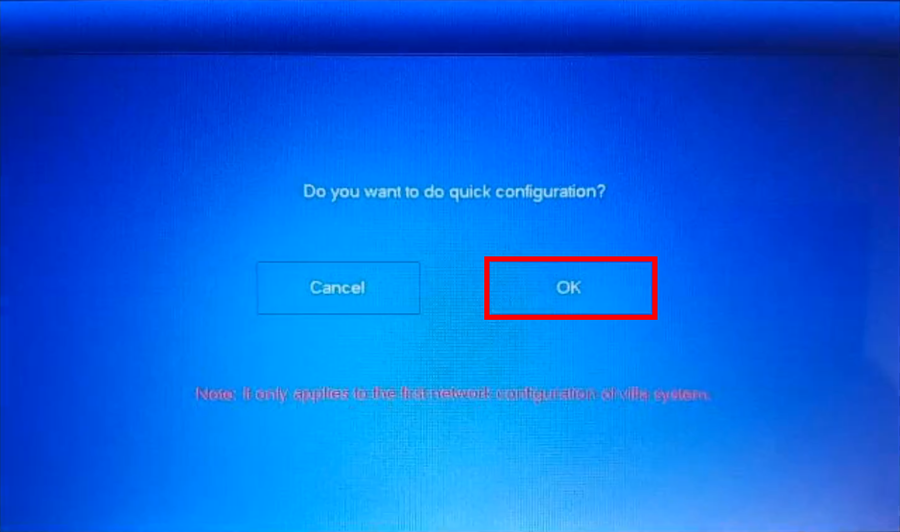
3. Proceed with the One Key Config by tapping on OK
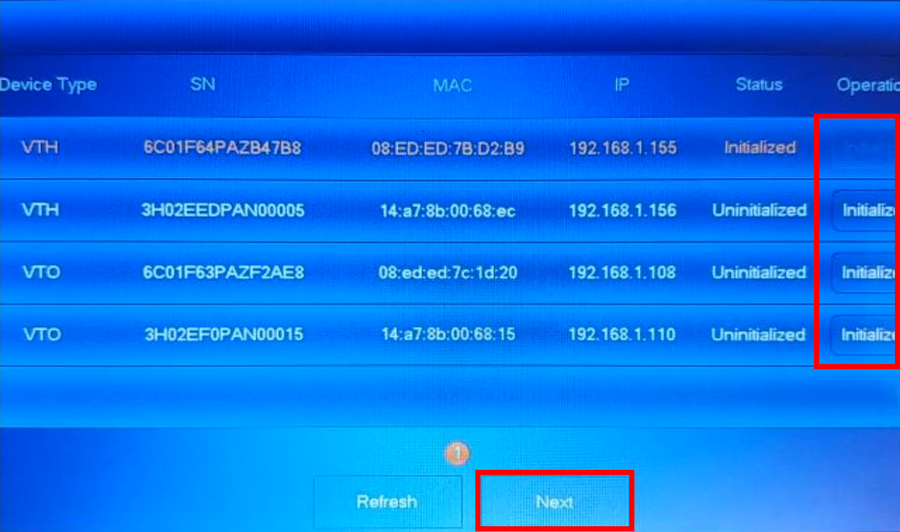
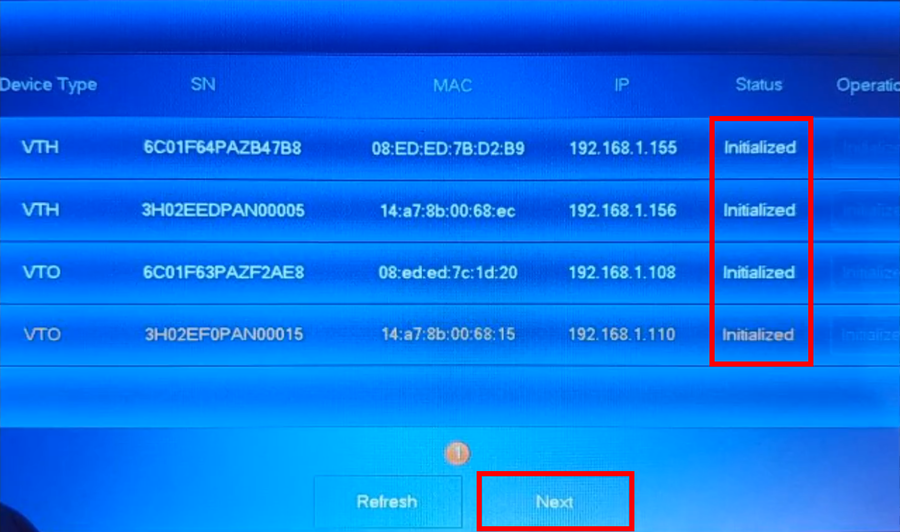
4. Initialize all the VDP devices by tapping on Initialize
5. Enter the password for the VTHs and VTOs.
Note: VTOs will require an 8 numerical/digit password combination
6. Tap on Next after all units are initialized
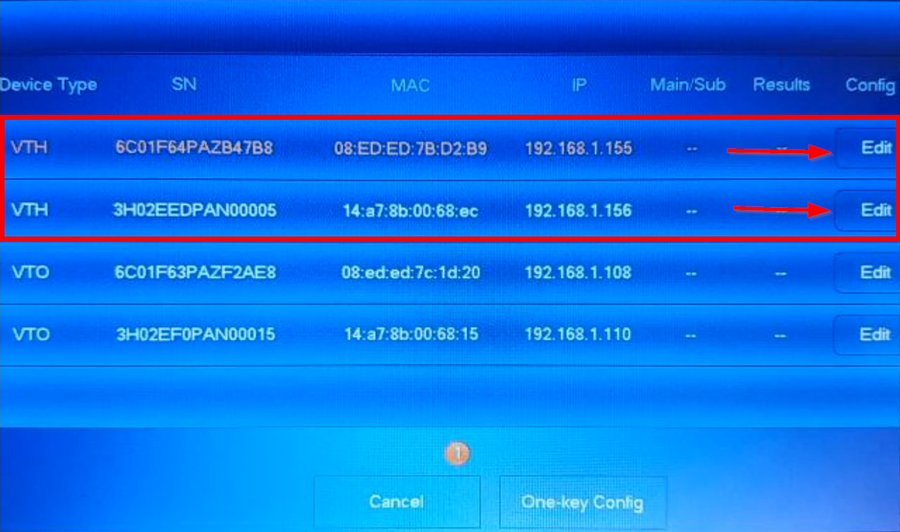
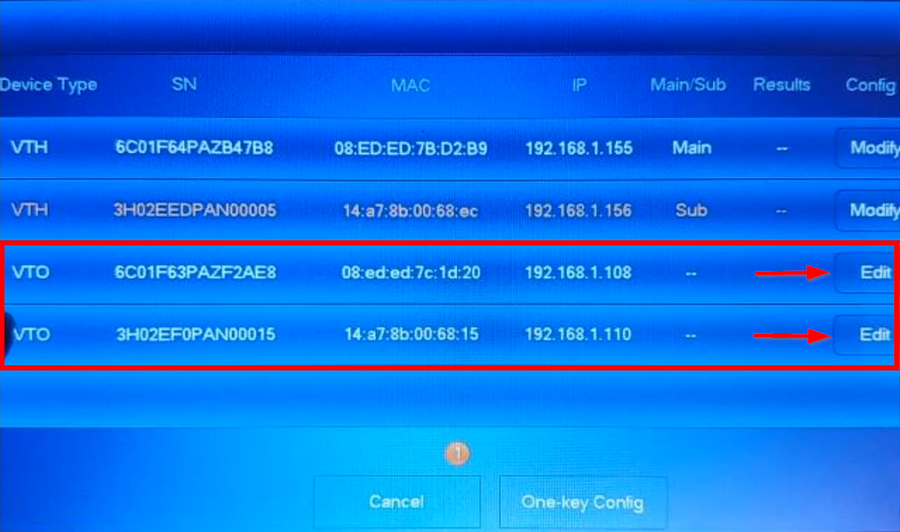
7. Tap on edit to assign Main and Subs, we can also edit IP Addresses to avoid IP conflicts
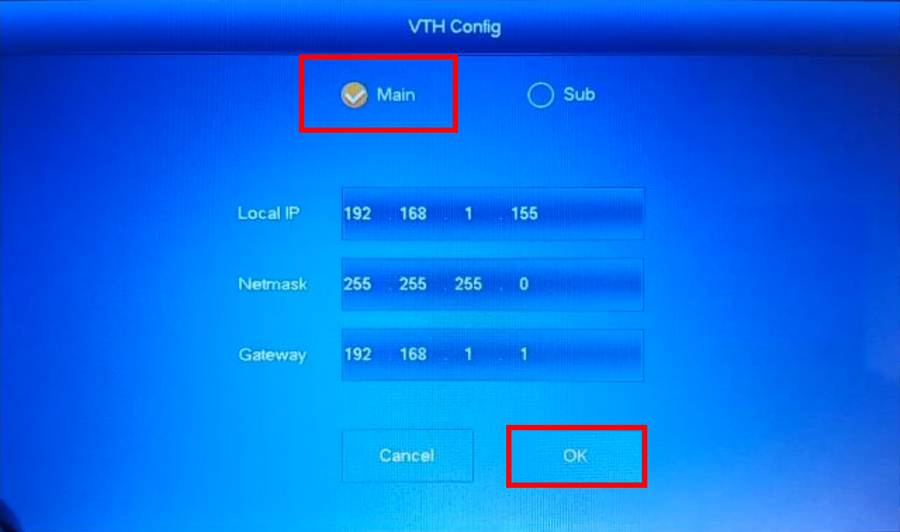
8. Select Main for the first VTH and modify the IP if needed
9. For the Second VTH assign it as a Sub and modify the IP if needed
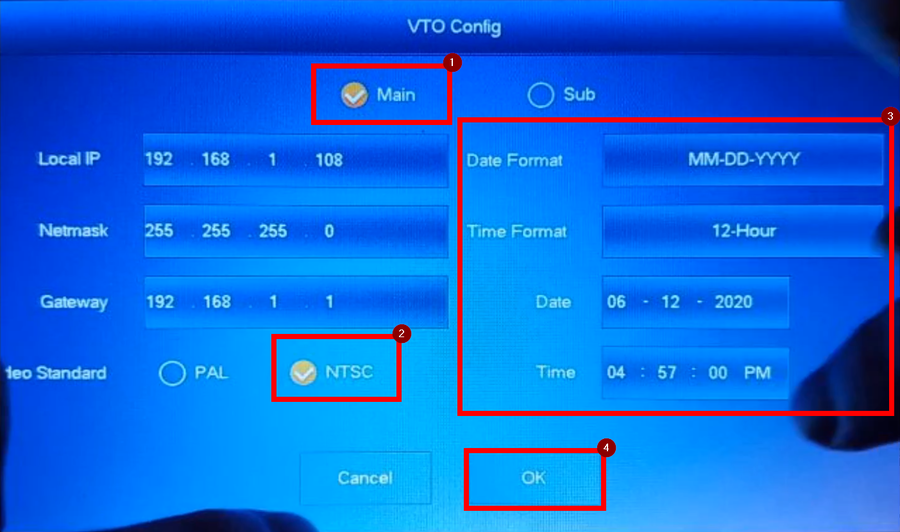
10. VTOs are next, choose a VTO that will be the main and tap on edit
11. The Main VTO will require you to enter Date and Time. Do NOT skip this step. Modify IP Address if needed
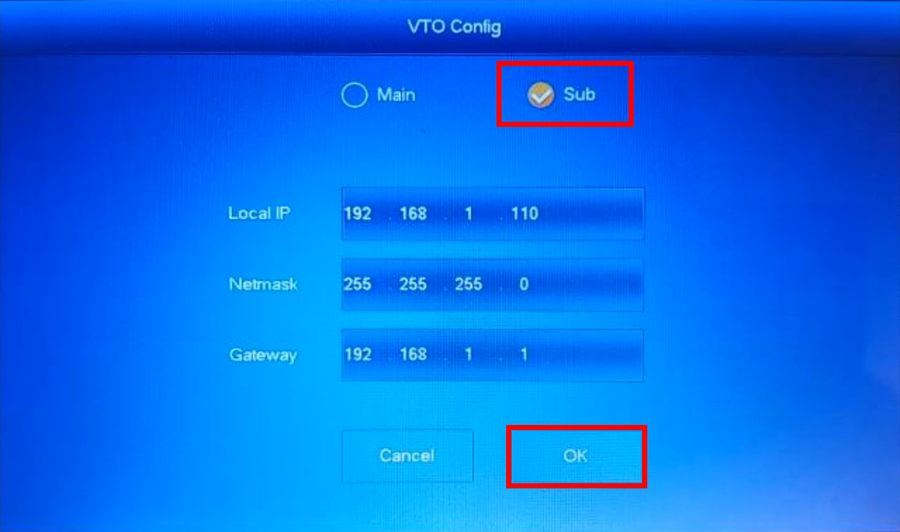
12. Assign the second VTO as a Sub. Modify IP Address if needed
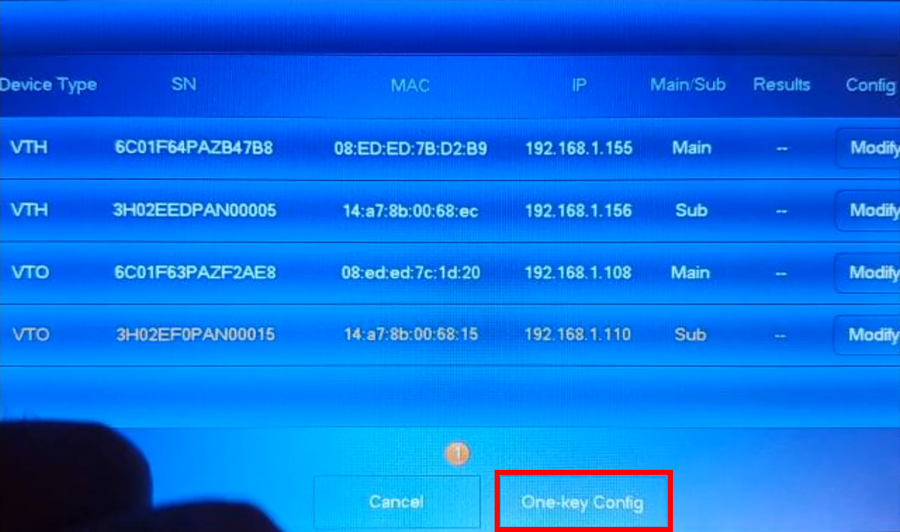
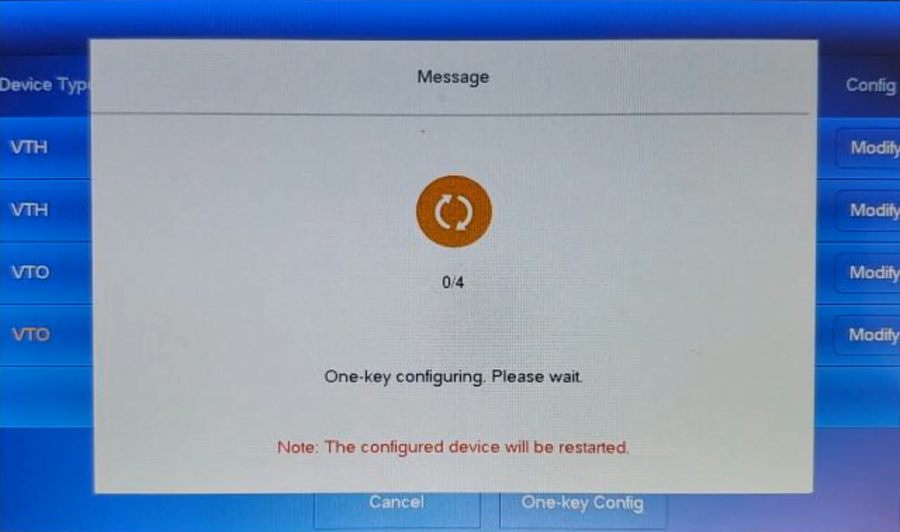
13. Tap on One-Key Config send the configuration to the units
14. The VTH will handle the SIP programming
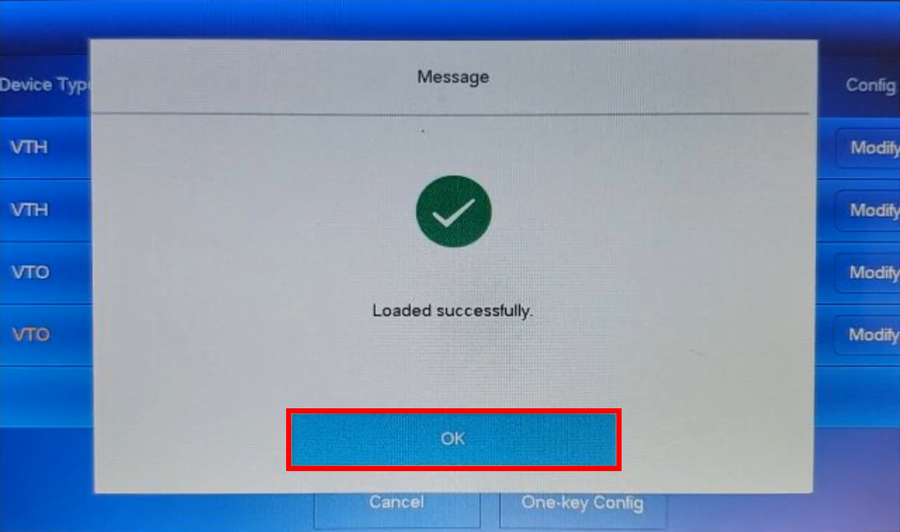
15. Tap on OK once completed
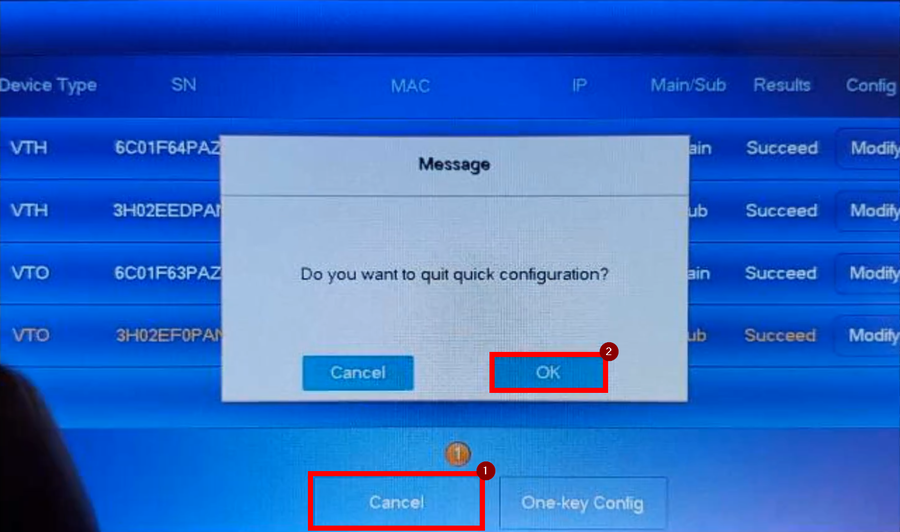
16. Cancel and tap on OK
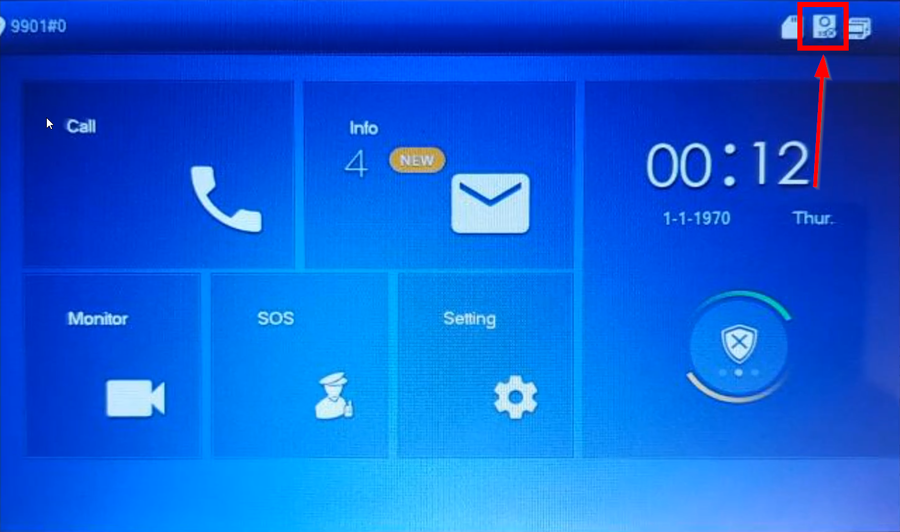
17. Wait for all the units to reboot and the Video Intercom Icon error will disappear
18. The configuration is now complete
