Access Control/Holiday Schedule Setup
Contents
How to Setup Holiday Schedule
Description
These articles will cover how to setup a Holiday Schedule for Access Control Devices
Prerequisites
- A Dahua Access Control Device added to one of the below software clients
- A Computer with one of the below software clients
Instructions
Step by Step Instructions
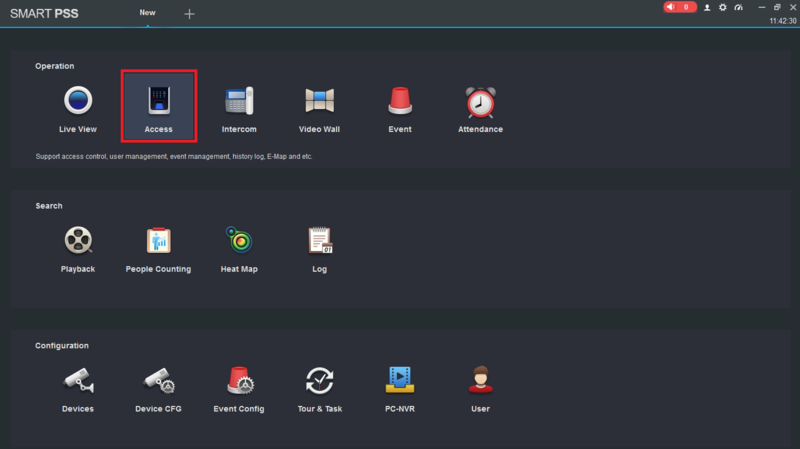
1. Open SmartPSS and select "Access" from the main menu
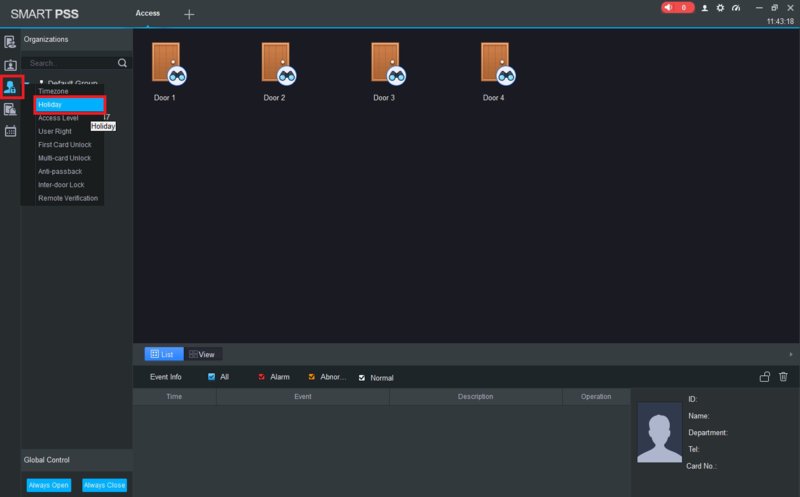
2. Select the Upload Users to Devices icon on the left (it looks like a person with a lock).
Select "Holiday" from the drop-down list
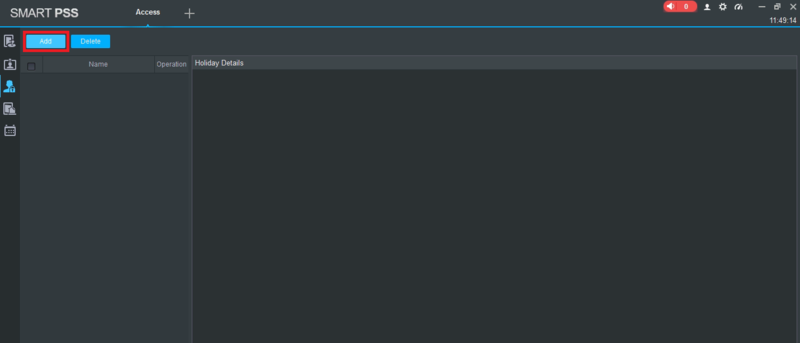
3. Select the "Add" button at the top left
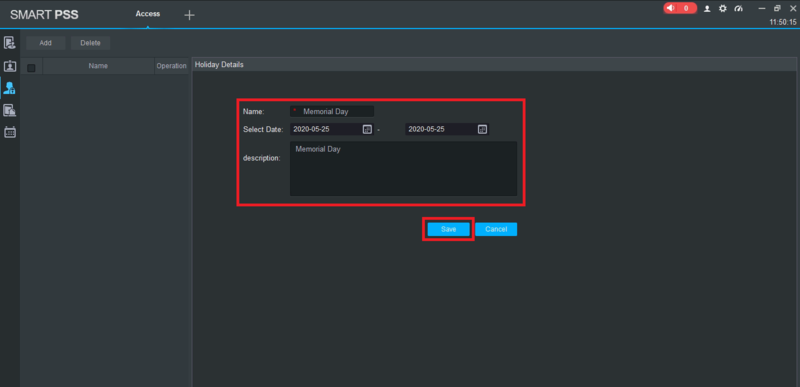
4. Fill in the name of the Holiday in the "Name" field.
Select the starting and ending dates in the fileds next to "Select Date".
Fill in a description of the Holiday in the "Description" field.
Select "Save" at the bottom
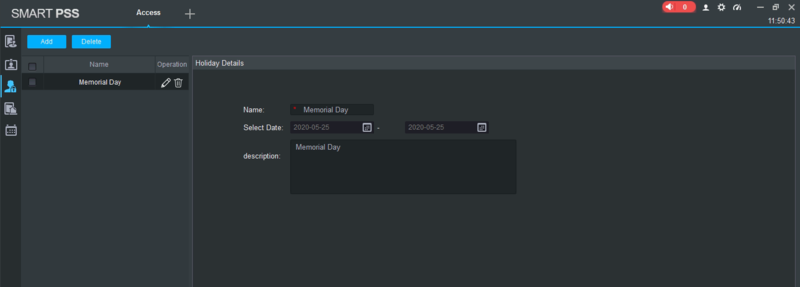
You will see your newly created Holiday in the list on the left.
You can add more Holidays by repeating Steps 3 and 4 for each Holiday
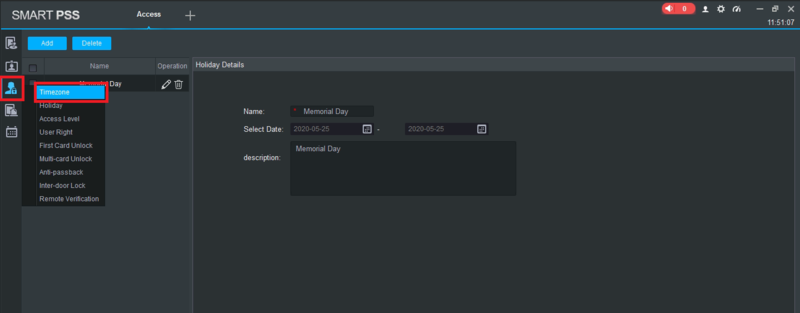
5. Select the Upload Users to Device icon on the left
Select "Timezone" from the drop-down list
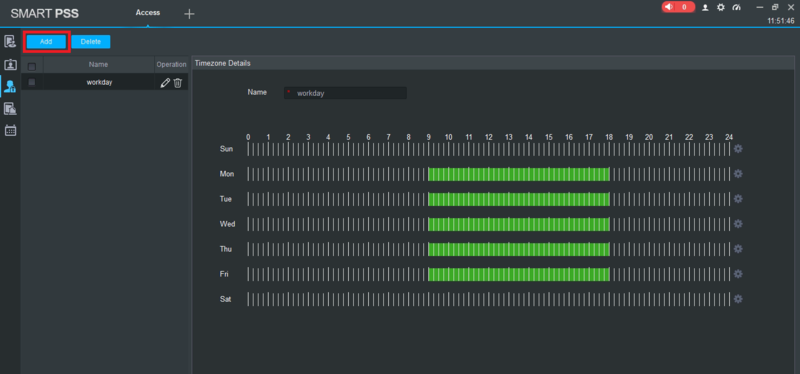
6. Select the "Add" button on the top left
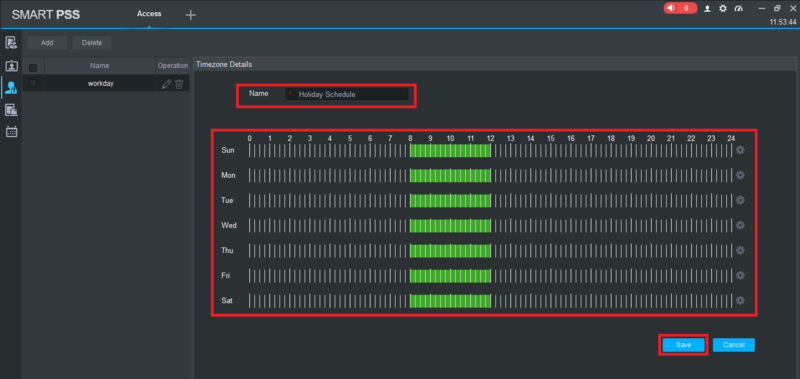
7. Fill in the name of the Schedule in the "Name" field.
Modify the schedule for all days of the week.
Select "Save" at the bottom
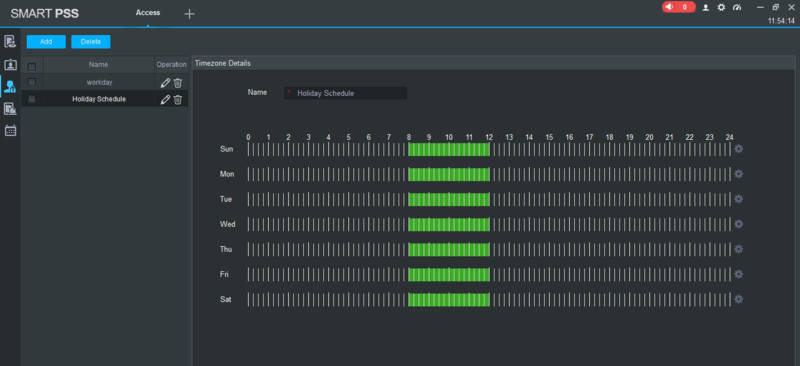
You will see your newly created Schedule in the list on the left
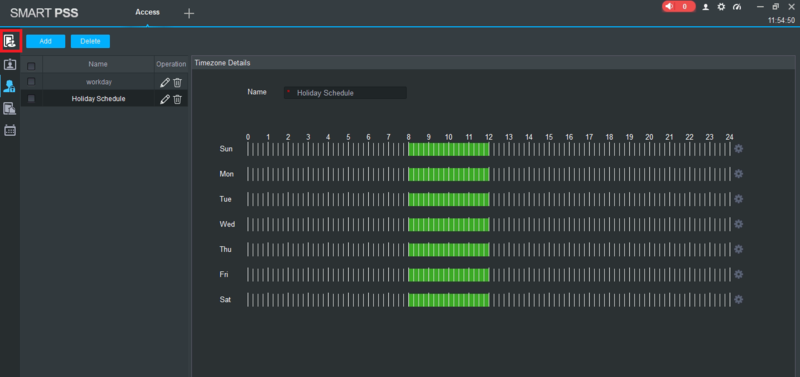
8. Select the Console icon on the left (it looks like a door with a joystick)
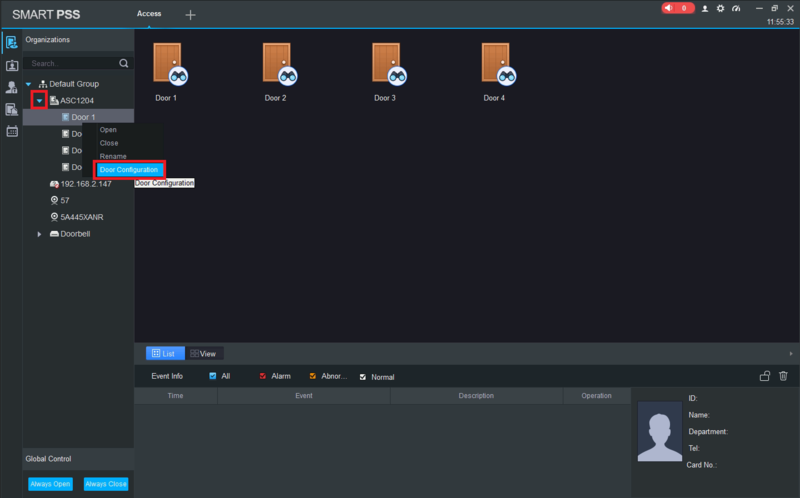
9. Expand the list for the access controller on the left.
Right click one of the doors and select "Door Configuration"
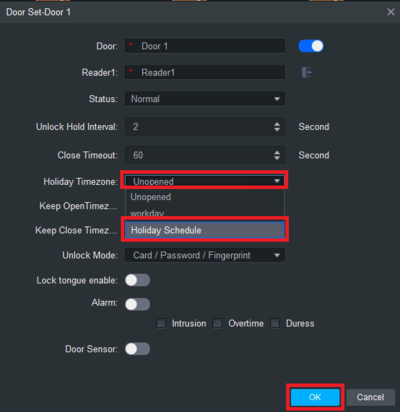
10. Select the field next to "Holiday Timezone".
Select the Holiday Schedule you created in Step 7 from the drop-down list.
Select "OK" at the bottom to save your changes.
Repeat Steps 9 and 10 for each door
Step by Step Instructions
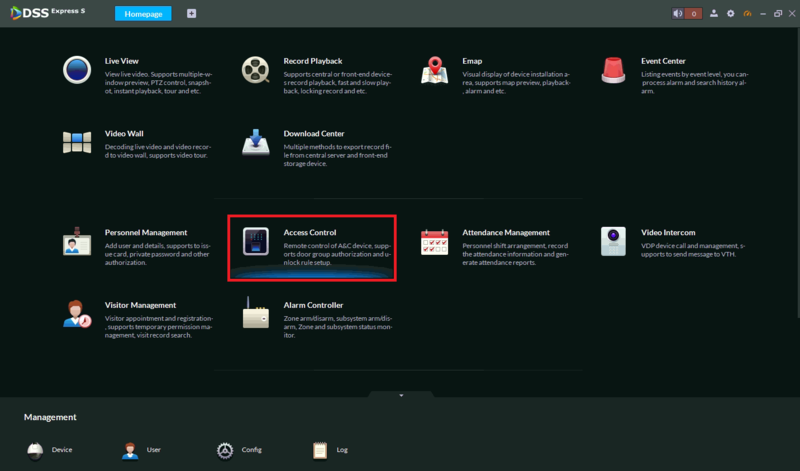
1. Open DSS Express S and select "Access Control" from the main menu
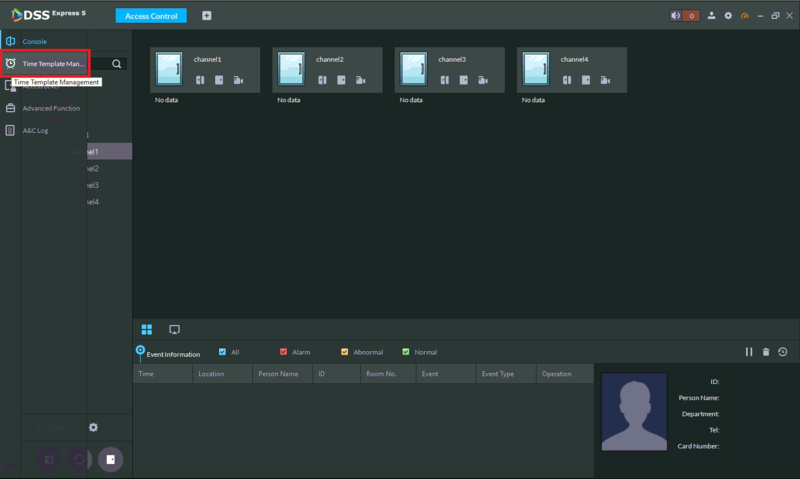
2. Select "Time Template Management" on the left
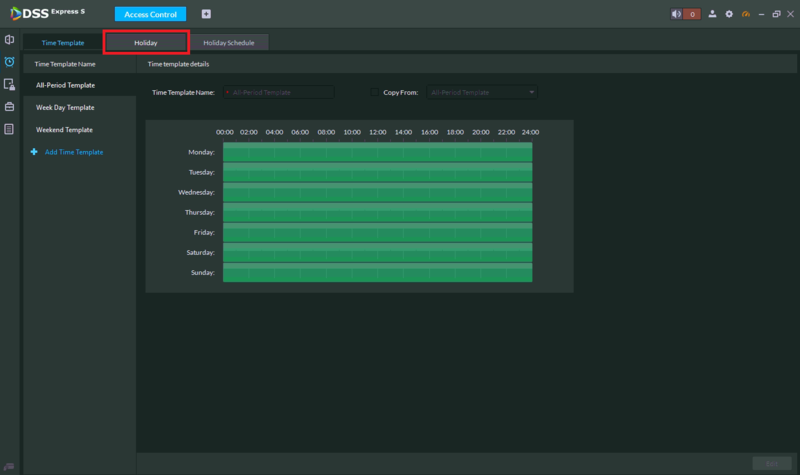
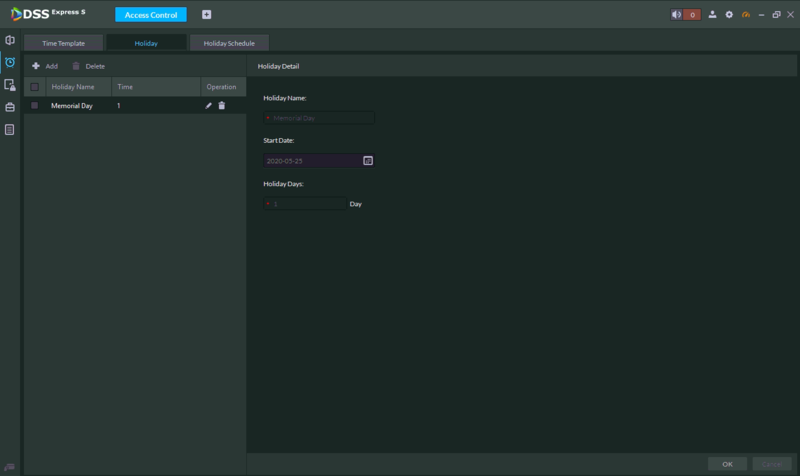
3. Select the "Holiday" tab at the top
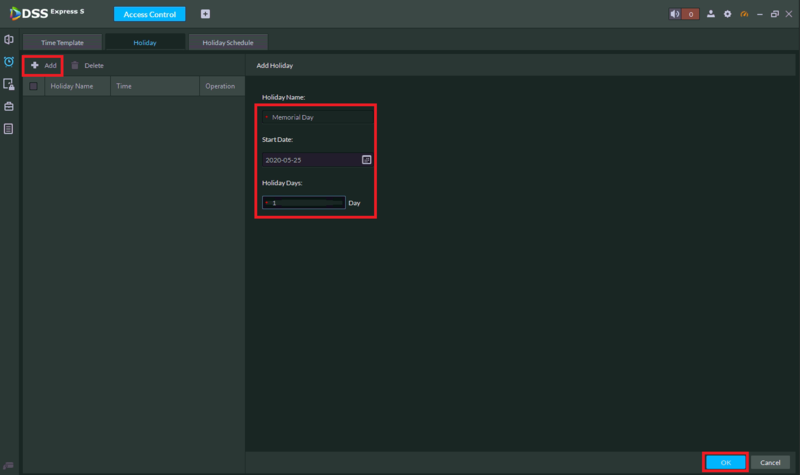
4. Select "Add" at the top left.
Fill in the name of the holiday in the "Holiday Name" field.
Select a starting date in the "Start Date" section.
Type in the number of days the holiday lasts in the "Holiday Days" field.
Select the "OK" button at the bottom to save the settings
You will see the saved Holiday in the list on the left
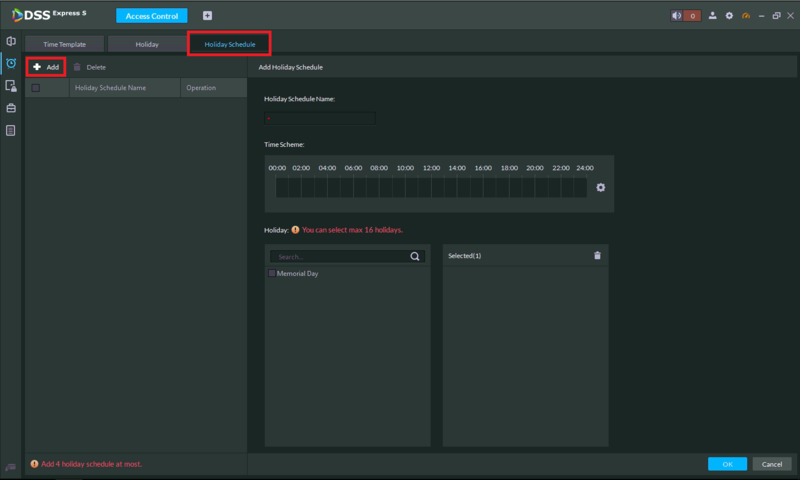
5. Select the "Holiday Schedule" tab at the top.
Select the "Add" button at the top left
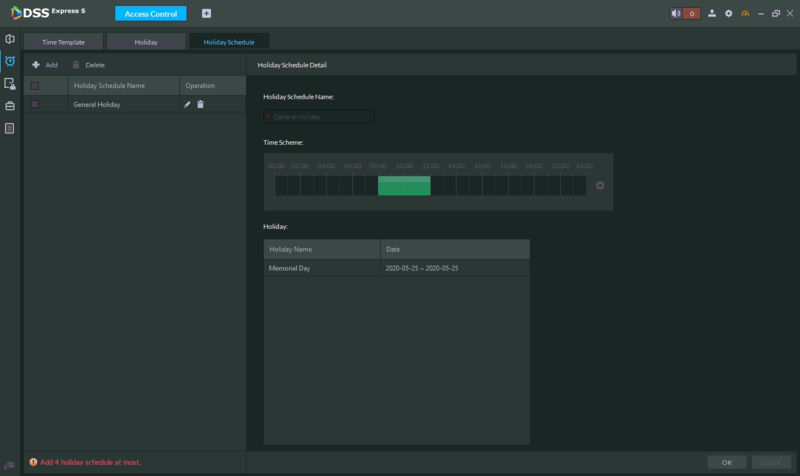
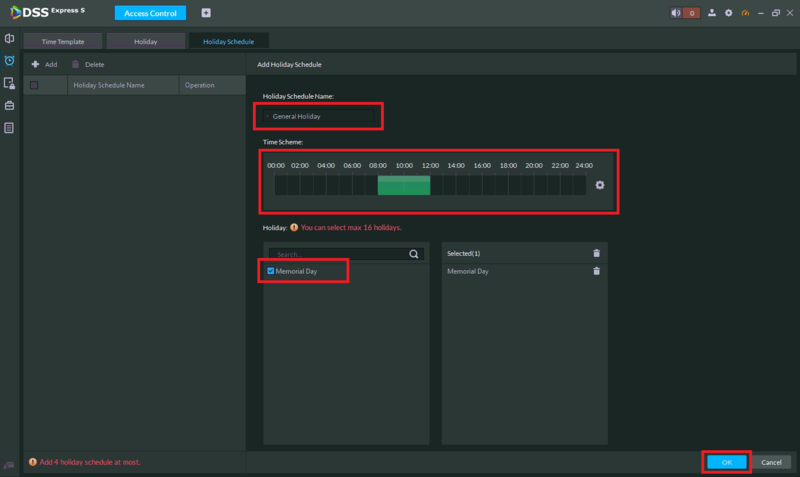
6. Put the name of the Holiday Schedule in the "Holiday Schedule Name" field.
Edit the daily schedule in the "Time Scheme" section.
Check the box next to every Holiday you want on this schedule from the "Holiday" list.
Select the "OK" button at the bottom to save the settings
You will see the saved Holiday Schedule on the left
