Difference between revisions of "EVS/How To Add To IVSS"
(→Step by Step Instruction) |
(→Step by Step Instruction) |
||
| Line 51: | Line 51: | ||
[[File:EVS - Add to IVSS - 7.jpg|600px]] | [[File:EVS - Add to IVSS - 7.jpg|600px]] | ||
| − | + | Click OK | |
| − | Click | + | 8. Click on the iSCSI Application tab to format the HDD |
| − | 8. | + | [[File:EVS - Add to IVSS - 8.jpg|600px]] |
Click Format and confirm the prompt | Click Format and confirm the prompt | ||
Revision as of 00:19, 7 November 2020
Contents
How to add EVS to IVSS
Description
This article is to show user how to add EVS to IVSS unit as an extended storage.
Prerequisites
- EVS Set Up as a Network Disk
- DSS Hardware or Software
Video Instruction
Step by Step Instruction
1. Login to the IVSS
Click Settings (gear icon)
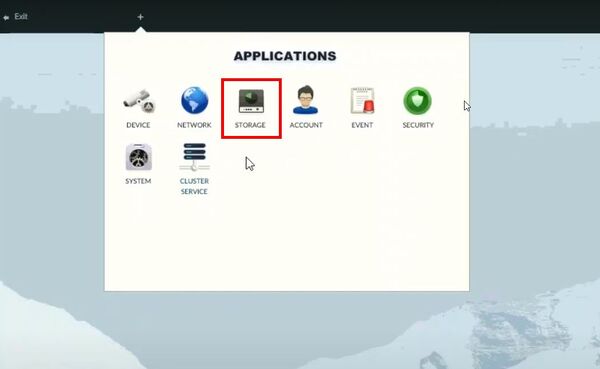
2. Select Storage
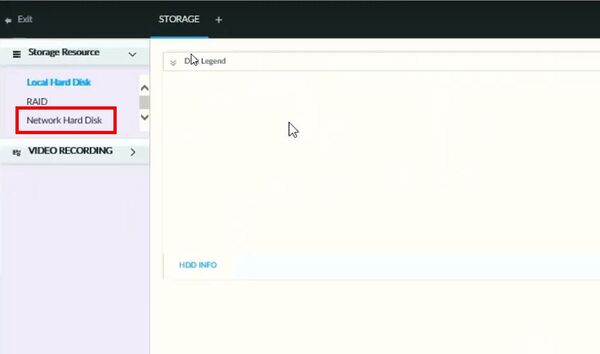
3. Select Network Hard Disk
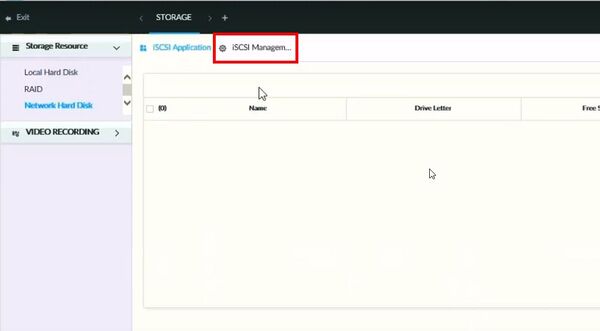
4. Click on iSCSI Management
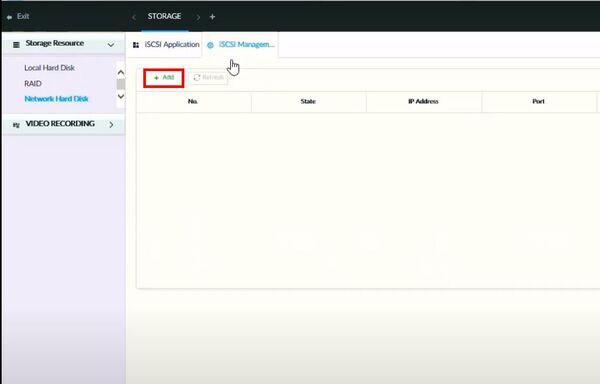
5. Click +Add
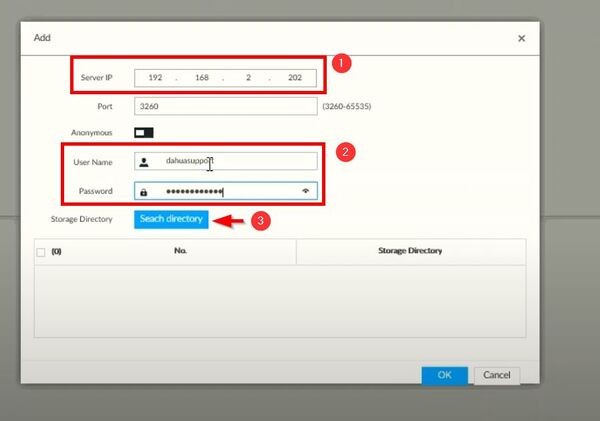
6. Enter Server IP - which is the EVS IP address
Enter the username/password created at EVS for Share Account during the previous step - EVS Set Up as a Network Disk
Click Search directory
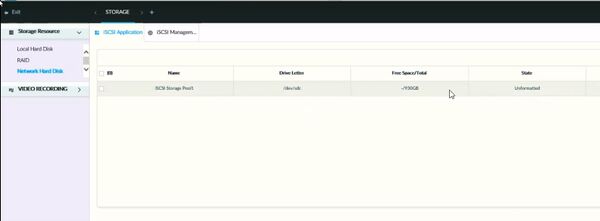
Once connected it will show the available storage
7. Check the box to Choose the Storage Pool for your recording
Click OK
8. Click on the iSCSI Application tab to format the HDD
Click Format and confirm the prompt
Formatting can take some time depending on HDD Size
Once complete the State will display as Normal

