Template:LincX2PRO Add Device and Setup Push Notifications DMSS

Revision as of 23:31, 30 November 2020 by Marques.Phillips (talk | contribs) (Created page with " ==Video Instructions== <embedvideo service="youtube">https://youtu.be/QnDlDUuwSMc</embedvideo> ==Step by Step Instructions== 1. From the Home screen of the app Press Me F...")

(diff) ← Older revision | Latest revision (diff) | Newer revision → (diff)

Video Instructions

Step by Step Instructions

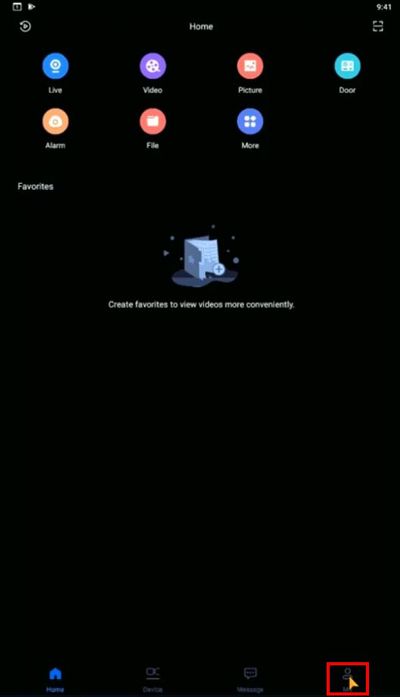
1. From the Home screen of the app

Press Me

LincX2Pro - Add Device and Setup Push Notifications - 1.jpg

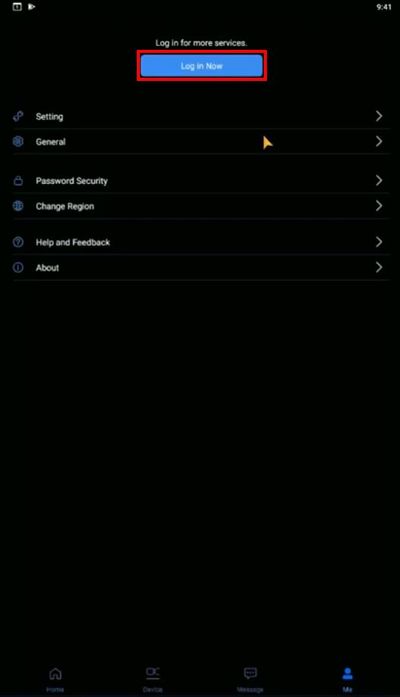
2. Press Log in Now (if not already logged into an account)

LincX2Pro - Add Device and Setup Push Notifications - 2.jpg

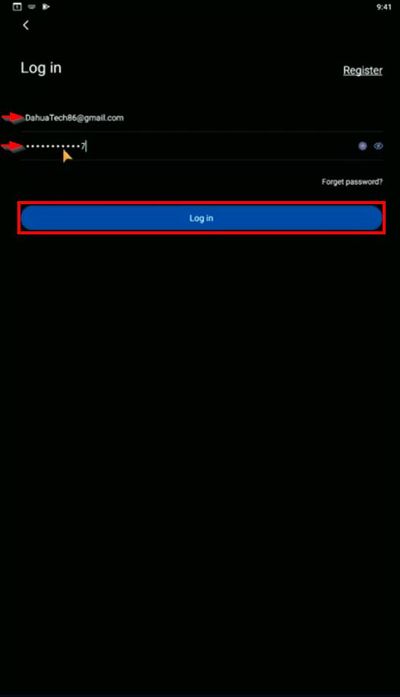
3. Enter the username and password for the account

Press Log in

LincX2Pro - Add Device and Setup Push Notifications - 3.jpg

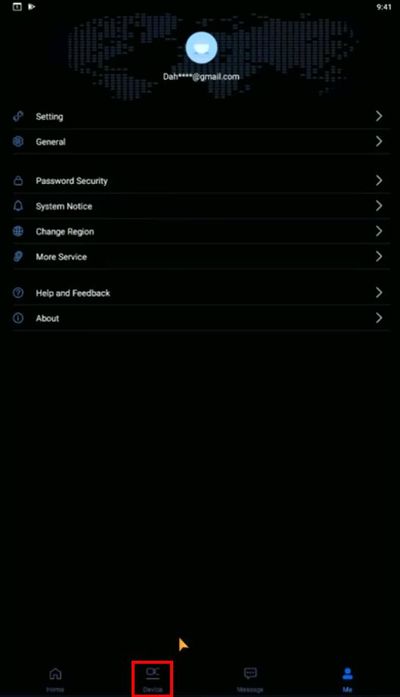
4. Press Device

LincX2Pro - Add Device and Setup Push Notifications - 4.jpg

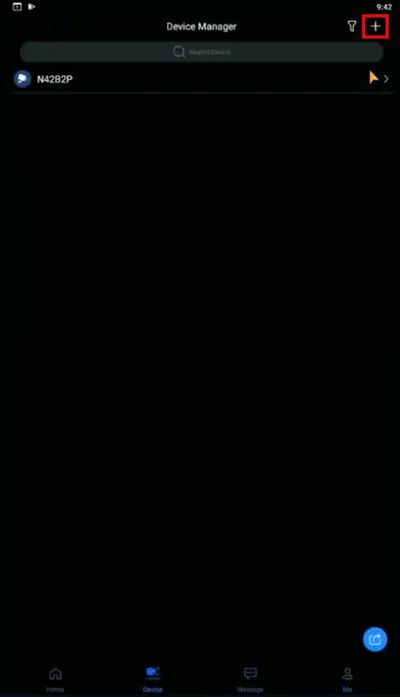
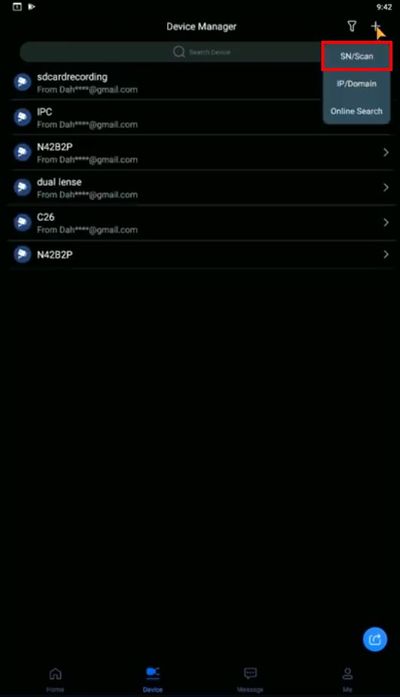
5. Press the + sign at the top right of the screen to begin adding a device

LincX2Pro - Add Device and Setup Push Notifications - 5.jpg

6. Select SN/Scan

LincX2Pro - Add Device and Setup Push Notifications - 6.jpg

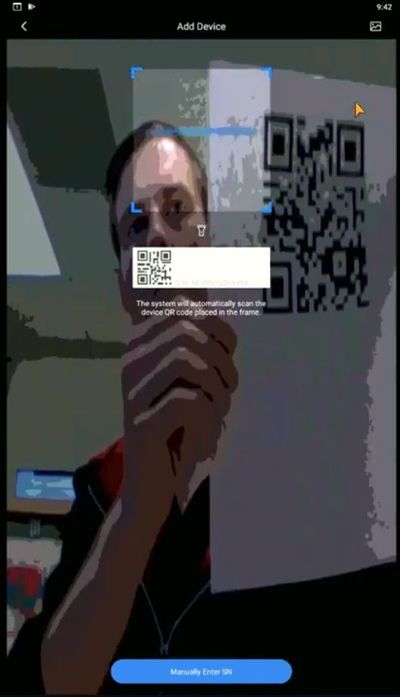
7. Use the camera interface to scan the QR code for the device or press Manually Enter SN to type in the Serial Number

LincX2Pro - Add Device and Setup Push Notifications - 7.jpg

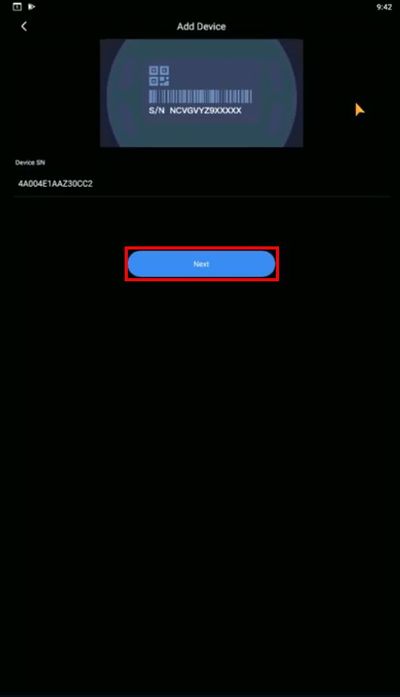
8. With the Device SN entered, Press Next

LincX2Pro - Add Device and Setup Push Notifications - 8.jpg

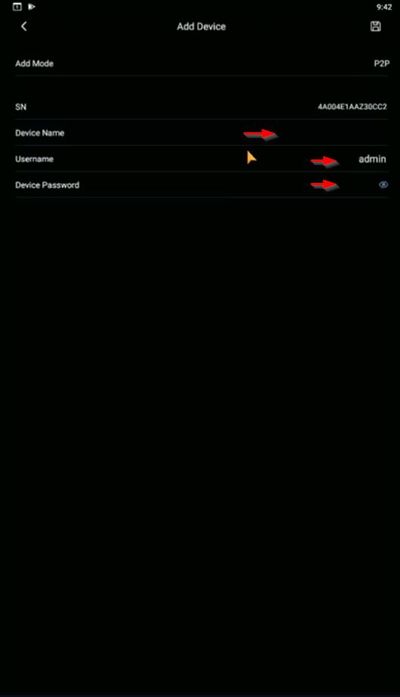
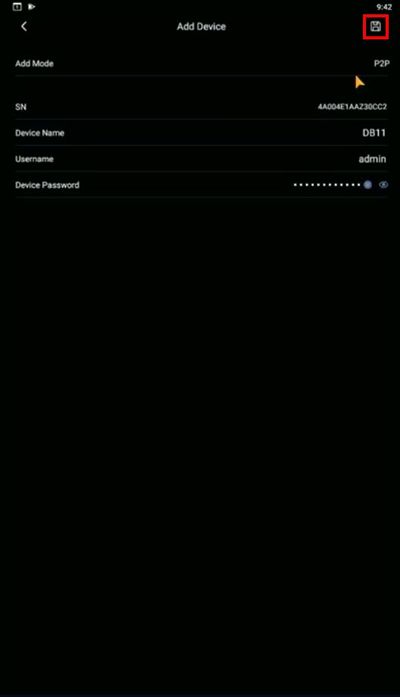
9. In the Add Device screen

Enter a Device Name (name for the device in the app)

Enter the Username / Password for the device

LincX2Pro - Add Device and Setup Push Notifications - 9.jpg

10. Press the Save icon

LincX2Pro - Add Device and Setup Push Notifications - 10.jpg

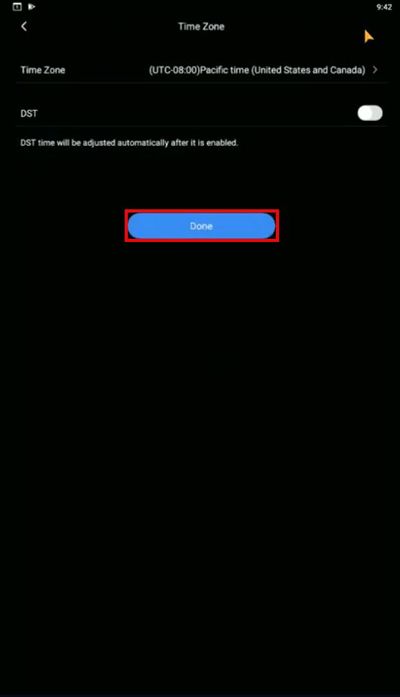
11. Select the appropriate Time Zone settings for the device

Press Done

LincX2Pro - Add Device and Setup Push Notifications - 11.jpg

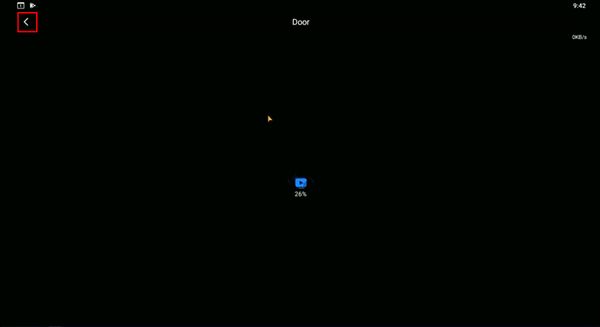
12. The app will attempt to connect to and load the device

Press the back arrow to return to the menu

LincX2Pro - Add Device and Setup Push Notifications - 12.jpg

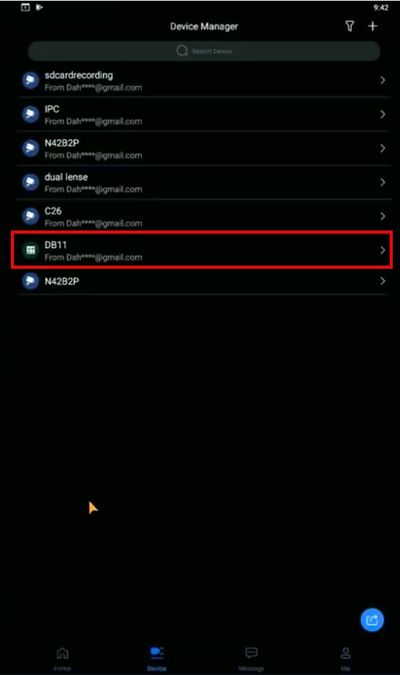
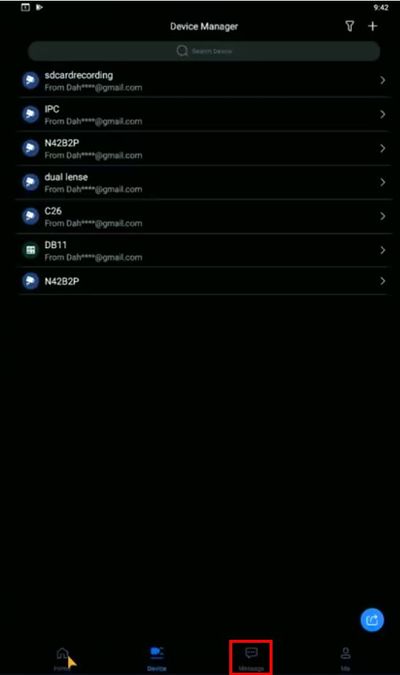
13. The Device Manager screen will show a list of added device

Confirm it appears in the list under Device Manager

LincX2Pro - Add Device and Setup Push Notifications - 13.jpg

14. Press Message

LincX2Pro - Add Device and Setup Push Notifications - 14.jpg

15. Use the toggle at the top to press the Cloud icon, to select Cloud Devices

LincX2Pro - Add Device and Setup Push Notifications - 15.jpg

16. Press the notification icon (Bell) to subscribe to notifications for a device

LincX2Pro - Add Device and Setup Push Notifications - 16.jpg

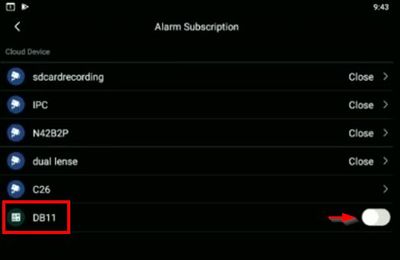
17. The Alarm Subscription menu will show a list of devices added to the cloud account

The added device will appear in the list

Toggle the switch next to the device to enable notifications

LincX2Pro - Add Device and Setup Push Notifications - 17.jpg

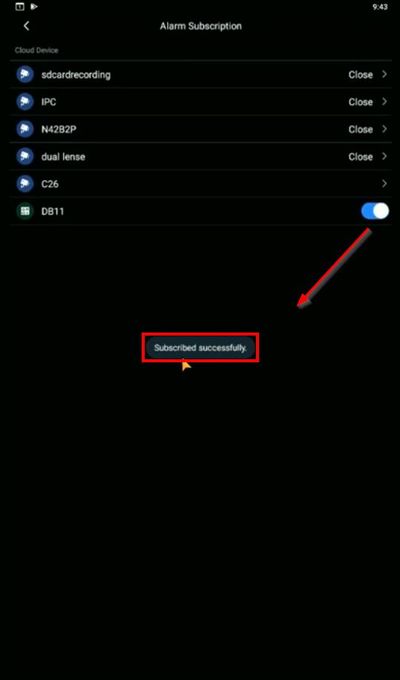
18. A prompt will appear to confirm a successful subscription

LincX2Pro - Add Device and Setup Push Notifications - 18.jpg

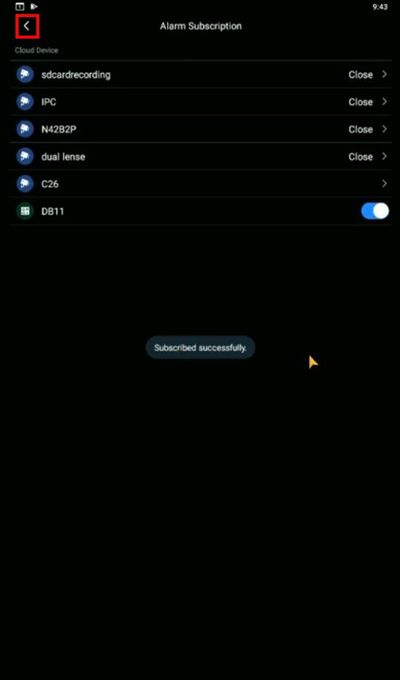
19. Press the arrow to exit the menu

LincX2Pro - Add Device and Setup Push Notifications - 19.jpg

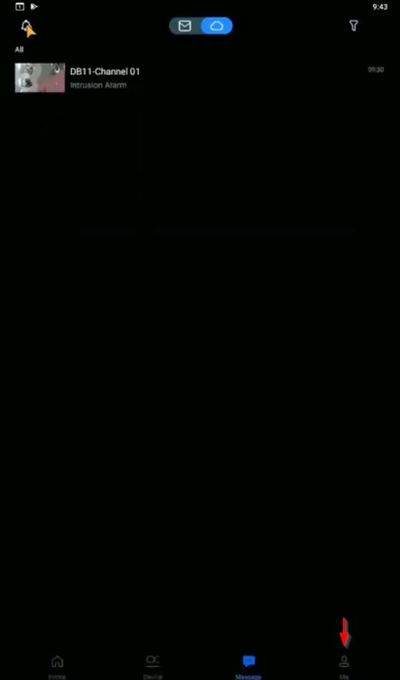
20. In the Home screen of the app, select Me

LincX2Pro - Add Device and Setup Push Notifications - 20.jpg

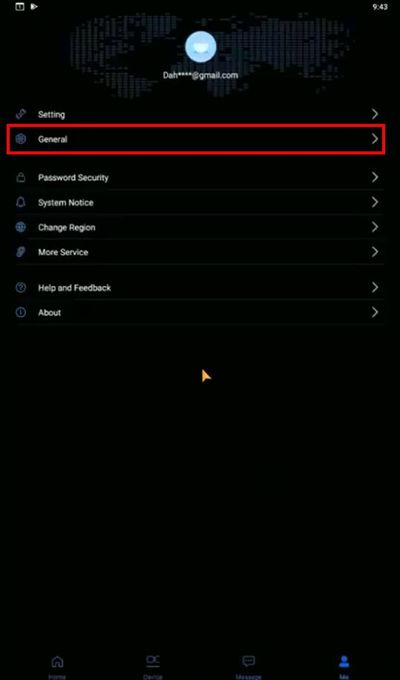
21. Press General

LincX2Pro - Add Device and Setup Push Notifications - 21.jpg

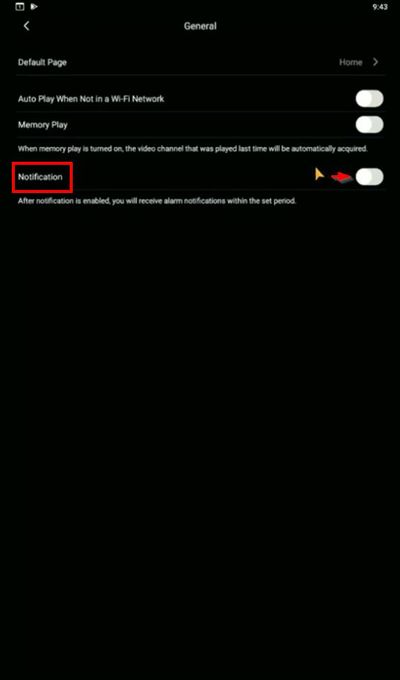
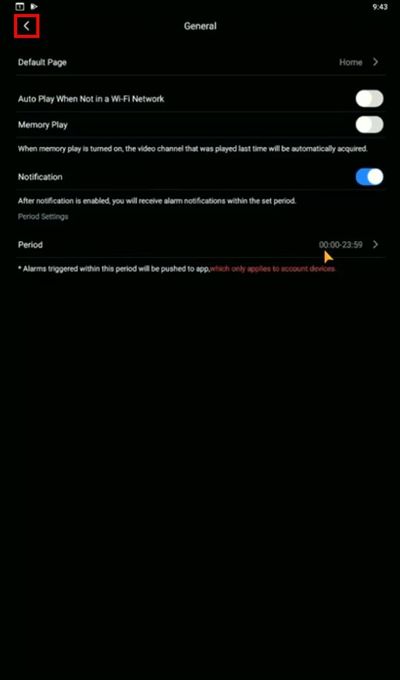
22. Toggle the switch next to Notifications to enable notifications for this cloud account

LincX2Pro - Add Device and Setup Push Notifications - 22.jpg

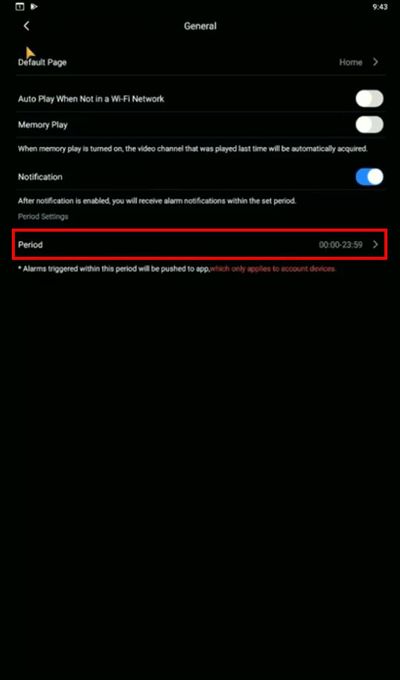
23. The period can be adjusted, by default it will enrolled for 24 hours a day

LincX2Pro - Add Device and Setup Push Notifications - 23.jpg

24. Press the arrow to exit the menu
LincX2Pro - Add Device and Setup Push Notifications - 24.jpg