 Video Setting Video Setting
Video Setting
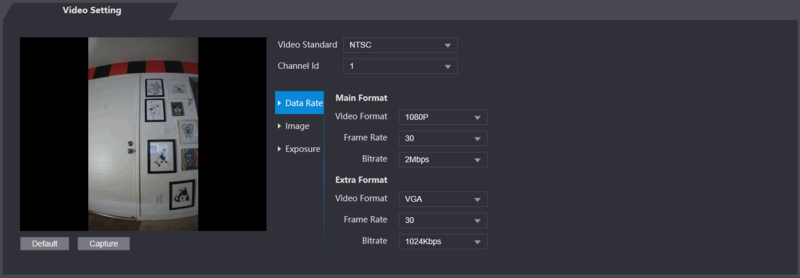
Data Rate
| Name
|
Description
|
| Video Standard
|
There are two options: NTSC and PAL. Select a standard according to the video standard of your region.
|
| Channel
|
There are two options: 1 and 2. 1 is white light camera and 2 is IR
light camera.
|
| Main Format
|
| Video Format
|
There are four options: D1, VGA, 720p and 1080p. Select an option according to the video quality you want.
|
| Frame Rate
|
The rate at which consecutive frames appear on a display. The frame rate range is 1–30fps.
|
| Bit Rate
|
The number of bits that are conveyed or processed per unit of time. There are five options: 2Mbps, 4Mbps, 6Mbps, 8Mbps, and 10Mbps
|
| Extra Format
|
| Video Format
|
There are three options: D1, VGA, and QVGA.
|
| Frame Rate
|
The rate at which consecutive frames appear on a display. The frame rate range is 1–30fps.
|
| Bit Rate
|
The number of bits that are conveyed or processed per unit of time. There are options: 512Kbps, 640Kbps, 768Kbps, 896Kbps, 1024Kbps, 1.25Mbps, 1.5Mbps, 1.75Mbps, and 2Mbps
|
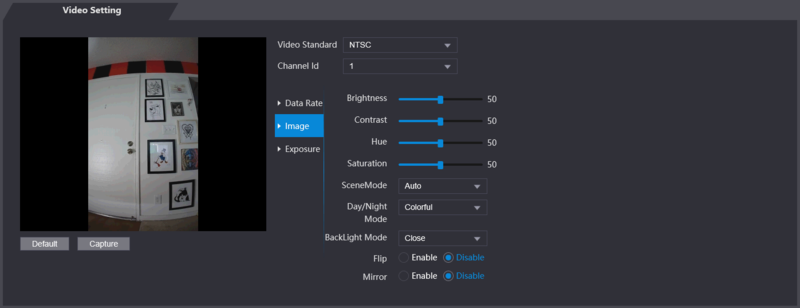
Image
| Name
|
Description
|
| Brightness
|
The larger the value is, the brighter the images will be.
|
| Contrast
|
Contrast is the difference in luminance or color that makes an object distinguishable. The larger the contrast value is, the greater the brightness and color contrast will be.
|
| Hue
|
The larger the value is, the deeper the color will be.
|
| Saturation
|
The larger the value is, the brighter the colors will be. The value does not change image brightness.
|
| Scene Mode
|
- Close: Without modes.
- Auto: The system automatically adjusts scene modes.
- Sunny: In this mode, image hue will be reduced.
- Night: In this mode, image hue will be increased.
(Sunny is selected by default.)
|
| Day/Night Mode
|
Day/Night mode decides the working status of the fill light.
- Auto: The system automatically adjusts the day/night modes.
- Colorful: In this mode, images are with colors.
- Black and white: In this mode, images are in black and white.
|
| Back Light Mode
|
- Close: Without backlight compensation.
- BLC: Backlight compensation corrects regions with extremely high or low levels of light to maintain a normal and usable level of light for the object in focus.
- WDR: In the wide dynamic range mode, the system dims bright areas and compensates dark areas to ensure the definition of objects in the bright areas and dark areas. When human faces are in the backlight, you need to enable WDR.
- HLC: Highlight compensation is needed to compensate for overexposure of highlights or strong light sources like spotlights, headlights, porch lights, etc. to create an image that is usable and not overtaken by a bright light.
|
| Mirror
|
When the function is enabled, images will be displayed with left and right side reversed.
|
| Flip
|
When this function is enabled, images can be flipped over.
|
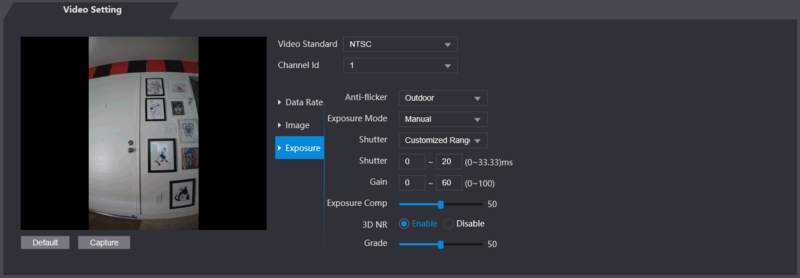
Exposure
| Name
|
Description
|
| Anti-flicker
|
- 50Hz: When the utility frequency of alternating current is 50Hz, the exposure is automatically adjusted to make sure that there are no stripes on images.
- 60Hz: When the utility frequency of alternating current is 60Hz, the exposure is automatically adjusted to make sure that there are no stripes on images.
- Outdoor: When Outdoor is selected, the exposure mode can be switched.
|
| Exposure Mode
|
- When you select Outdoor in the Anti-flicker drop-down list, you can select Shutter Priority as the exposure mode.
- Exposure modes of different devices might vary, and the actual product shall prevail.
You can select from:
- Auto: The access controller will automatically adjust brightness of images.
- Shutter Priority: The access controller will adjust image brightness according to shutter exposure value range. If the image brightness is not enough and the shutter value has reached upper or lower limit, the access controller will adjust gain value automatically to get ideal brightness.
- Manual: You can configure gain and shutter value manually to adjust image brightness
|
| Shutter
|
The larger the shutter value is and the shorter the exposure time is, the darker the images will be.
|
| Shutter Value Range
|
If you select Customized Range, you can customize the shutter value range.
|
| Gain Value Range
|
When the gain value range is set, video quality will be improved.
|
| Exposure Compensation
|
You can increase video brightness by adjusting exposure compensation value.
|
| 3D NR
|
When 3D Noise Reduction (RD) is enabled, video noise can be reduced, and high definition videos will be produced.
|
| Grade
|
You can adjust the value of the 3D NR when 3D NR is enabled. The larger the value is, the less the noise there will be.
|
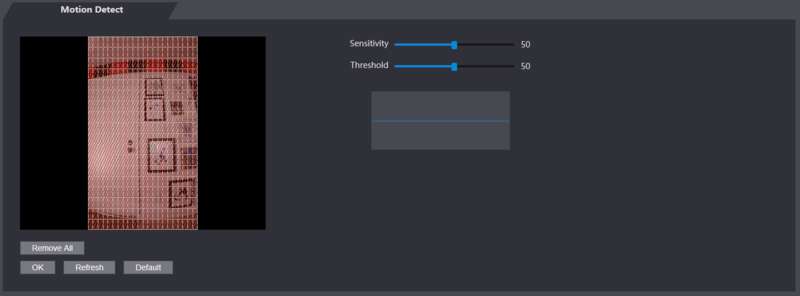
Motion Detect
Volume Setting

Image Mode

|
 Face Detect Face Detect
Face Detect

| Name
|
Description
|
| Face Recognition Threshold
|
Face recognition accuracy can be adjusted. The larger the value is, the higher the accuracy will be.
|
| Max. Angle of Face Recognition
|
Set the control panel shooting angle of profiles. The larger the value is, the wider range of the profiles will be recognized.
|
| Pupillary Distance
|
Pupillary distance is the pixel value of the image between the centers of the pupils in each eye. You need to set an appropriate value so that the access controller can recognize faces as needed. The value changes according to the face sizes and the distance between faces and the lens. The closer the face is to the lens, the greater the value should be. If an adult is 1.5 meters away from the lens, the pupillary distance value can be within 50 to 70.
|
| Recognition Timeout
|
When a person who does not have the access permission stands in front of the access controller and gets the face recognized, the controller will prompt that face recognition failed. The prompt interval is called recognition timeout
|
| Recognition Interval
|
When a person who has the access permission stands in front of the access controller and gets the face recognized, the controller will prompt that face recognition succeeded. The prompt interval is the recognition interval.
|
| Invalid Face Promp Interval
|
When a face has no access permission stands in front of the access controller, the controller will prompt that the face is invalid. The prompt interval is invalid face prompt interval.
|
| Anti-fake Threshold
|
This function prevents people from unlocking by human face images or face models. The larger the value is, the more difficult face images can unlock the door. The recommended value range is above 80.
|
|
 Network Setting Network Setting
TCP/IP

| Name
|
Parameter
|
| IP Address/SubnetMask/Gateway IP Address
|
The IP address, subnet mask, and gateway IP address should be on the same network segment. After configuration, tap to save the configurations.
|
| DHCP
|
DHCP (Dynamic Host Configuration Protocol). When the DHCP is enabled, the IP address can be automatically acquired, and the IP address, subnet mask and gateway IP address cannot be manually configured.
|
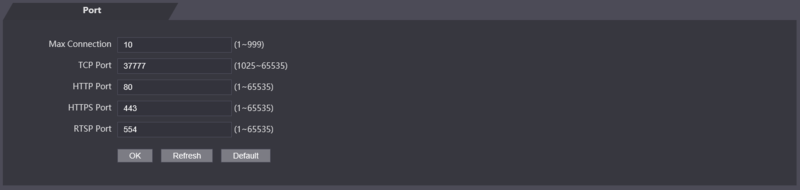
Port
Register
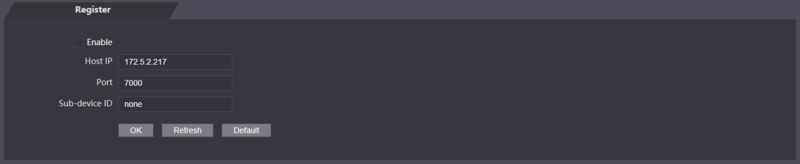
By active registering, you can connect the access controller to the management platform, and then you can manage the access controller through the management platform. Configurations you have made can be cleared on the managing platform, and the access controller can be initialized, you need to protect the platform managing permission in case of data loss caused by improper operation.
| Name
|
Parameter
|
| Server IP Address
|
IP address of the managing platform.
|
| Port
|
Port number of the managing platform
|
| Device ID
|
Subordinate device number on the managing platform.
|
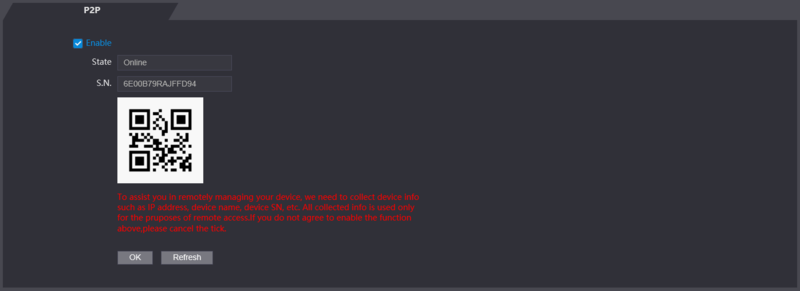
P2P
|


