Video Intercom/SIP 2.0/Stand Alone Multiple VTH and VTO Setup

Revision as of 22:43, 3 September 2020 by William.V (talk | contribs)

  UNDER CONSTRUCTION
Please watch the Video Instructions until the Step by Step Instructions are completed, Thank you for your patience
These instructions are for Generation 2, IP-based Video Intercom Devices only.
Icon Name Generation Technology SIP 2.0 Example Device 1 Example Device 2 Identifying Characteristic PC Software Mobile App
Gen2-SIP2.0-IP Gen 2 IP SIP 2.0 VTH1550CH-S DHI-VTO2000A-S "-S" at end of model name DSS or DSS Express S DSS Mobile for VDP

Stand Alone Multiple VTH and VTO Setup

Description

This guide will show how to setup multiple VTO and VTH devices on a network

In this example a VTO will be designated as the main VTO and also act as the SIP server for the installation

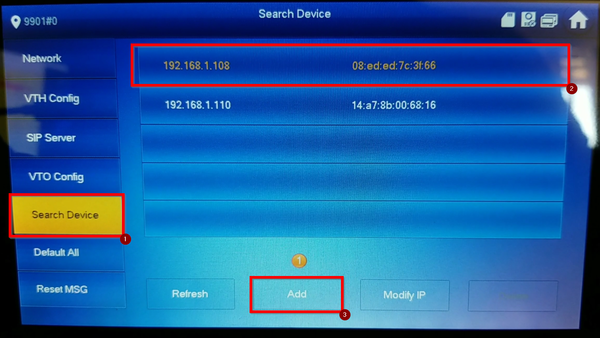
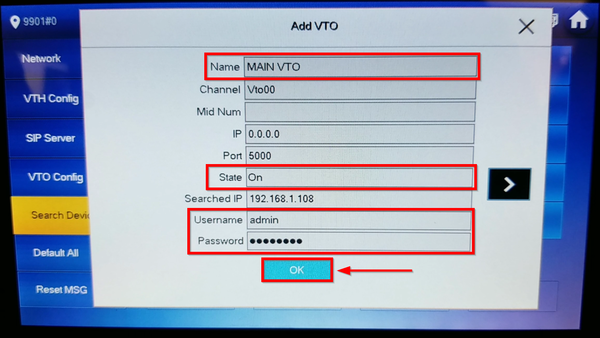
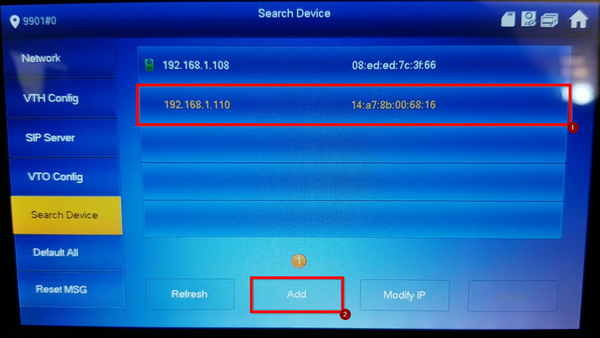
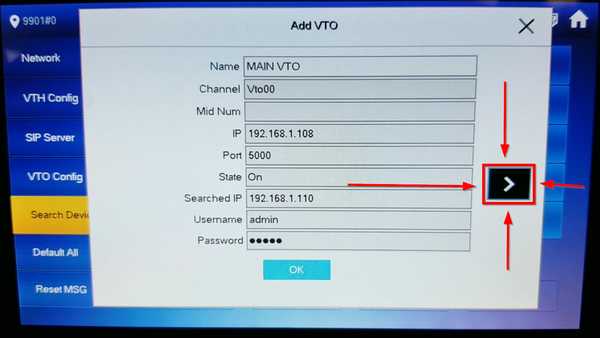
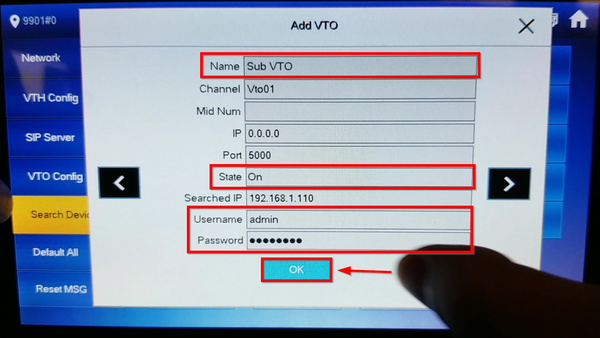
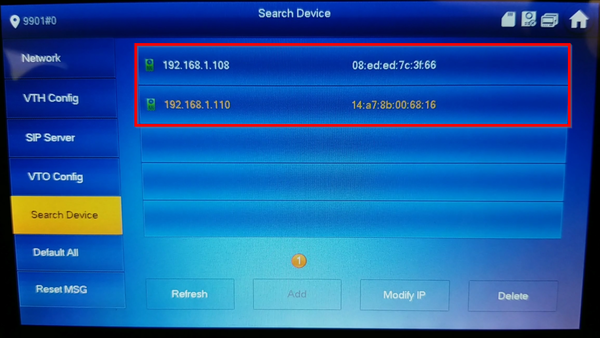
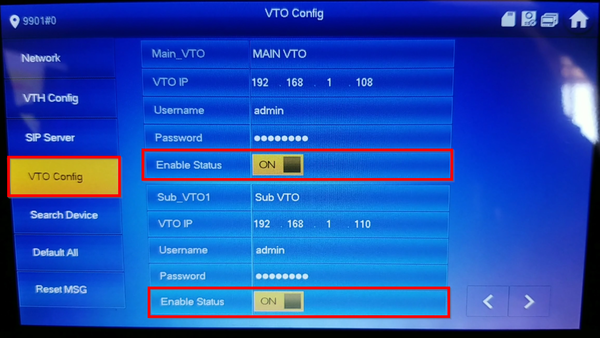
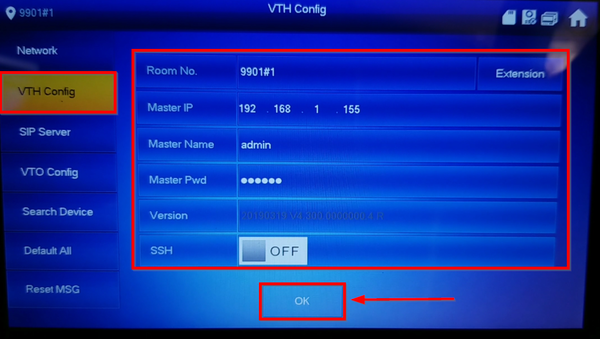
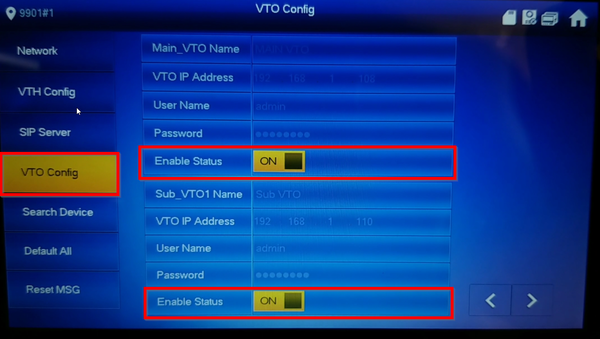
In this example a VTO2202F-P will act as Main VTO and a VTO2111D will act as Sub VTO. The VTH2421FW-P will act as the Main VTH and will send the SIP/VTO information to our extension VTH5221D-S

Prerequisites

  • Laptop/PC on the same network
  • VDP Config
  • Gen2 SIP VTOs and VTHs

Devices

NOTE: These are the device settings we used for this article
Icon Device Network Settings SIP Server Settings ID No.
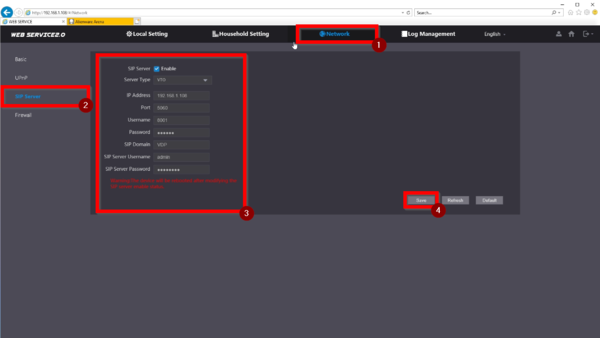
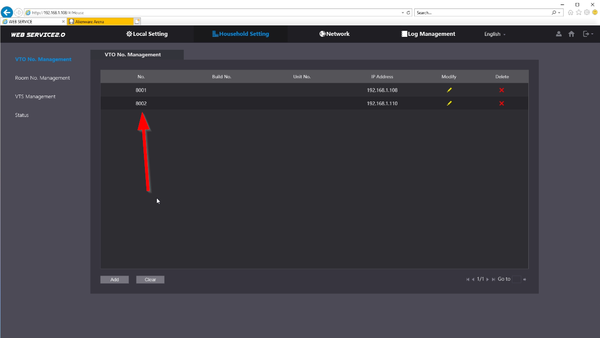
VTO2202F.png VTO2202F-P 192.168.1.108

Status:Enabled
Server IP:192.168.1.108
Server Type:VTO
Network Port:5060
Username:8001
Register Password:(Leave Default)
Domain:VDP
Sip Server Username:admin
Sip Server Password:admin123

8001(VTO No)
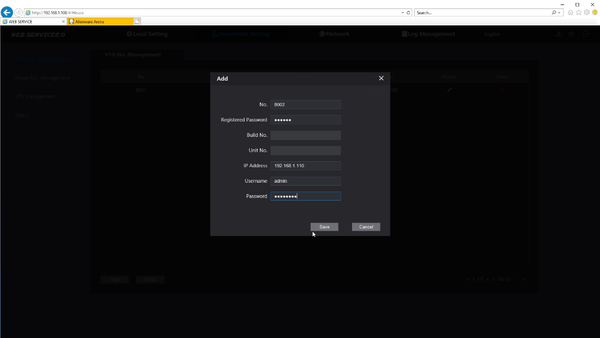
VTO2111D-WP.png VTO2111D_WP-S 192.168.1.110

Status:Disabled
Server IP:192.168.1.108
Server Type:VTO
Network Port:5060
Username:8002
Register Password:(Leave Default)
Domain:VDP
Sip Server Username:admin
Sip Server Password:admin123

8002(VTO No)
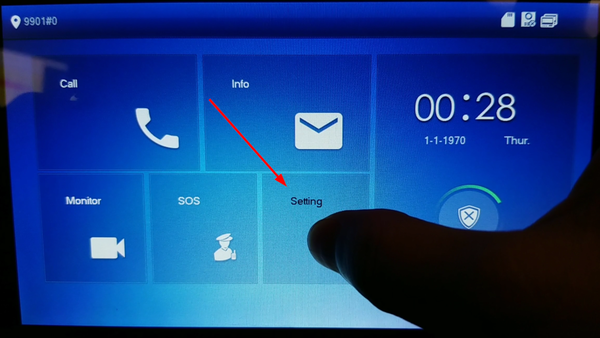
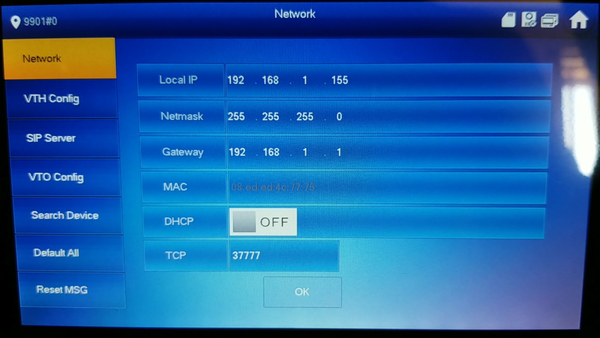
VTH2421FWl image web-1.png VTH2421FW-P 192.168.1.155

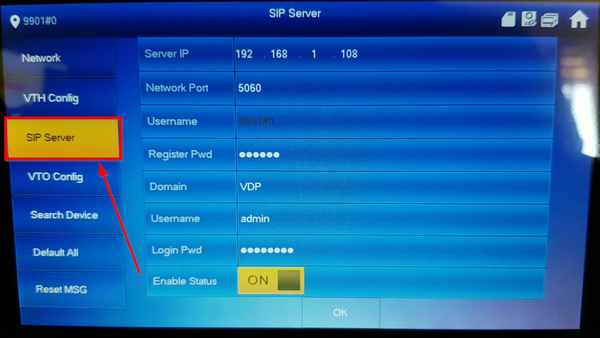
Server IP:192.168.1.108
Network Port:5060
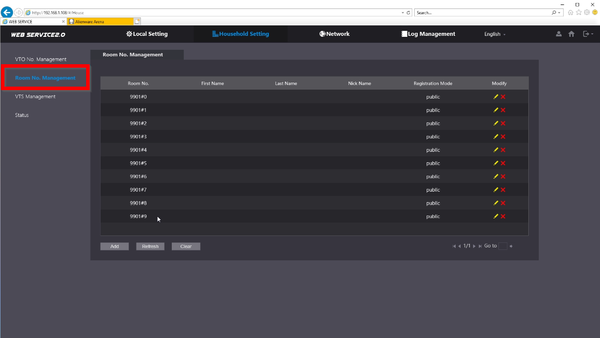
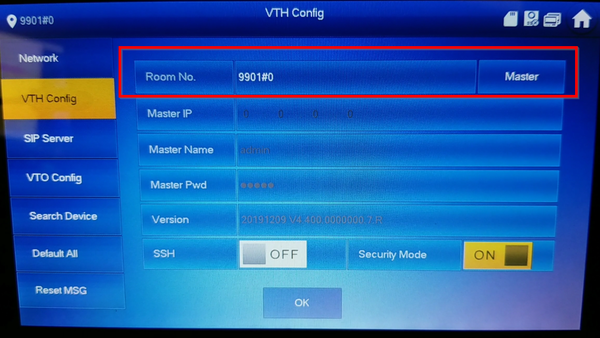
Username:9901#0
Register Password:(Leave Default)
Domain:VDP
Sip Server Username:admin
Sip Server Password:admin123
Status:Enabled

9901#0 (Room No)
DHI-VTH5221D.png VTH5221D-S 192.168.1.156

Server IP:192.168.1.108
Network Port:5060
Username:9901#1
Register Password:(Leave Default)
Domain:VDP
Sip Server Username:admin
Sip Server Password:admin123
Status:Enabled

9901#1 (Room No)

Video Instructions

Step by Step Instructions

Main VTO Setup (SIP Server)

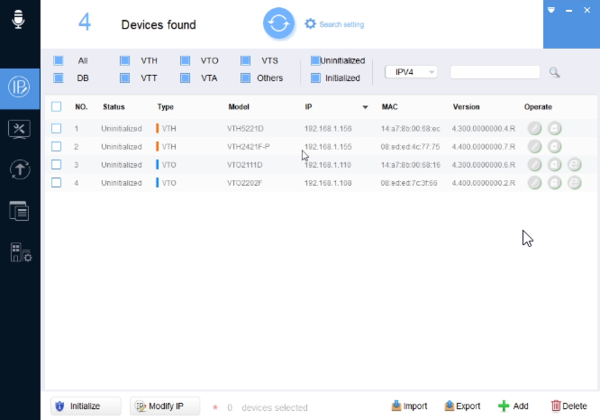
1. Find the VTO you would like to make the Main

Multiple VTO and VTH SIP Setup-1.png

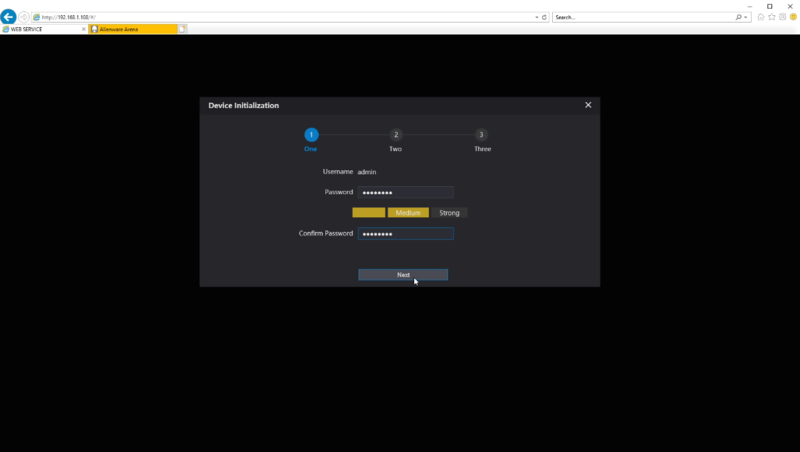
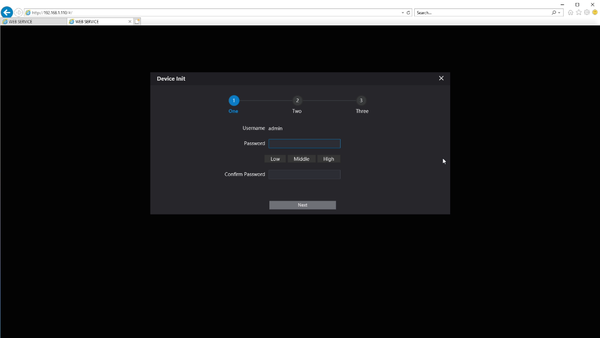
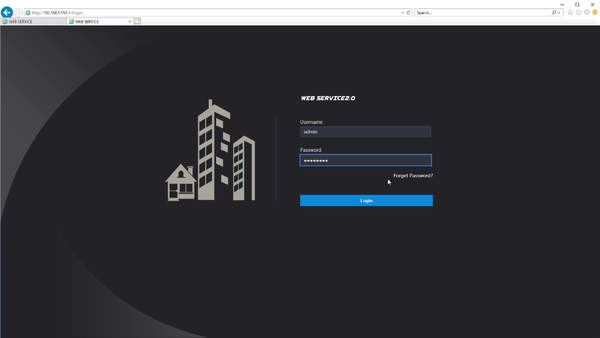
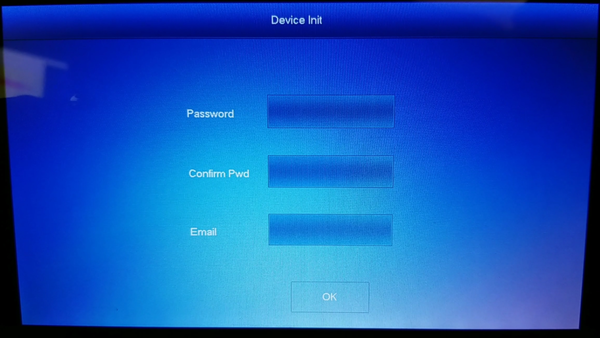
2. Type the IP Address on a browser and setup a password for the VTO. In this tutorial we used admin123

Multiple VTO and VTH SIP Setup-2.png

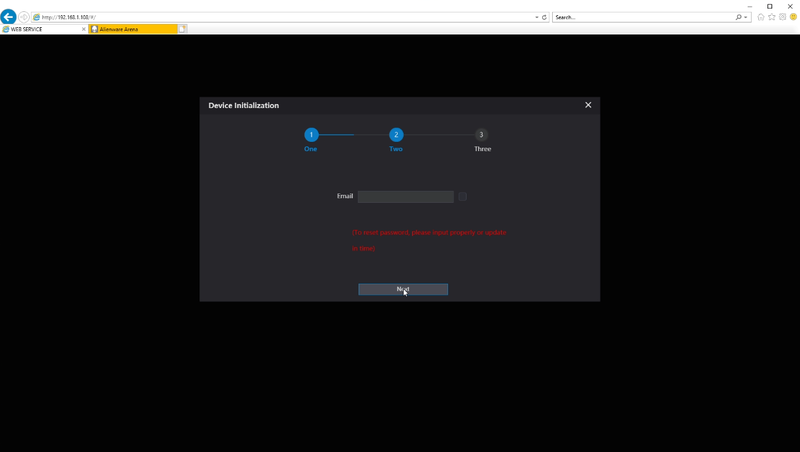
3. Please enter an email in case you lose the admin password

Multiple VTO and VTH SIP Setup-3.png

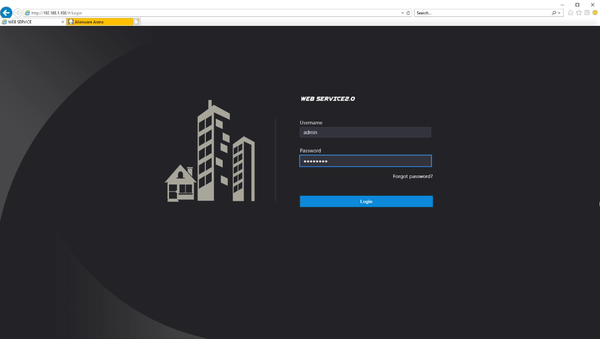
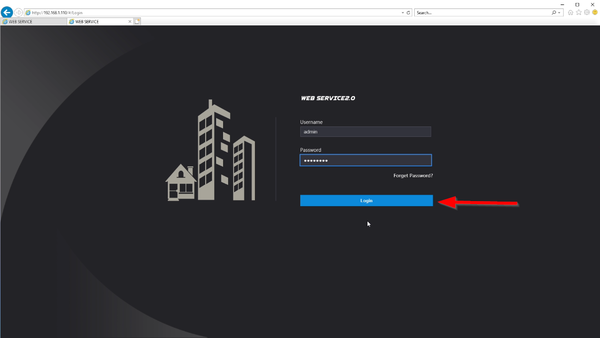
4. Login to the WEBUI using the password you just created

Multiple VTO and VTH SIP Setup-4.png

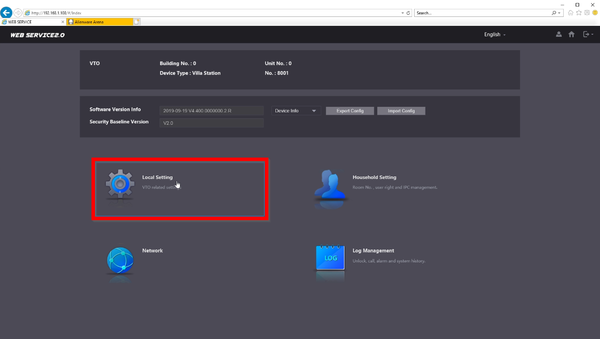
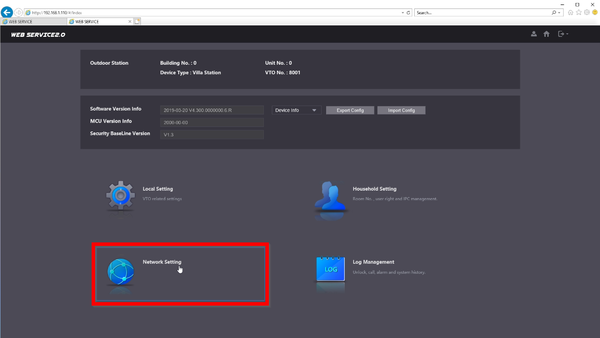
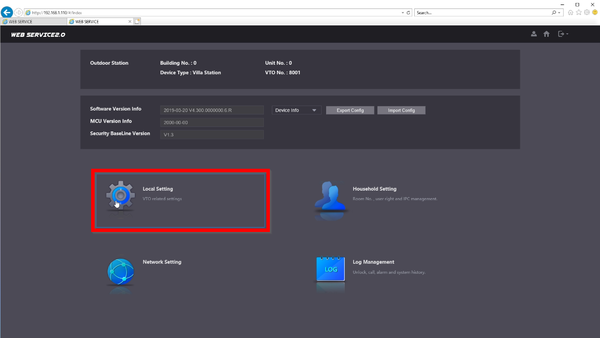
5. First step is to go to "Local Setting"

Multiple VTO and VTH SIP Setup-5.png

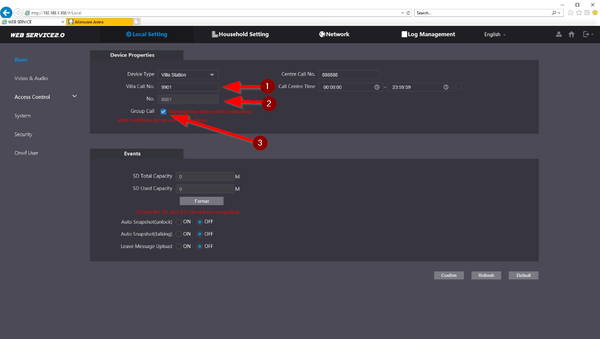
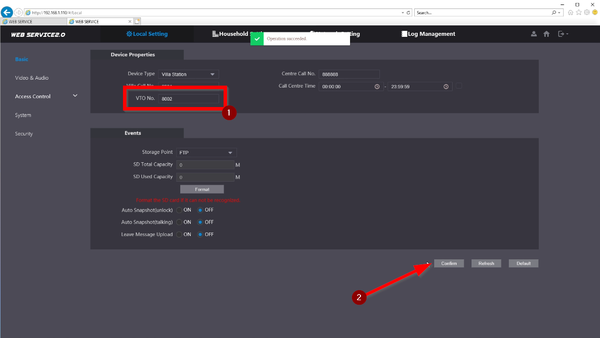
6. Review the settings and make sure Group Call is enabled

Villa Call No. : This indicates the Room No on the VTH it will reach out too
No. : No. is the VTO Number. It can be changed when SIP server is disabled Group Call: This will call all VTHs on the same Room No family including Extensions

Multiple VTO and VTH SIP Setup-6.png

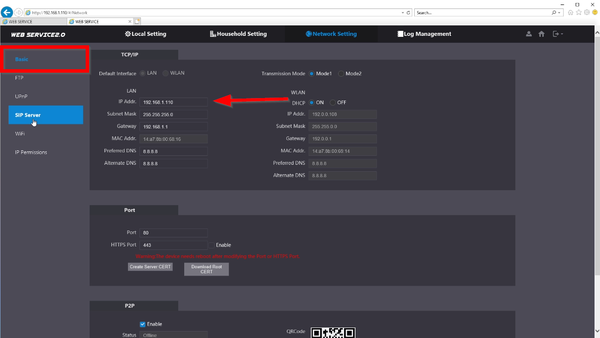
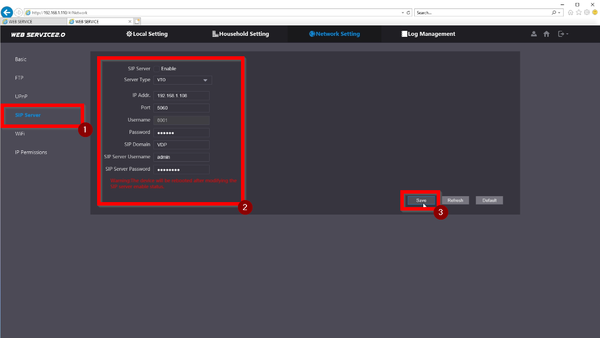
7. Navigate to over to Network -> SIP Server (You will need to Disable the SIP Server in order to make changes)

SIP Server:

Multiple VTO and VTH SIP Setup-7.png

8.

Multiple VTO and VTH SIP Setup-8.png

9.

Multiple VTO and VTH SIP Setup-9.png

10.

Multiple VTO and VTH SIP Setup-10.png

11.

Multiple VTO and VTH SIP Setup-11.png

12.

Multiple VTO and VTH SIP Setup-12.png

13.

Multiple VTO and VTH SIP Setup-13.png

14.

Multiple VTO and VTH SIP Setup-14.png

15.

Multiple VTO and VTH SIP Setup-15.png

16.

Multiple VTO and VTH SIP Setup-16.png

17.

Multiple VTO and VTH SIP Setup-17.png

18.

Multiple VTO and VTH SIP Setup-18.png

19.

Multiple VTO and VTH SIP Setup-19.png

20.

Multiple VTO and VTH SIP Setup-20.png

21.

Multiple VTO and VTH SIP Setup-21.png

22.

Multiple VTO and VTH SIP Setup-22.png

23.

Multiple VTO and VTH SIP Setup-23.png

24.

Multiple VTO and VTH SIP Setup-24.png

25.

Multiple VTO and VTH SIP Setup-25.png

26.

Multiple VTO and VTH SIP Setup-26.png

27.

Multiple VTO and VTH SIP Setup-27.png

28.

Multiple VTO and VTH SIP Setup-28.png

29.

Multiple VTO and VTH SIP Setup-29.png

30.

Multiple VTO and VTH SIP Setup-30.png

31.

Multiple VTO and VTH SIP Setup-31.png

32.

Multiple VTO and VTH SIP Setup-32.png

33.

Multiple VTO and VTH SIP Setup-33.png

34.

Multiple VTO and VTH SIP Setup-34.png

35.

Multiple VTO and VTH SIP Setup-35.png

36.
Multiple VTO and VTH SIP Setup-36.png