Difference between revisions of "Video Intercom/SIP 2.0/Stand Alone VTH and VTO Setup"
(→VTO Setup) |
(→Step by Step Instructions) |
||
| Line 18: | Line 18: | ||
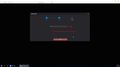
You can find the current IP of the VTO by using VDPConfig from a local computer | You can find the current IP of the VTO by using VDPConfig from a local computer | ||
| − | [[File:Stand_Alone_VTH_and_VTO_Setup_-_SIP_-_1.jpg]] | + | [[File:Stand_Alone_VTH_and_VTO_Setup_-_SIP_-_1.jpg|500px]] |
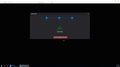
Enter the IP into Internet Explorer | Enter the IP into Internet Explorer | ||
| − | [[File:Stand_Alone_VTH_and_VTO_Setup_-_SIP_-_2.jpg]] | + | [[File:Stand_Alone_VTH_and_VTO_Setup_-_SIP_-_2.jpg|500px]] |
2. The Device Initialization will appear if this device has not been initialized | 2. The Device Initialization will appear if this device has not been initialized | ||
| − | + | Device Initialization Steps: | |
| − | |||
| − | |||
| − | |||
| − | |||
| − | |||
<gallery> | <gallery> | ||
File:Stand_Alone_VTH_and_VTO_Setup_-_SIP_-_3.jpg|Create a password for the device | File:Stand_Alone_VTH_and_VTO_Setup_-_SIP_-_3.jpg|Create a password for the device | ||
| Line 38: | Line 33: | ||
</gallery> | </gallery> | ||
| + | 3. Log into the device by entering the Username and Password and click Login | ||
| + | [[File:Stand_Alone_VTH_and_VTO_Setup_-_SIP_-_6.jpg]] | ||
| − | + | 4. Click Local Setting | |
[[File:Stand_Alone_VTH_and_VTO_Setup_-_SIP_-_7.jpg]] | [[File:Stand_Alone_VTH_and_VTO_Setup_-_SIP_-_7.jpg]] | ||
| + | |||
| + | 5. Under Basic settings, confirm the information being used. | ||
| + | |||
| + | In this example we will use the default | ||
[[File:Stand_Alone_VTH_and_VTO_Setup_-_SIP_-_8.jpg]] | [[File:Stand_Alone_VTH_and_VTO_Setup_-_SIP_-_8.jpg]] | ||
| + | |||
| + | Villa Call No. = 9901 | ||
[[File:Stand_Alone_VTH_and_VTO_Setup_-_SIP_-_9.jpg]] | [[File:Stand_Alone_VTH_and_VTO_Setup_-_SIP_-_9.jpg]] | ||
| + | |||
| + | 6. Now the SIP function must be enabled and configured | ||
| + | |||
| + | Click Network Settings | ||
[[File:Stand_Alone_VTH_and_VTO_Setup_-_SIP_-_10.jpg]] | [[File:Stand_Alone_VTH_and_VTO_Setup_-_SIP_-_10.jpg]] | ||
| + | |||
| + | 7. Click SIP Server | ||
[[File:Stand_Alone_VTH_and_VTO_Setup_-_SIP_-_11.jpg]] | [[File:Stand_Alone_VTH_and_VTO_Setup_-_SIP_-_11.jpg]] | ||
| + | |||
| + | 8. In this example, the VTO device itself will act as the SIP server | ||
| + | |||
| + | To make changes to SIP Server settings, start by unchecking the box next to Enable | ||
[[File:Stand_Alone_VTH_and_VTO_Setup_-_SIP_-_12.jpg]] | [[File:Stand_Alone_VTH_and_VTO_Setup_-_SIP_-_12.jpg]] | ||
| + | |||
| + | The fields can now be edited | ||
[[File:Stand_Alone_VTH_and_VTO_Setup_-_SIP_-_13.jpg]] | [[File:Stand_Alone_VTH_and_VTO_Setup_-_SIP_-_13.jpg]] | ||
| + | * Server Type - VTO | ||
| + | * IP Address - IP Address of VTO device , in this example 192.168.2.163 | ||
| + | * | ||
[[File:Stand_Alone_VTH_and_VTO_Setup_-_SIP_-_14.jpg]] | [[File:Stand_Alone_VTH_and_VTO_Setup_-_SIP_-_14.jpg]] | ||
Revision as of 18:09, 7 November 2019
Contents
Stand Alone VTH and VTO Setup
Description
This guide will show how to setup a VTO and VTH device on a network
This guide will use a VTO2000A and VTH1510
The setup will be similar for
Prerequisites
- VTO and VTH initialized and set up on network
- VTO and VTH log in information
Video Instructions
Step by Step Instructions
VTO Setup
1. Log into the web interface of the VTO by entering the IP
You can find the current IP of the VTO by using VDPConfig from a local computer

Enter the IP into Internet Explorer

2. The Device Initialization will appear if this device has not been initialized
Device Initialization Steps:

Create a password for the device
Enter an email address for password recovery
Select OK to complete initialization


3. Log into the device by entering the Username and Password and click Login

4. Click Local Setting

5. Under Basic settings, confirm the information being used.
In this example we will use the default

Villa Call No. = 9901

6. Now the SIP function must be enabled and configured
Click Network Settings

7. Click SIP Server

8. In this example, the VTO device itself will act as the SIP server
To make changes to SIP Server settings, start by unchecking the box next to Enable

The fields can now be edited

- Server Type - VTO
- IP Address - IP Address of VTO device , in this example 192.168.2.163

