EVS/Date and Time
Contents
Date and Time
Description
This guide will show how to adjust the Date and Time for a EVS device
Prerequisites
- EVS device powered on, set up and connected to the network
- Computer with network access
- IP address of EVS device
Video Instructions
Step by Step Instructions
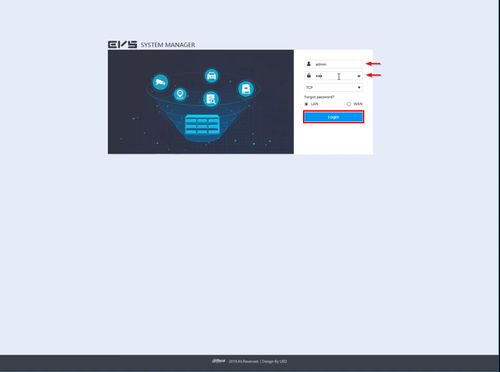
1. Log into the EVS System Manager by typing the IP in to a web browser
Enter the Username and Password and click Login
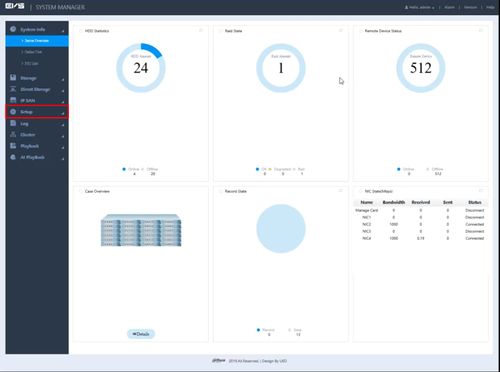
2. Click Setup
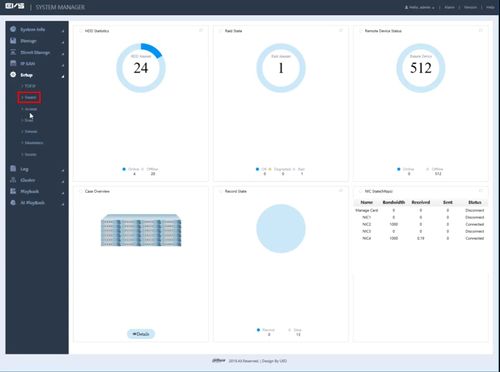
3. Click General
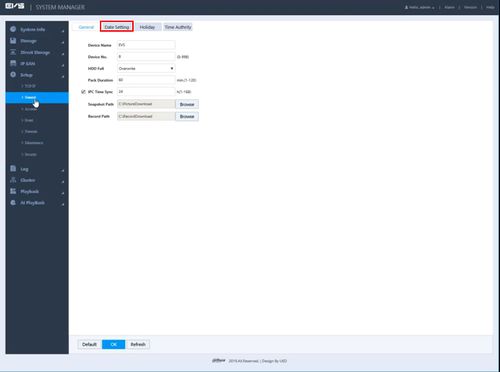
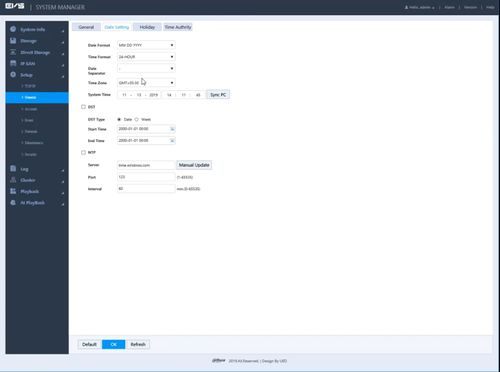
4. Click The 'Date Setting' tab
5. Use the top section to adjust the Date and Time using the drop-down boxes
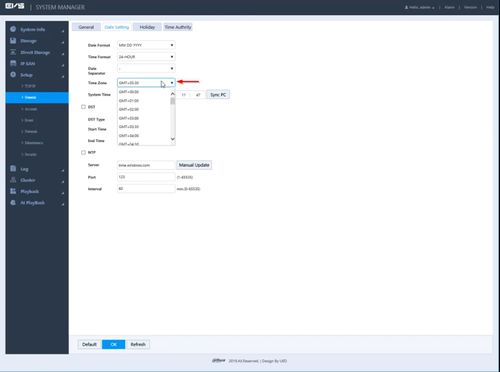
6. Click the drop-down next to Time Zone to set the Time Zone for the server
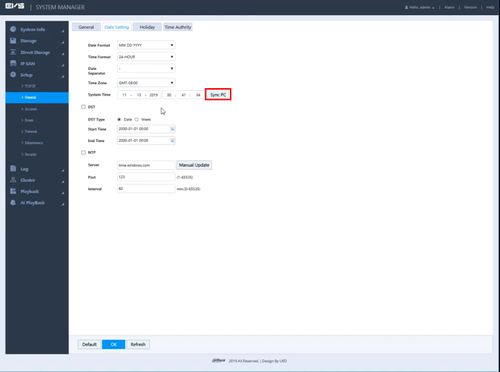
7. Click 'Sync PC' to automatically sync the time with the system time of the computer accessing the EVS
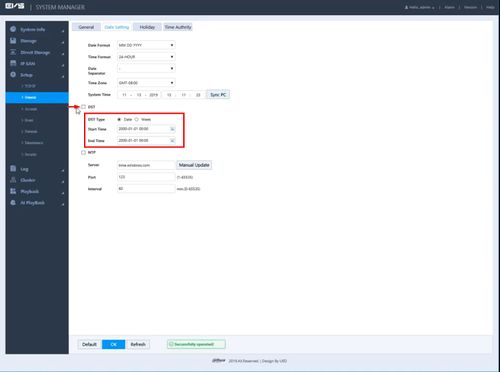
8. DST
Use the checkbox to enable the DST (Daylight Savings Time)
Select the DST Type
Use the drop-down box to select the Start and End Time for the Daylight Savings Time adjustment
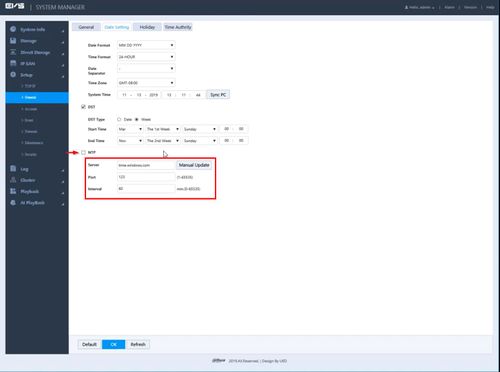
9. NTP
Use the checkbox to enable NTP (Network Time Protocol)
Enter information for the NTP server (if other than default)
Interval - set a time period for how often the server checks time, in minutes
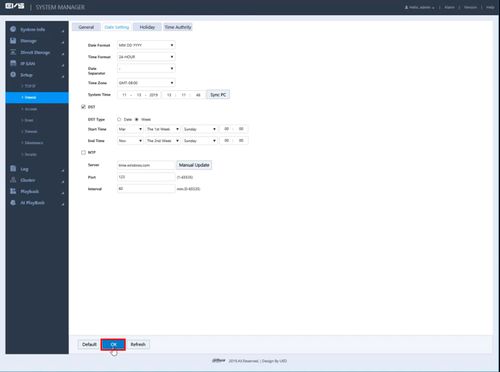
10. Click OK to save all settings
