|
|
| Line 60: |
Line 60: |
| | </div> | | </div> |
| | </div> | | </div> |
| − |
| |
| − |
| |
| − | {| class="toccolours mw-collapsible mw-collapsed"
| |
| − | |+ Card No. Setup
| |
| − | |-
| |
| − | ! scope="col" | Manual Add
| |
| − | ! scope="col" | Auto Add
| |
| − | |-
| |
| − | | Select 'Card issuer' from the drop down box and to manually enter a card number
| |
| − |
| |
| − | [[File:How_To_Setup_Access_SmartPSS_-_6.jpg|600px]]
| |
| − | | Select 'Device' from the drop down box and then use the device tree to select the reader you wish to use, then scan the card at the reader to enter the card number
| |
| − |
| |
| − | [[File:How_To_Setup_Access_SmartPSS_-_7.jpg|600px]]
| |
| − | |}
| |
| − |
| |
| − |
| |
| − |
| |
| − |
| |
| − | <div class="toccolours mw-collapsible mw-collapsed">
| |
| − | Card No. Setup:
| |
| − | <div class="mw-collapsible-content">
| |
| − | | style="text-align: center;"| Manual Add
| |
| − | | style="text-align: center;"| Auto Add
| |
| − | |-
| |
| − | | style="text-align: center;"| Select 'Card issuer' from the drop down box and to manually enter a card number
| |
| − |
| |
| − | [[File:How_To_Setup_Access_SmartPSS_-_6.jpg|600px]]
| |
| − | | style="text-align: center;"| Select 'Device' from the drop down box and then use the device tree to select the reader you wish to use, then scan the card at the reader to enter the card number
| |
| − |
| |
| − | [[File:How_To_Setup_Access_SmartPSS_-_7.jpg|600px]]
| |
| − | |}</div>
| |
| − | </div>
| |
| − |
| |
| − |
| |
| − |
| |
| − |
| |
| − | {| class="mw-collapsible"
| |
| − | |+ Card No. Setup
| |
| − | |-
| |
| − | ! scope="col" | Manual
| |
| − | ! scope="col" | Auto Add
| |
| − | |-
| |
| − | | Select 'Card issuer' from the drop down box and to manually enter a card number
| |
| − |
| |
| − | [[File:How_To_Setup_Access_SmartPSS_-_6.jpg|600px]]
| |
| − | | Select 'Device' from the drop down box and then use the device tree to select the reader you wish to use, then scan the card at the reader to enter the card number
| |
| − |
| |
| − | [[File:How_To_Setup_Access_SmartPSS_-_7.jpg|600px]]
| |
| − | |}
| |
| − |
| |
| − |
| |
| − |
| |
| − |
| |
| − | <div class="toccolours mw-collapsible" style="width:400px; overflow:auto;">
| |
| − | <div style="font-weight:bold;line-height:1.6;">Card No. Setup</div>
| |
| − | <div class="mw-collapsible-content">
| |
| − |
| |
| − | |-
| |
| − | ! scope="col" | Auto Add
| |
| − | ! scope="col" | Manual Add
| |
| − | |-
| |
| − | | Data 1
| |
| − | | Data 2
| |
| − | |}
| |
| − |
| |
| − | </div></div>
| |
| − |
| |
| − |
| |
| − | 3.
| |
Revision as of 17:27, 5 April 2019
How To Setup Access In SmartPSS
Description
This article will show you how to setup access control in SmartPSS 2.0
Prerequisites
Video Instructions
Step by Step Instructions
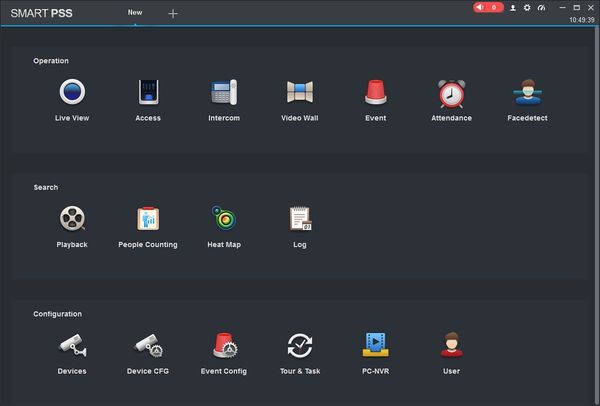
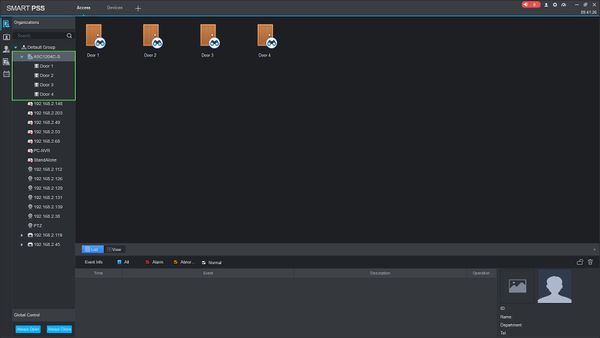
1. Launch SmartPSS.
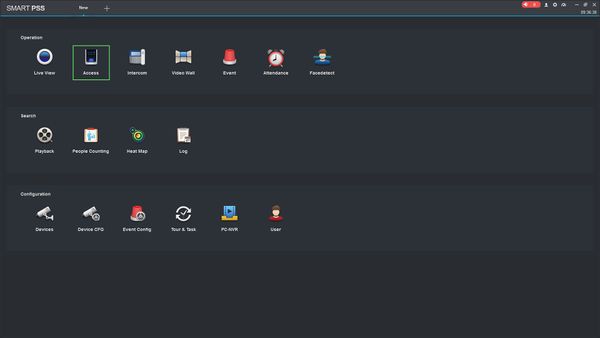
2. Click Access
3. Access Control Devices will appear in the Device Tree on the left.
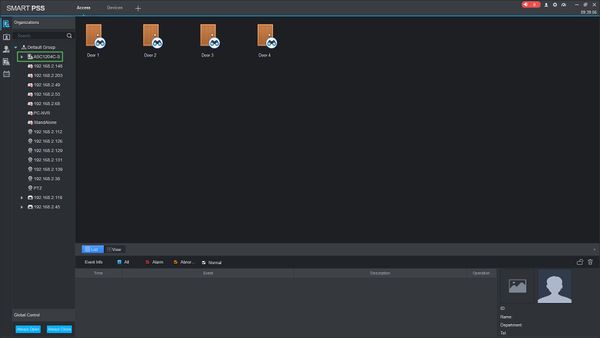
You can click to expand the tree to see all Doors added to the controller
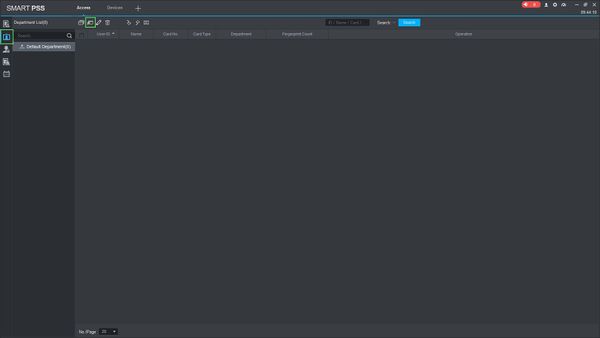
Adding A User
1. Click the User tab, then click Manual Add
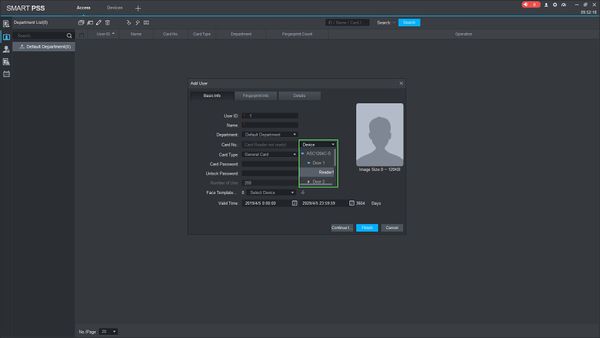
2. The Add User menu will appear
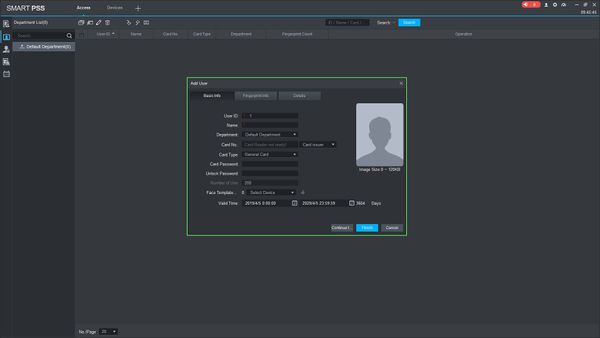
Enter the information for the user.
User ID and Name are required fields
Manual Add
Select 'Card issuer' from the drop down box and to manually enter a card number
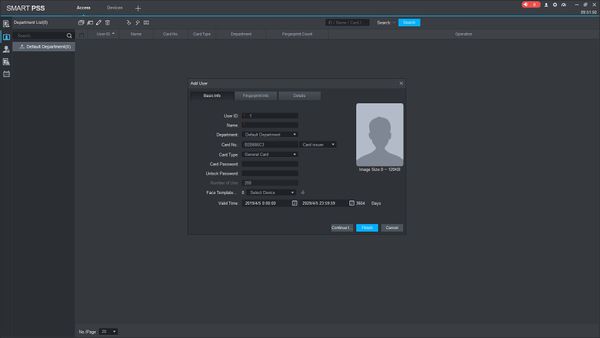
OR
Auto Add
Select 'Device' from the drop down box and then use the device tree to select the reader you wish to use, then scan the card at the reader to enter the card number