Notice: Firmware Links Under Maintenance We are currently undergoing maintenance on all firmware links. If any links are inaccessible, please email or contact Tech Support for the firmware. We appreciate your patience during the maintenance, thank you for your understanding.
Access Control/How To Setup DHI ASM100
Contents
How To Setup DHI-ASM100
Description
This step by step guide will run through the use of DHI-ASM100 with SmartPSS 1.16.1's access control section to assist in assigning 13.56 MHz MIFARE cards.
Prerequisites
- Windows 7/8.1/10 PC
-
 SmartPSS 1.16.1
 - DHI-ASM100
- DHI-ASC1204B/ASC1204C added to SmartPSS1.16.1
Video Instructions
Step by Step Instructions
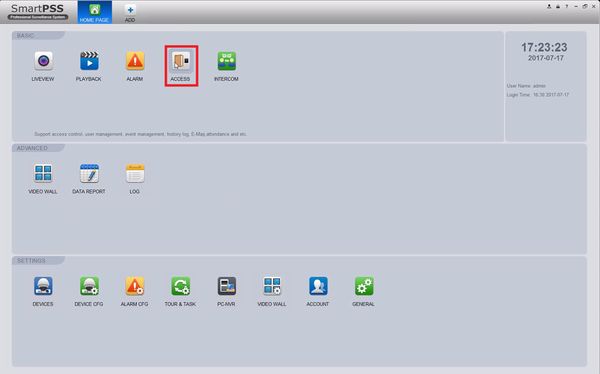
1. Connect the USB cable from the DHI-ASM100 to the Windows PC. Launch SmartPSS 1.16.1 then select ACCESS.
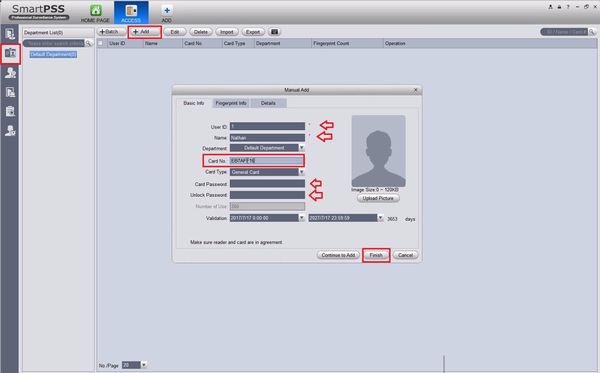
2. Single User Select the User tab on the top left, then select +Add. This is the area of SmartPSS 1.16.1 where you can add a new user to the ACCESS, in this page you can input:
- User ID
- Name
- Department (must be configured before)
- Card Type
- Card Password
- Unlock Password
- Validation Period
- 120KB picture
When you select Card No. the DHI-ASM100 will beep, when the light is greed it will read the card.
3. Batch User
A - User ID: Upper and lower case letters and numbers allowed, but no spaces.
B - Name: Upper and lower case letters, numbers, spaces allowed.
C - Card No.: this will be inputted with the card reader
D - Card Type: General Card - 13.65 mhz mifare

