Difference between revisions of "Thermal/Temperature Monitoring/Physical Setup"
(→Next Step) |
|||
| Line 46: | Line 46: | ||
Physical setup is now complete you can continue with setup and programming: | Physical setup is now complete you can continue with setup and programming: | ||
| − | If | + | If the camera is plugged into an NVR, follow the [[Thermal/Temperature Monitoring/NVR Setup|steps to set up Thermal Monitoring solution with camera connected to NVR]] |
| + | |||
| + | If the camera is connected to the LAN, follow the [[Thermal/Temperature Monitoring/Stand Alone Camera Setup|steps to set up Thermal Monitoring solution with stand alone camera]] | ||
Revision as of 14:40, 24 April 2020
Contents
Temperature Monitoring Solution Physical Setup
Error creating thumbnail: File missing
Description
This guide will show the proper physical arrangement/setup of the devices for the Temperature Monitoring Solution
Video Instructions
Step by Step Instructions
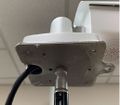
Mounting Adapter Plates
The mounting brackets/plates must be installed to both the camera and black body device
To attach the tripod:
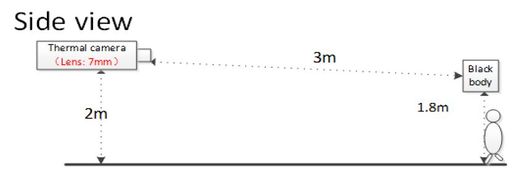
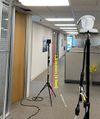
Suggested Physical Layout
JQ-D70Z Black body Setup
Next Step
Physical setup is now complete you can continue with setup and programming:
If the camera is plugged into an NVR, follow the steps to set up Thermal Monitoring solution with camera connected to NVR
If the camera is connected to the LAN, follow the steps to set up Thermal Monitoring solution with stand alone camera


