Difference between revisions of "IP Camera/Playback/Fisheye Dewarp Playback"
| Line 6: | Line 6: | ||
* Connected Fish Eye camera | * Connected Fish Eye camera | ||
===Video Instructions=== | ===Video Instructions=== | ||
| − | <embedvideo service="youtube"> | + | <embedvideo service="youtube">https://youtu.be/daoE6ri4GOo</embedvideo> |
===Step by Step Instructions=== | ===Step by Step Instructions=== | ||
1. Go into a fisheye, right click and go to fisheye. | 1. Go into a fisheye, right click and go to fisheye. | ||
Latest revision as of 00:14, 12 August 2016
Contents
How to Dewarp a Fisheye Camera During Playback
Description
Follow the step by step guide below to Dewarp a Fisheye Camera During Playback on a NVR.
Prerequisites
- NVR with de-warp capability
- Connected Fish Eye camera
Video Instructions
Step by Step Instructions
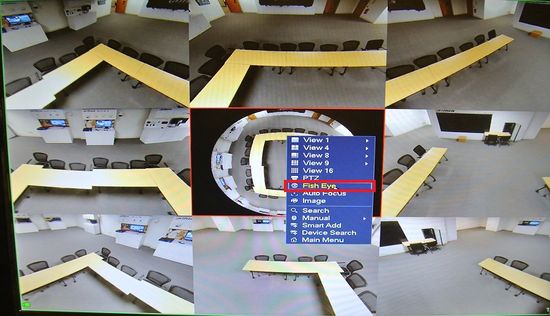
1. Go into a fisheye, right click and go to fisheye.
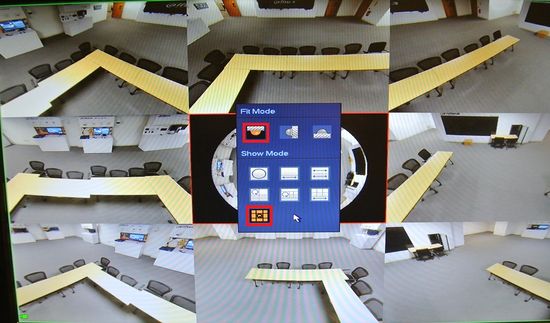
2. Select the fit mode and the show mode for the dewarp.
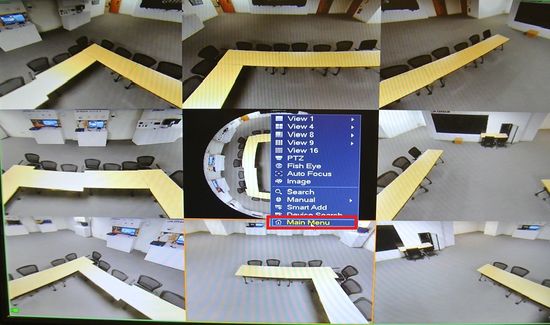
3. Exit out and go to main menu.
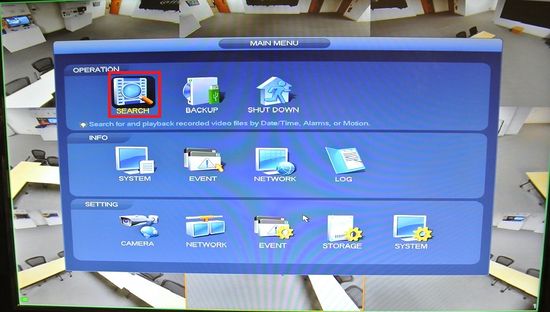
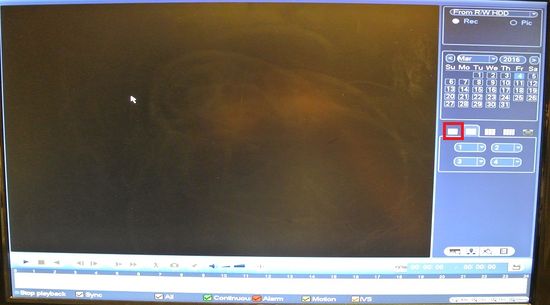
4. Click on Search.
5. Click here for single view recording on the fisheye.
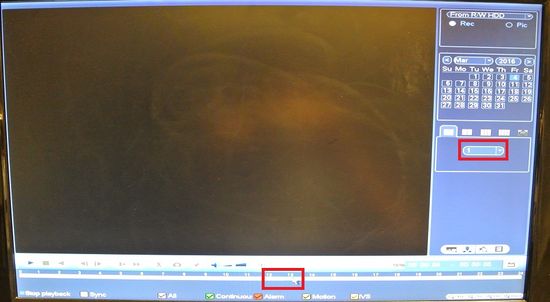
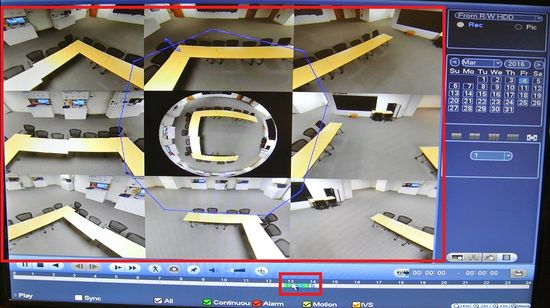
6. select the channel of the fisheye and then choose the time frame.
7. You may now go view different time frame of the playback on fisheye dewarp.
