Difference between revisions of "NVR/Basic Setup/Dual HDMI"
(Created page with "==2 HDMI Function Setup== Click Here to Download PDF Document ===Advanced Dual HDMI Setup=== Note: These features only apply to the following...") |
(No difference)
|
Latest revision as of 14:01, 31 March 2017
Contents
2 HDMI Function Setup
Click Here to Download PDF Document
Advanced Dual HDMI Setup
Note: These features only apply to the following systems:
- NVR608R-64-4K
- NVR608-64-4K,NVR608-128-4K
- NVR608R-128-4K
- NVR616-64-4K
- NVR616-128-4K
- NVR616R-64-4K
- NVR616R-128-4K
- NVR616D-64-4K
- NVR616D-128-4K
- NVR616DR-128-4K
- NVR616DR-64-4K
Video Instructions
Step by Step Instructions
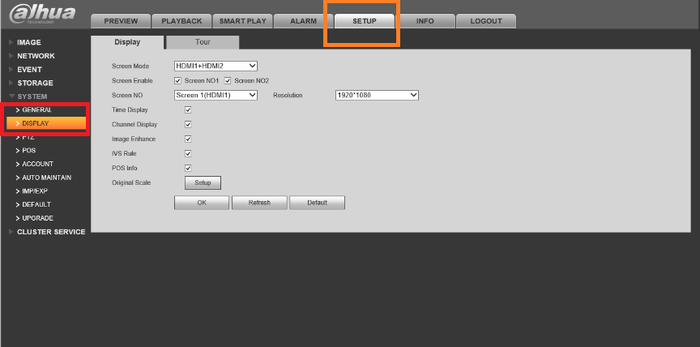
Step 1. Log in to WebService.
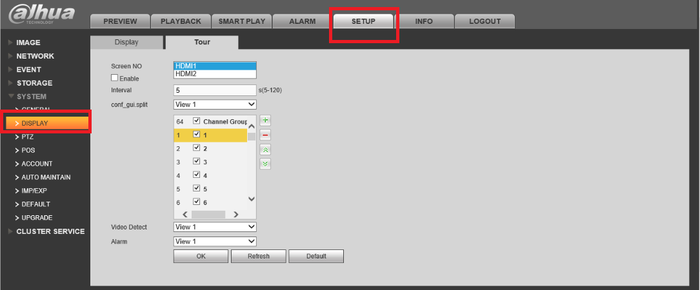
Step 2. Select Set up tab → Display
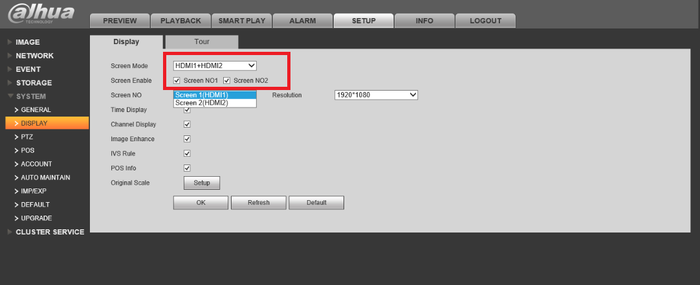
Step 3. Select HDMI 1 + HDMI 2 → Check screen enable 1 and 2.
Note : This will only show as a selection if you have both HDMIs 1 and 2 plugged into 2 monitors
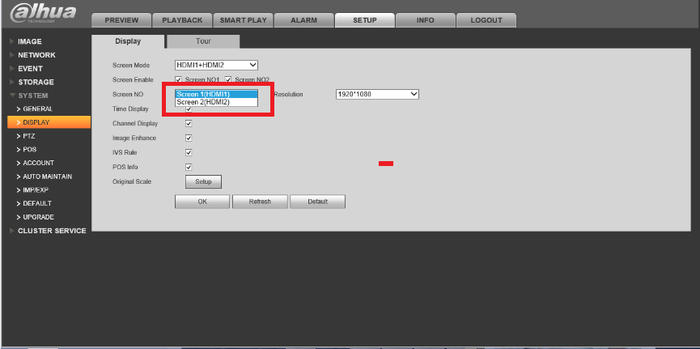
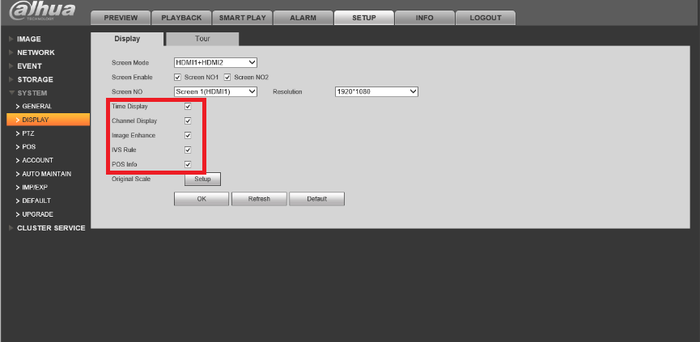
Step 4.Select screen 1 or 2 . This will determine which screen will show features like IVS Rule, POS info etc.
Step 5. Select what you would like displayed on the secondary monitor → Select "OK"
2 HDMI Tour Setup
You can set one of the HDMIs as a dedicated tour.
Step 1. Select Set Up → Select Display.
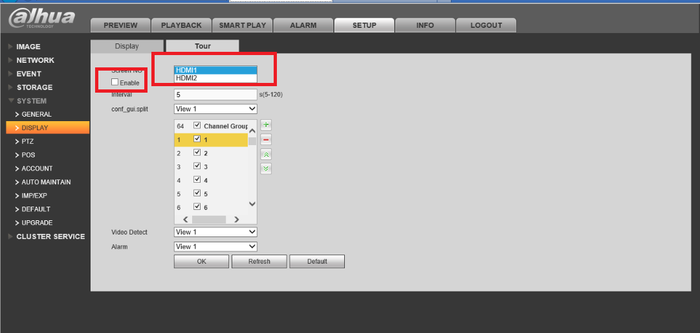
Step 2. Check Enable → Select Screen.
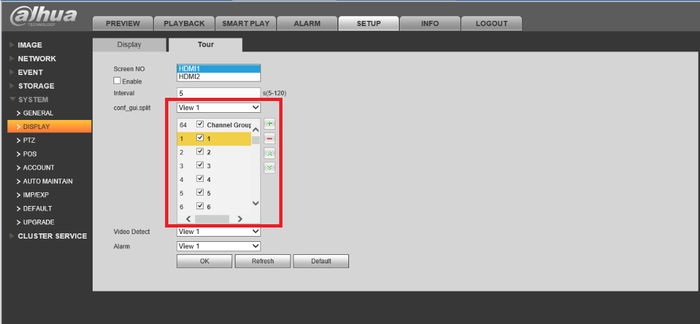
Step 3. Select a View for split view → Select which channels you want in this view.
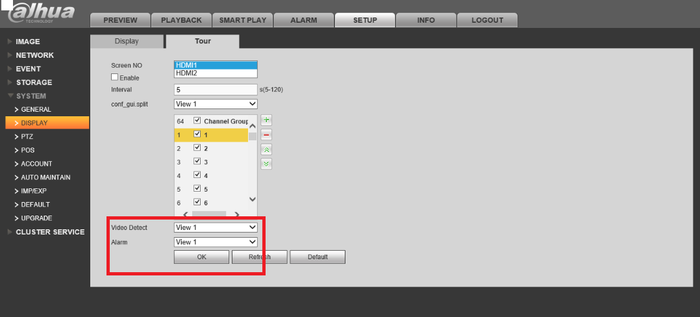
Step 4. Select a view for video detect → Select a view for alarm → Click "OK" to save.
Dual HDMI Setup
Note: These features only apply to the following systems:
- DHI-NVR4208-8P-4K
- DHI-NVR4216-4K
- DHI-NVR4216-8P-4K
- DHI-NVR4232-16P-4K
- DHI-NVR4232-4K
- DHI-NVR4232-8P-4K
- DHI-NVR4408-4K
- DHI-NVR4408-8P-4K
- DHI-NVR4416-16P-4K
- DHI-NVR4416-4K
- DHI-NVR4432-16P-4K
- DHI-NVR4432-4K
- DHI-NVR4808-4K
- DHI-NVR4816-16P-4K
- DHI-NVR4816-4K
- DHI-NVR4832-16P-4K
- DHI-NVR4832-4K
