Difference between revisions of "Troubleshoot/Internet Explorer ActiveX Setup"
| (3 intermediate revisions by 2 users not shown) | |||
| Line 1: | Line 1: | ||
===Configure Internet Explorer Security Settings=== | ===Configure Internet Explorer Security Settings=== | ||
| − | === | + | ===Prerequisites=== |
| − | + | * NVR or IPC | |
| + | * IP Address of the NVR or IPC | ||
| + | * PC | ||
| + | * Internet Explorer | ||
| + | |||
===Video Instructions=== | ===Video Instructions=== | ||
| − | <embedvideo service="youtube"> | + | <embedvideo service="youtube">https://youtu.be/a9dm7v1Q-Lw</embedvideo> |
| + | |||
===Step by Step Instructions=== | ===Step by Step Instructions=== | ||
1. Open Internet Explorer. | 1. Open Internet Explorer. | ||
| Line 9: | Line 14: | ||
[[file:IESetup1.png]] | [[file:IESetup1.png]] | ||
| − | 2. Click on the gear icon in the upper right hand corner | + | 2. Click on the gear icon in the upper right hand corner |
[[file:IESetup2.png]] | [[file:IESetup2.png]] | ||
| Line 25: | Line 30: | ||
[[file:IESetup5.png]] | [[file:IESetup5.png]] | ||
| − | 6. Click the, "Sites" box immediately below the zones. | + | 6. Click the, "Sites" box immediately below the zones. |
[[file:IESetup6.png]] | [[file:IESetup6.png]] | ||
| Line 41: | Line 46: | ||
[[file:IESetup9.png]]=>[[file:IESetup10.png]] | [[file:IESetup9.png]]=>[[file:IESetup10.png]] | ||
| − | 10. Click, "Reset" and then, "Yes" in the confirmation dialogue. | + | 10. Click, "Reset" and then, "Yes" in the confirmation dialogue. |
[[file:IESetup11.png]] | [[file:IESetup11.png]] | ||
| Line 50: | Line 55: | ||
12. Ensure the following are ENABLED: | 12. Ensure the following are ENABLED: | ||
| − | *Browsing->Enable third-party browser extensions | + | |
| − | *Security->Allow software to run or install even if the signature is invalid | + | * Browsing->Enable third-party browser extensions |
| + | * Security->Allow software to run or install even if the signature is invalid | ||
| + | |||
[[file:IESetup13.png]][[file:IESetup14.png]] | [[file:IESetup13.png]][[file:IESetup14.png]] | ||
| Line 59: | Line 66: | ||
14. Reboot your computer, and try to access your system. | 14. Reboot your computer, and try to access your system. | ||
| − | |||
| − | |||
{{Template:Footer:Remote_Access}} | {{Template:Footer:Remote_Access}} | ||
| + | |||
| + | [[Category:Remote Access]] | ||
| + | [[Category:Troubleshoot]] | ||
| + | [[Category:HCVR]] | ||
| + | [[Category:How To]] | ||
| + | [[Category:NVR]] | ||
| + | [[Category:Tutorial]] | ||
| + | [[Category:UI]] | ||
| + | [[Category:Web UI]] | ||
| + | [[Category:FAQ]] | ||
Latest revision as of 22:11, 1 August 2019
Contents
Configure Internet Explorer Security Settings
Prerequisites
- NVR or IPC
- IP Address of the NVR or IPC
- PC
- Internet Explorer
Video Instructions
Step by Step Instructions
1. Open Internet Explorer.
2. Click on the gear icon in the upper right hand corner
3. Click, "Internet Options"
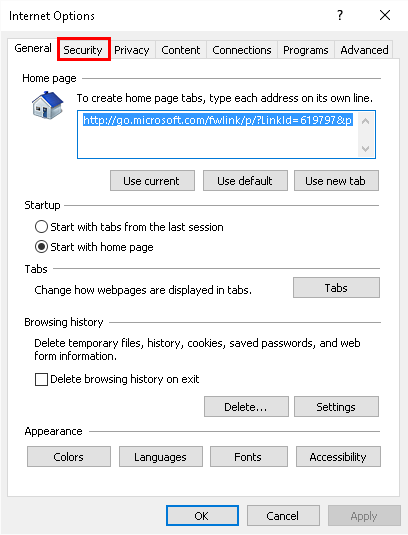
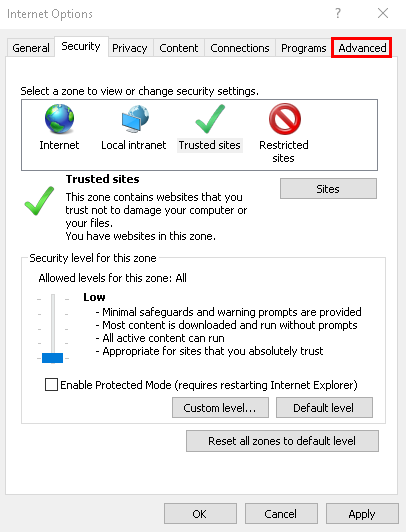
4. Click the, "Security" tab.
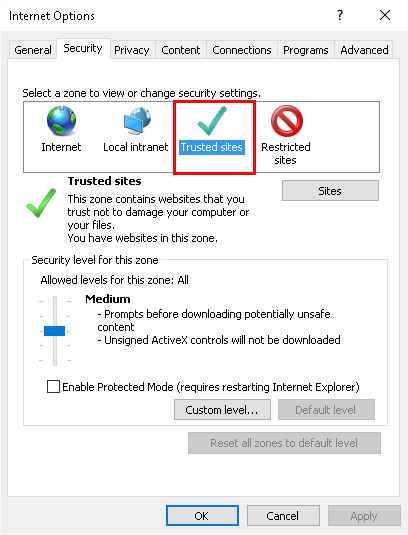
5. Click the, "Trusted sites" icon.
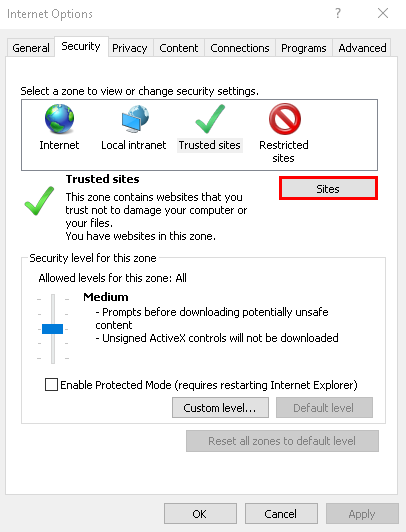
6. Click the, "Sites" box immediately below the zones.
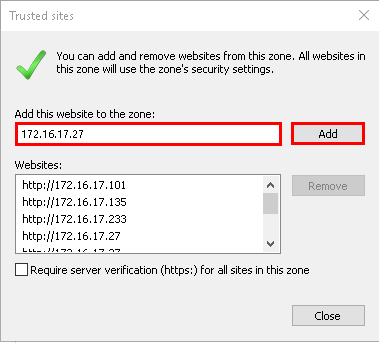
7. Input your devices IP address into the top box, click, "Add" and then, "Close"
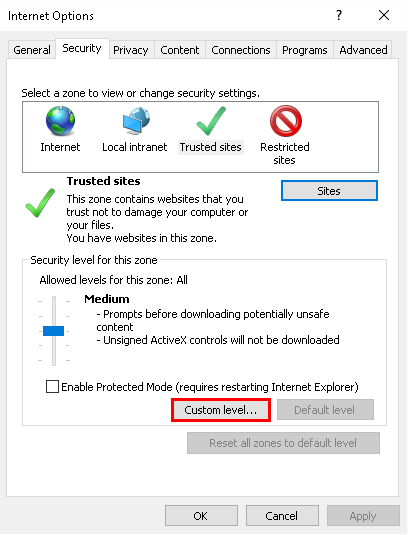
8. Click, "Custom level..."
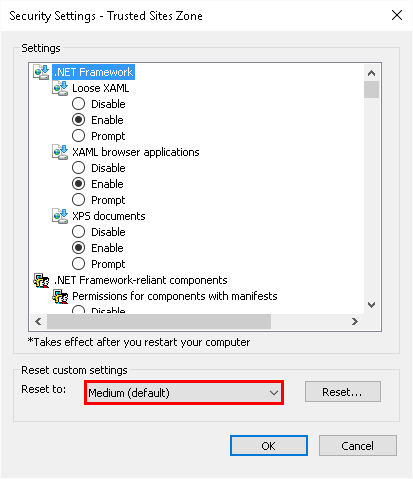
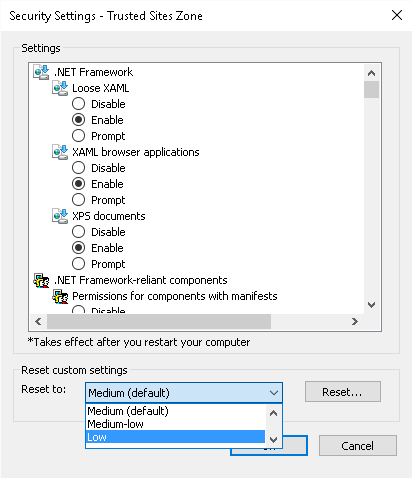
9. Click the drop down box at the bottom of this window, and change the setting to, "Low"
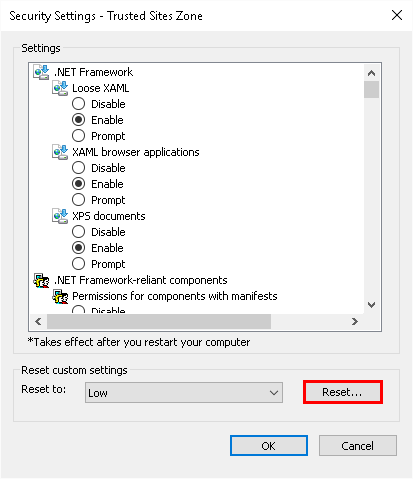
10. Click, "Reset" and then, "Yes" in the confirmation dialogue.
11. Click on the, "Advanced" tab.
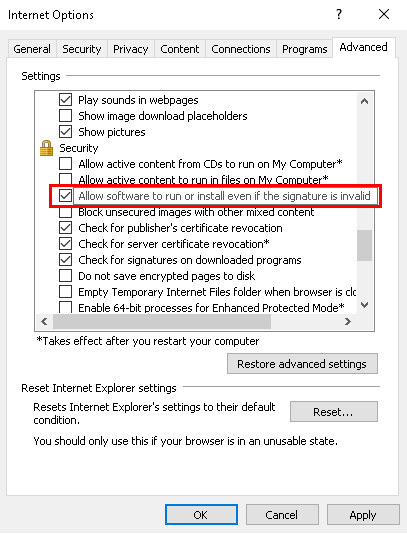
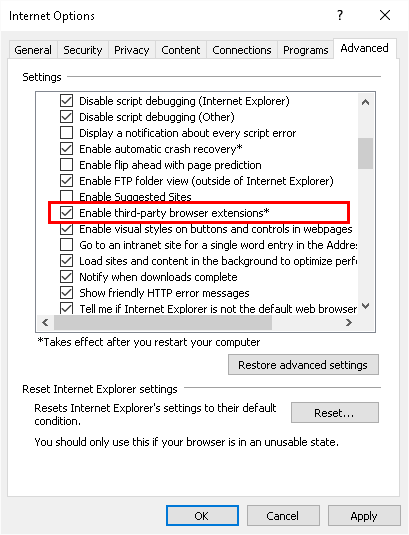
12. Ensure the following are ENABLED:
- Browsing->Enable third-party browser extensions
- Security->Allow software to run or install even if the signature is invalid
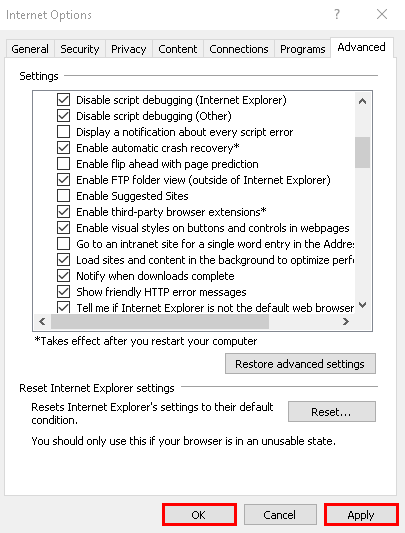
13. Click, "Apply" and then, "OK"
14. Reboot your computer, and try to access your system.


