Difference between revisions of "NVR/Recording Setup/Schedule Record"
(→Description) |
(→Step By Step Instructions) |
||
| (47 intermediate revisions by 4 users not shown) | |||
| Line 3: | Line 3: | ||
Dahua NVRs and DVRs offer a variety of recording options. You can configure recording schedules based on the following methods: | Dahua NVRs and DVRs offer a variety of recording options. You can configure recording schedules based on the following methods: | ||
| − | + | * Regular | |
| − | + | * Motion Detection | |
| − | + | * Alarm Based | |
| + | * Motion Detection + Alarm | ||
| + | * IVS if the feature is available depending on the model. | ||
| + | |||
| + | These schedules can be set individually for each camera or copied to all cameras. | ||
| + | |||
| + | ===Prerequisites=== | ||
| + | * Dahua NVR or DVR | ||
| + | * Internal HDD | ||
| − | |||
| − | |||
===Video Instructions=== | ===Video Instructions=== | ||
<embedvideo service="youtube">https://youtu.be/CqHpCUIKpRw</embedvideo> | <embedvideo service="youtube">https://youtu.be/CqHpCUIKpRw</embedvideo> | ||
| Line 17: | Line 23: | ||
[[file:ScheduleRecord1.png|500px]] | [[file:ScheduleRecord1.png|500px]] | ||
| − | 2. Click, "Schedule" on the left hand side. | + | 2. Click, "Schedule" on the left hand side. |
[[file:ScheduleRecord5.png]] | [[file:ScheduleRecord5.png]] | ||
| − | 3. Click the Gear icon to the right of any of the graphs. | + | 3. Click the Gear icon to the right of any of the graphs. |
[[file:ScheduleRecord2.png|500px]] | [[file:ScheduleRecord2.png|500px]] | ||
| Line 29: | Line 35: | ||
[[file:ScheduleRecord3.png|500px]] | [[file:ScheduleRecord3.png|500px]] | ||
| − | 5. Click, "Save" This will return you to the previous screen which should look like this. | + | 5. Click, "Save" This will return you to the previous screen which should look like this. |
[[file:ScheduleRecord4.png|500px]] | [[file:ScheduleRecord4.png|500px]] | ||
6. Click, "Apply" and then, "OK" | 6. Click, "Apply" and then, "OK" | ||
| + | |||
| + | ==Schedule Record Setup for Web service== | ||
| + | ===Prerequisites=== | ||
| + | * WEB access to IE (Internet Explorer) | ||
| + | * User Name and Password of device. | ||
| + | * Internal HDD | ||
| + | |||
| + | ===Video Instructions=== | ||
| + | <embedvideo service="youtube">https://youtu.be/RX25EfvS-fo</embedvideo> | ||
| + | |||
| + | ===Step By Step Instructions=== | ||
| + | 1. Log into the device through the web service using Internet Explorer. | ||
| + | |||
| + | [[file:Webinterfaceplayb1.png|600px]] | ||
| + | |||
| + | 2. Select the "Setup" tab. | ||
| + | |||
| + | [[file:Webinterfaceplayb2.png|600px]] | ||
| + | |||
| + | 3. From the left hand side select Storage -> Schedule | ||
| + | |||
| + | [[file:Webinterfaceplayb3.png|600px]] | ||
| + | |||
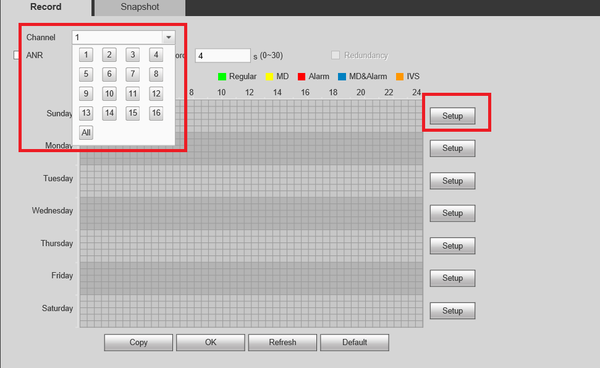
| + | 4. Select the channel/camera recordings are to be scheduled for -> Select Setup . | ||
| + | |||
| + | [[file:Webinterfaceplayb5.png|600px]] | ||
| + | |||
| + | 5. You will have the options to set for Regular Recordings, MD (Motion Detection) , Alarm , MD & Alarm. For this tutorial we are using Regular Recordings. | ||
| + | |||
| + | [[file:Webinterfaceplayb6.png|600px]] | ||
| + | |||
| + | * Here you can see that you are able to set multiple periods. For this tutorial we will only be setting one period. Check off Regular -> Select the day or days to set scheduled recordings -> select ok to save | ||
| + | |||
| + | [[file:Webinterfaceplayb7.png|600px]] | ||
| + | |||
| + | 7. Depending on the days selected from the previous step you will see green colored bars which represents regular recording. | ||
| + | |||
| + | [[file:Webinterfaceplayb8.png|600px]] | ||
| + | |||
| + | 8. You can select the copy button to mirror the same schedule to another channel/camera -> Select OK -> Select OK to save all settings. | ||
| + | |||
| + | [[file:Webinterfaceplayb9.png|600px]] | ||
| + | |||
| + | ==Schedule Record for SmartPSS 2.0== | ||
| + | ===Description=== | ||
| + | Set up regular recordings for SmartPSS 2.0 | ||
| + | |||
| + | ===Prerequisites=== | ||
| + | * Dahua NVR or DVR | ||
| + | * Internal HDD | ||
| + | |||
| + | ===Video Instructions=== | ||
| + | <embedvideo service="youtube">https://youtu.be/IKgwQAyTfrw</embedvideo> | ||
| + | |||
| + | ===Step By Step Instructions=== | ||
| + | 1. From the Main Menu Select "Device CFG" (Device Configuration). | ||
| + | |||
| + | [[File:SPSS_ScheduledRec_1.PNG|400px]] | ||
| + | |||
| + | |||
| + | 2. From the left hand side select the device the scheduled recording is to be set for. | ||
| + | |||
| + | [[File:SPSS_ScheduledRec_2.PNG|400px]] | ||
| + | |||
| + | |||
| + | 3. Select "Storage" -> Select "Schedule". | ||
| + | |||
| + | [[File:SPSS_ScheduledRec_3.PNG|400px]] | ||
| + | |||
| + | |||
| + | 4. From the channel drop down menu select the channel for recording. | ||
| + | |||
| + | [[File:SPSS_ScheduledRec_4.PNG|400px]] | ||
| + | |||
| + | |||
| + | 5. Click on the settings icon. Here you will see a menu for the days and hours for the scheduled recordings. | ||
| + | |||
| + | [[File:SPSS_ScheduledRec_5.PNG|400px]] | ||
| + | |||
| + | |||
| + | 6. By default Regular will be selected, for this tutorial Motion Detect (MD) will be added. Check MD -> Check mark the day or days recordings are to be set for -> select save. | ||
| + | |||
| + | [[File:SPSS_ScheduledRec_6.PNG|400px]] | ||
| + | |||
| + | |||
| + | 7. Here you can see green across for the days you set schedule recordings for in the previous step. You can copy the configuration set in the previous step to other channels -> Select "Apply" and "Save" to save configuration. | ||
| + | |||
| + | [[File:SPSS_ScheduledRec_7.PNG|400px]] | ||
| + | |||
| + | |||
| + | |||
| + | |||
| + | [[Category:NVR]] | ||
| + | |||
| + | [[Category:Record]] | ||
| + | |||
| + | [[Category:Record Setup]] | ||
Latest revision as of 00:11, 7 February 2020
Contents
Schedule Record
Description
Dahua NVRs and DVRs offer a variety of recording options. You can configure recording schedules based on the following methods:
- Regular
- Motion Detection
- Alarm Based
- Motion Detection + Alarm
- IVS if the feature is available depending on the model.
These schedules can be set individually for each camera or copied to all cameras.
Prerequisites
- Dahua NVR or DVR
- Internal HDD
Video Instructions
Step by Step Instructions
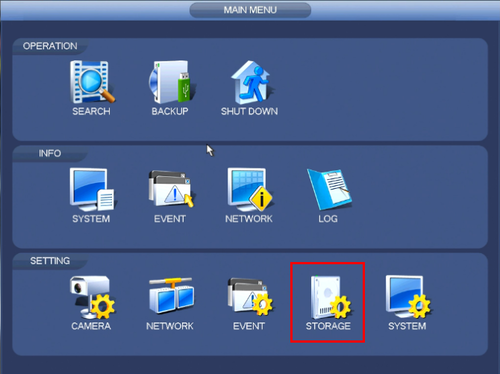
1. From the Main Menu click, "Storage" under, "Settings"
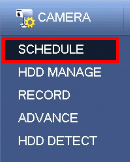
2. Click, "Schedule" on the left hand side.
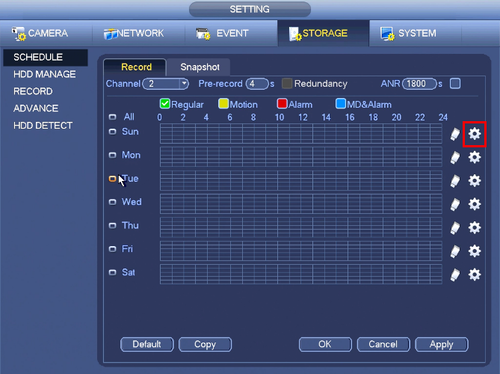
3. Click the Gear icon to the right of any of the graphs.
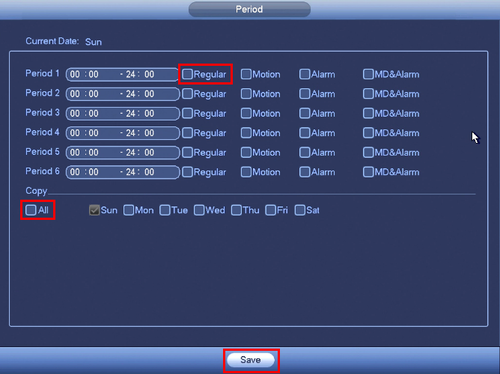
4. Check the box for, "Regular" then click the, "All" box below, "Copy"
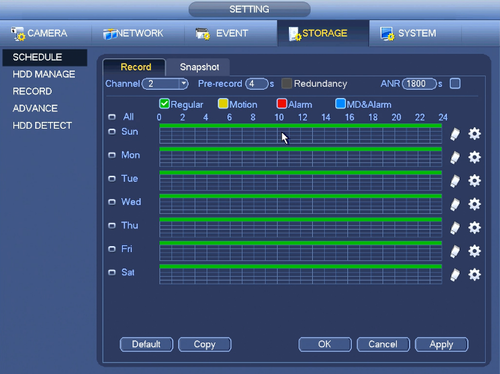
5. Click, "Save" This will return you to the previous screen which should look like this.
6. Click, "Apply" and then, "OK"
Schedule Record Setup for Web service
Prerequisites
- WEB access to IE (Internet Explorer)
- User Name and Password of device.
- Internal HDD
Video Instructions
Step By Step Instructions
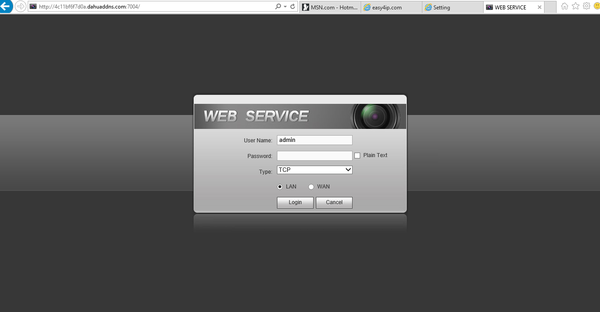
1. Log into the device through the web service using Internet Explorer.
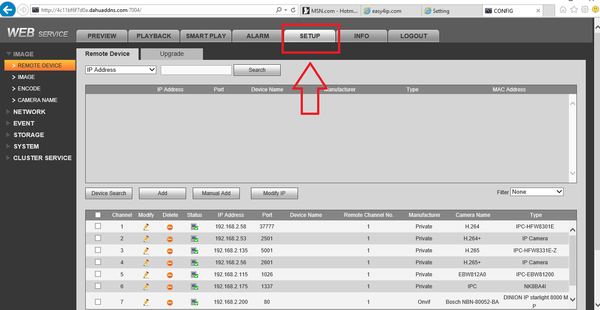
2. Select the "Setup" tab.
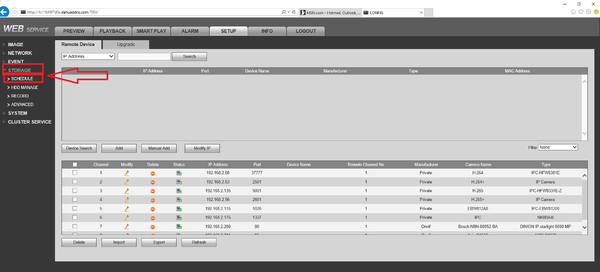
3. From the left hand side select Storage -> Schedule
4. Select the channel/camera recordings are to be scheduled for -> Select Setup .
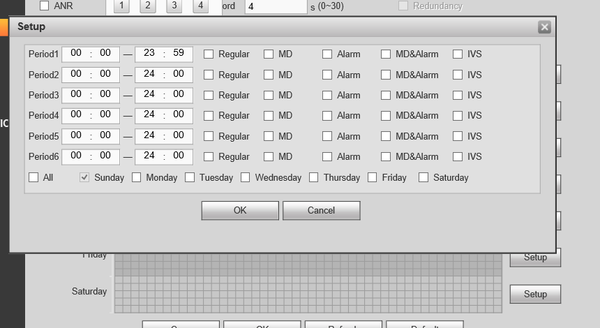
5. You will have the options to set for Regular Recordings, MD (Motion Detection) , Alarm , MD & Alarm. For this tutorial we are using Regular Recordings.
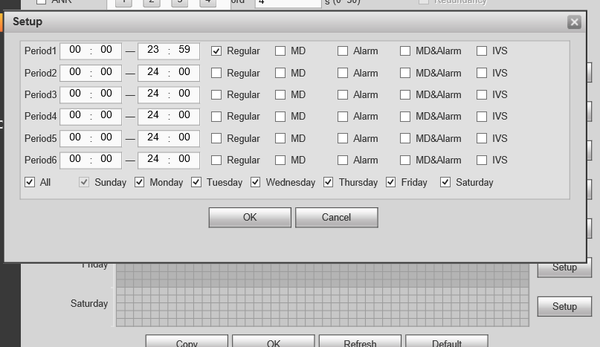
- Here you can see that you are able to set multiple periods. For this tutorial we will only be setting one period. Check off Regular -> Select the day or days to set scheduled recordings -> select ok to save
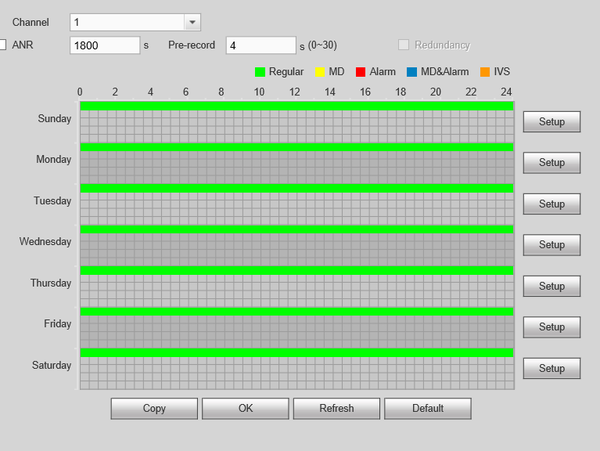
7. Depending on the days selected from the previous step you will see green colored bars which represents regular recording.
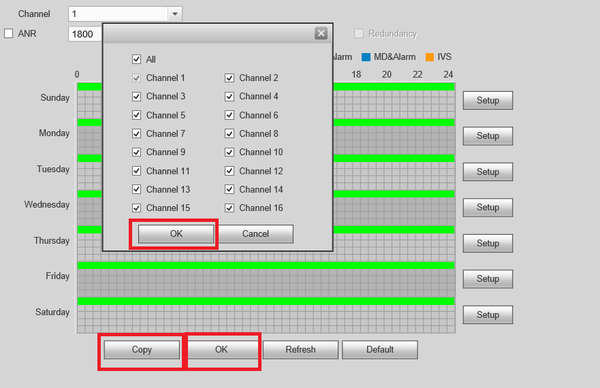
8. You can select the copy button to mirror the same schedule to another channel/camera -> Select OK -> Select OK to save all settings.
Schedule Record for SmartPSS 2.0
Description
Set up regular recordings for SmartPSS 2.0
Prerequisites
- Dahua NVR or DVR
- Internal HDD
Video Instructions
Step By Step Instructions
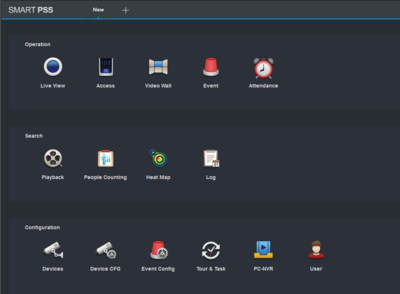
1. From the Main Menu Select "Device CFG" (Device Configuration).
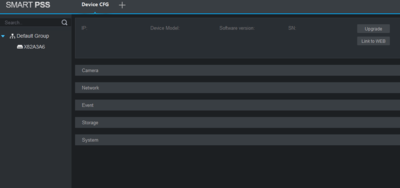
2. From the left hand side select the device the scheduled recording is to be set for.
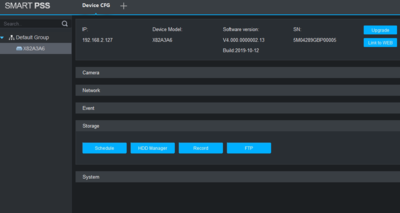
3. Select "Storage" -> Select "Schedule".
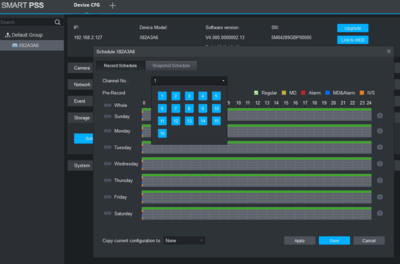
4. From the channel drop down menu select the channel for recording.
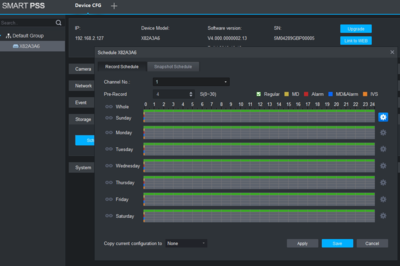
5. Click on the settings icon. Here you will see a menu for the days and hours for the scheduled recordings.
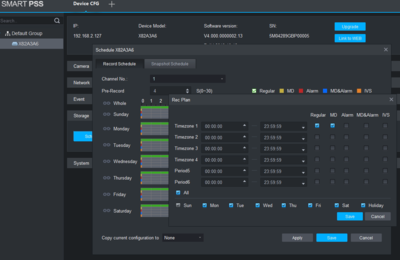
6. By default Regular will be selected, for this tutorial Motion Detect (MD) will be added. Check MD -> Check mark the day or days recordings are to be set for -> select save.
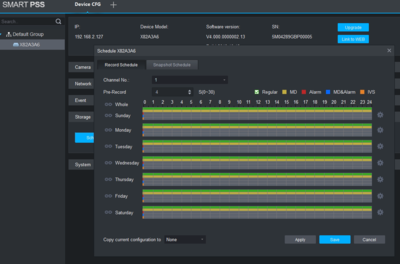
7. Here you can see green across for the days you set schedule recordings for in the previous step. You can copy the configuration set in the previous step to other channels -> Select "Apply" and "Save" to save configuration.
