Difference between revisions of "NVRiSettingStorage"
(→HDD Manage) |
|||
| (5 intermediate revisions by one other user not shown) | |||
| Line 1: | Line 1: | ||
==NVR Interface-Setting-Storage== | ==NVR Interface-Setting-Storage== | ||
| − | + | <imagemap> | |
| + | Image:NVRiSettingStorage.png | ||
| + | rect 0 25 122 60 [[NVRiSettingCamera]] | ||
| + | rect 122 26 246 60 [[NVRiSettingNetwork]] | ||
| + | rect 248 27 369 61 [[NVRiSettingEvent]] | ||
| + | rect 370 27 492 61 [[NVRiSettingStorage]] | ||
| + | rect 493 27 616 61 [[NVRiSettingSystem]] | ||
| + | desc none | ||
| + | </imagemap> | ||
===Schedule=== | ===Schedule=== | ||
[[file:NVRiSettingStorageSchedule.png]] | [[file:NVRiSettingStorageSchedule.png]] | ||
| + | |||
====Record==== | ====Record==== | ||
[[file:NVRiSettingStorageScheduleRecord.png]] | [[file:NVRiSettingStorageScheduleRecord.png]] | ||
| Line 27: | Line 36: | ||
====Snapshot==== | ====Snapshot==== | ||
[[file:NVRiSettingStorageScheduleSnapshot.png]] | [[file:NVRiSettingStorageScheduleSnapshot.png]] | ||
| + | |||
===HDD Manage=== | ===HDD Manage=== | ||
[[file:NVRiSettingStorageHDDManage.png]] | [[file:NVRiSettingStorageHDDManage.png]] | ||
| − | |||
| − | #Select a HDD and then select format from the dropdown list. Click Execute button. | + | Here you can view HDD information such as type, status, total capacity, record time and etc. The operation includes format, resume from error, change HDD property (Read write, Read-only). Here you can also set alarm and HDD storage position. |
| − | #Click OK button to complete the setup. You can see system needs to restart to activate current setup. | + | |
| + | # Select a HDD and then select format from the dropdown list. Click Execute button. | ||
| + | # Click OK button to complete the setup. You can see system needs to restart to activate current setup. | ||
===Record=== | ===Record=== | ||
| Line 39: | Line 50: | ||
===Advance=== | ===Advance=== | ||
[[file:NVRiSettingStorageAdvance.png]] | [[file:NVRiSettingStorageAdvance.png]] | ||
| + | |||
| + | It is to set HDD group, and HDD group setup for main stream, sub stream and snapshot operation | ||
| + | |||
| + | '''Important:'''HDD group and quota mode can not be valid at the same time. System needs to restart once you change the mode here. | ||
| + | |||
====HDD==== | ====HDD==== | ||
[[file:NVRiSettingStorageAdvanceHDD.png]] | [[file:NVRiSettingStorageAdvanceHDD.png]] | ||
| + | |||
| + | * HDD: Here you can view the HDD amount the device can support. | ||
| + | * Group: It lists the HDD Group number of current hard disk. | ||
| + | |||
====Main Stream==== | ====Main Stream==== | ||
[[file:NVRiSettingStorageAdvanceMainStream.png]] | [[file:NVRiSettingStorageAdvanceMainStream.png]] | ||
| + | |||
| + | Please select the correspond group from the dropdown list and then click Apply button. | ||
| + | |||
| + | Click main stream/sub stream/snapshot button to set corresponding HDD group information. | ||
| + | |||
====Sub Stream==== | ====Sub Stream==== | ||
[[file:NVRiSettingStorageAdvanceSubStream.png]] | [[file:NVRiSettingStorageAdvanceSubStream.png]] | ||
| + | |||
====Snapshot==== | ====Snapshot==== | ||
[[file:NVRiSettingStorageAdvanceSnapshot.png]] | [[file:NVRiSettingStorageAdvanceSnapshot.png]] | ||
| + | |||
===HDD Detect=== | ===HDD Detect=== | ||
[[file:NVRiSettingStorageHDDDetect.png]] | [[file:NVRiSettingStorageHDDDetect.png]] | ||
| + | |||
| + | '''Note: '''This function is for some series product only. | ||
| + | |||
====Detect==== | ====Detect==== | ||
[[file:NVRiSettingStorageHDDDetectDetect.png]] | [[file:NVRiSettingStorageHDDDetectDetect.png]] | ||
| + | |||
| + | The HDD detect function is to detect HDD current status so that you can clearly understand the HDD performance and replace the malfunction HDD. | ||
| + | |||
| + | There are two detect types: | ||
| + | |||
| + | * Quick detect is to detect via the universal system files. System can quickly complete the HDD scan. If you want to use this function, please make sure the HDD is in use now. If the HDD is removed from other device, please make sure the write-data once was full after it installed on current device. | ||
| + | * Global detect adopts Windows mode to scan. It may take a long time and may affect the HDD that is recording. | ||
| + | |||
====Report==== | ====Report==== | ||
[[file:NVRiSettingStorageHDDDetectReport.png]] | [[file:NVRiSettingStorageHDDDetectReport.png]] | ||
| + | |||
| + | After the detect operation, you can go to the detect report to view corresponding information. | ||
| + | |||
| + | |||
| + | |||
| + | |||
| + | [[Category:NVR Interface]] | ||
Latest revision as of 19:12, 15 August 2016
Contents
NVR Interface-Setting-Storage

Schedule
Record
The record type priority is: Alarm>Motion>Regular
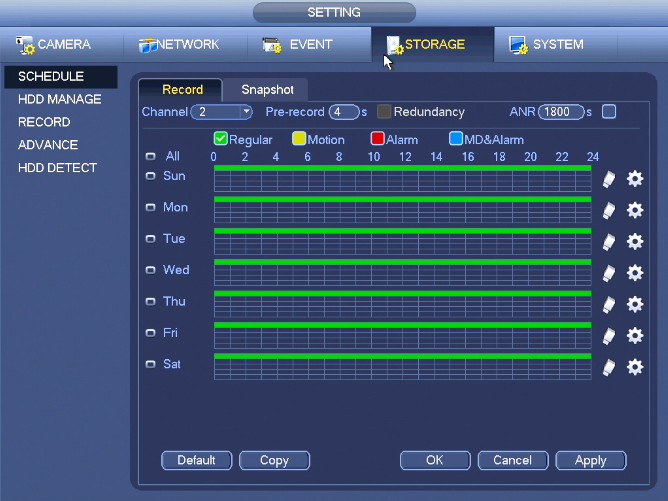
Schedule Record
Set record time, record plan and etc. Please note system is in 24-hour record by default after its first boot up.
In the main menu, from Main menu->Setting->Storage->Schedule, you can go to schedule menu. See Figure 4‑55. There are total six periods.
- Channel: Please select the channel number first. You can select “all” if you want to set for the whole channels.
-
 : Sync connection icon. Select icon
 of several dates, all checked items can be edited or together. Now the icon is shown as
-
 : Click it to delete a record type from one period.
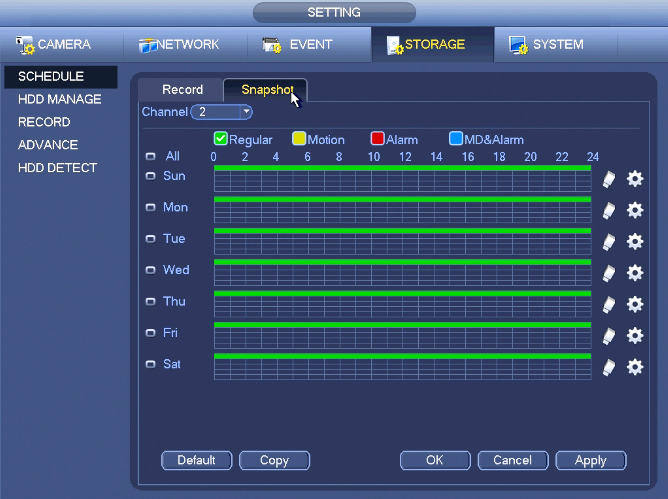
 - Record Type: Please check the box to select corresponding record type. There are four types: Regular/MD (motion detect)/Alarm/MD&Alarm.
- Week day: There are eight options: ranges from Saturday to Sunday and all.
- Holiday: It is to set holiday setup. Please note you need to go to the General interface (Main Menu->Setting->System->General) to add holiday first. Otherwise you can not see this item.
- Pre-record: System can pre-record the video before the event occurs into the file. The value ranges from 1 to 30 seconds depending on the bit stream.
- Redundancy: System supports redundancy backup function. It allows you backup recorded file in two disks. You can highlight Redundancy button to activate this function. Please note, before enable this function, please set at least one HDD as redundant. (Main menu->Setting->Storage->HDD Manager). Please note this function is null if there is only one HDD.
- ANR: It is to save video to the SD card of the network camera in case the network connection fails. The value ranges from 0s~ After the network connection resumed, the system can get the video from the SD card and there is no risk of record loss.
- Period setup: Click button
 after one date or a holiday, you can see an interface shown as in Figure 4‑56.There are four record types: regular, motion detection (MD), Alarm, MD & alarm.
Snapshot
HDD Manage
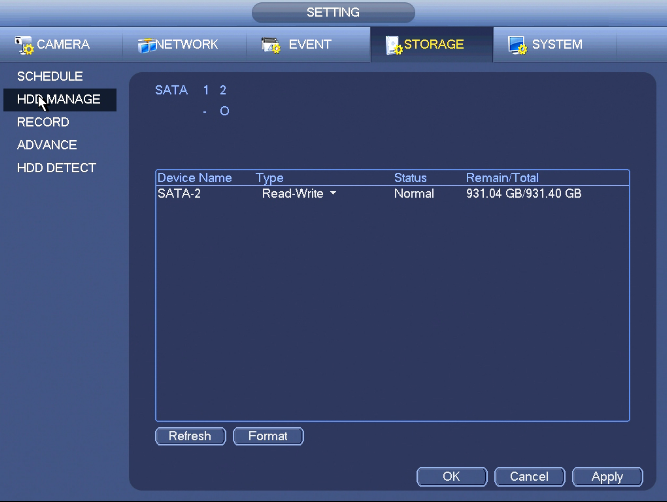
Here you can view HDD information such as type, status, total capacity, record time and etc. The operation includes format, resume from error, change HDD property (Read write, Read-only). Here you can also set alarm and HDD storage position.
- Select a HDD and then select format from the dropdown list. Click Execute button.
- Click OK button to complete the setup. You can see system needs to restart to activate current setup.
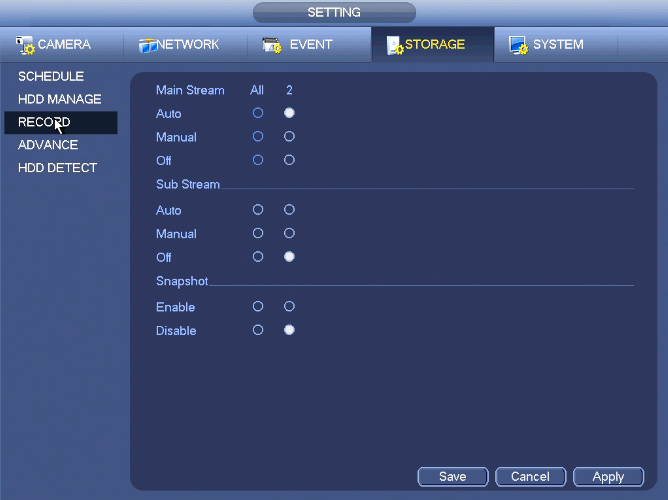
Record
Advance
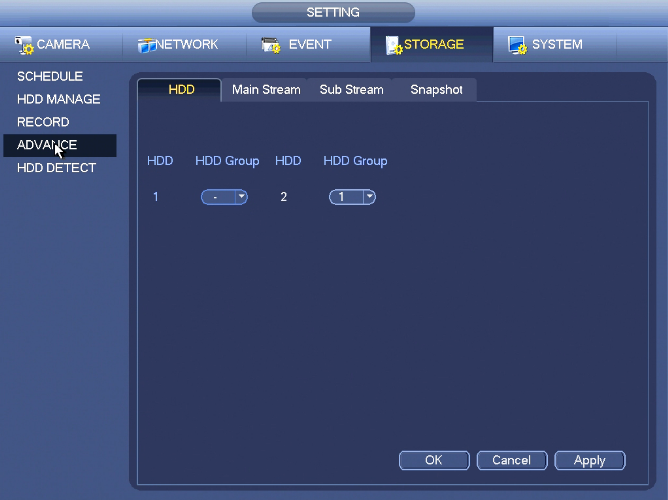
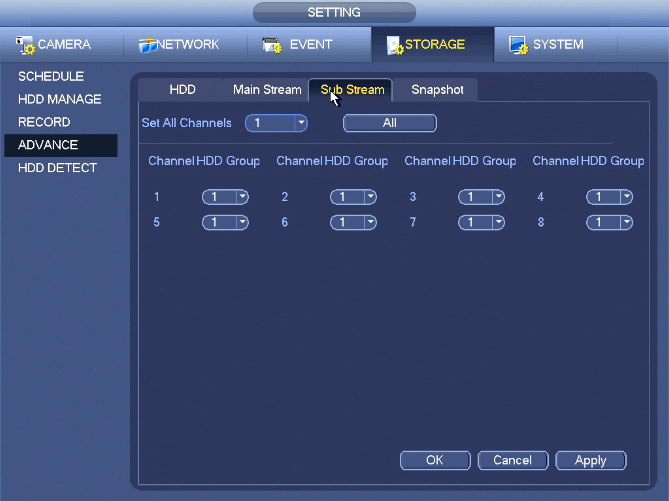
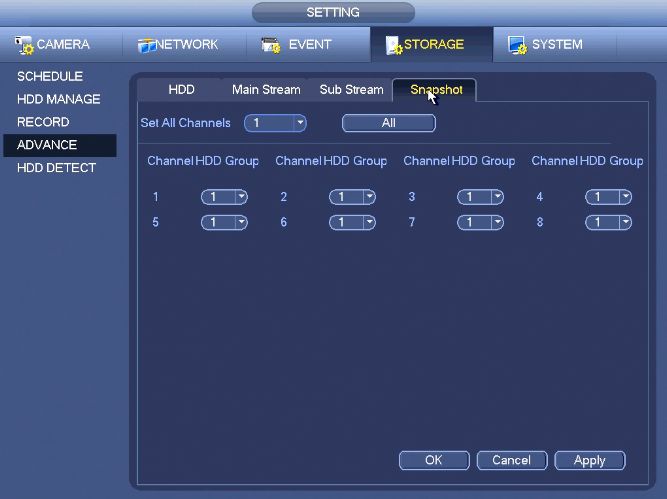
It is to set HDD group, and HDD group setup for main stream, sub stream and snapshot operation
Important:HDD group and quota mode can not be valid at the same time. System needs to restart once you change the mode here.
HDD
- HDD: Here you can view the HDD amount the device can support.
- Group: It lists the HDD Group number of current hard disk.
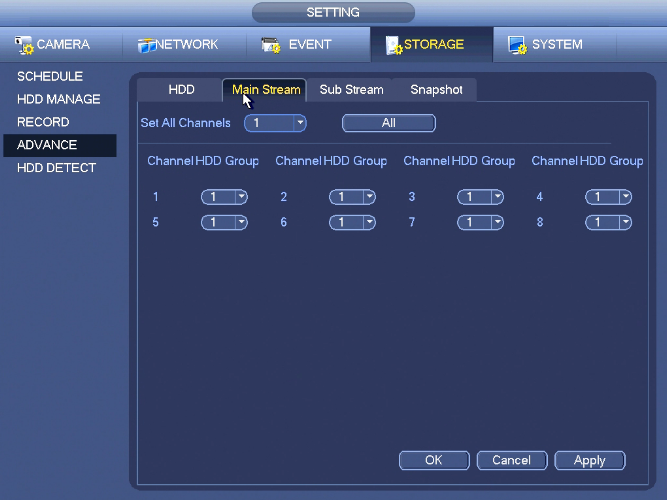
Main Stream
Please select the correspond group from the dropdown list and then click Apply button.
Click main stream/sub stream/snapshot button to set corresponding HDD group information.
Sub Stream
Snapshot
HDD Detect
Note: This function is for some series product only.
Detect
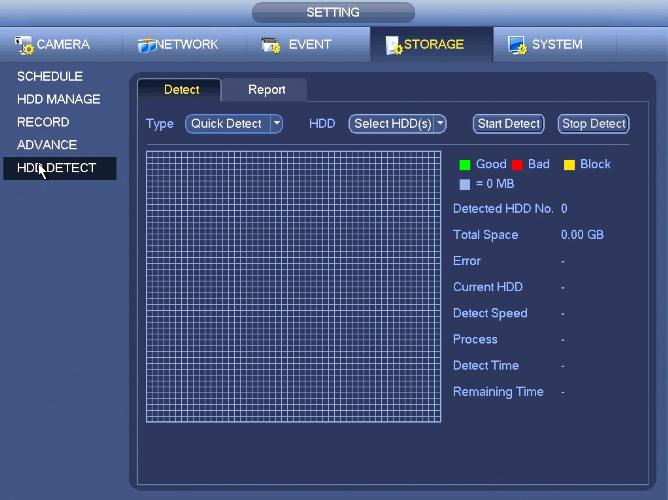
The HDD detect function is to detect HDD current status so that you can clearly understand the HDD performance and replace the malfunction HDD.
There are two detect types:
- Quick detect is to detect via the universal system files. System can quickly complete the HDD scan. If you want to use this function, please make sure the HDD is in use now. If the HDD is removed from other device, please make sure the write-data once was full after it installed on current device.
- Global detect adopts Windows mode to scan. It may take a long time and may affect the HDD that is recording.
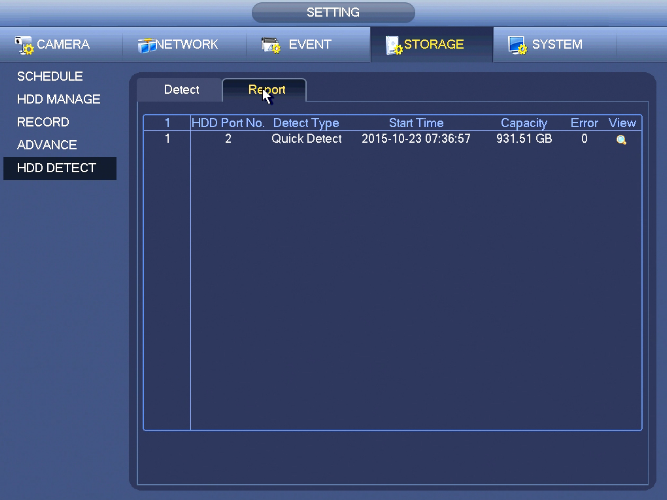
Report
After the detect operation, you can go to the detect report to view corresponding information.
