Difference between revisions of ":PTZ IVS Auto Tracking"
(→Step by Step Instructions) |
(→Prerequisites) |
||
| (5 intermediate revisions by 2 users not shown) | |||
| Line 5: | Line 5: | ||
===Prerequisites=== | ===Prerequisites=== | ||
| − | * IVS | + | * Auto-Tracking capable PTZ |
| + | |||
| + | ===IVS Best Practices=== | ||
| + | To assess issues with IVS compatibility between the camera and NVR, please update both devices to the most current firmware and factory reset the NVR, and use the hard reset button to reset the camera. | ||
==How to Setup Single Scene== | ==How to Setup Single Scene== | ||
| Line 98: | Line 101: | ||
===Step by Step Instructions=== | ===Step by Step Instructions=== | ||
| − | 1. From the home menu select live view. | + | 1. From the home menu select live view. |
| − | 2. From the right hand side select to highlight the PTZ device -> Right click on highlighted PTZ -> IVS Config | + | 2. From the right hand side select to highlight the PTZ device -> Right click on highlighted PTZ -> Select IVS Channel Config. |
[[File:HBBHJBHJ.jpg|800px]] | [[File:HBBHJBHJ.jpg|800px]] | ||
Latest revision as of 22:43, 12 February 2018
Contents
PTZ IVS Auto Tracking Setup
Description
- Disclaimer - Auto Tracking and Panoramic view will not work simultaneously
PTZ tracking is an innovative feature that transforms manually controlled PTZ cameras into automated tracking systems that keep an moving object in focus and centered in the frame. It follows the object where stationary cameras would lose the object once out of the fixed cameras field of view.
Prerequisites
- Auto-Tracking capable PTZ
IVS Best Practices
To assess issues with IVS compatibility between the camera and NVR, please update both devices to the most current firmware and factory reset the NVR, and use the hard reset button to reset the camera.
How to Setup Single Scene
Video Instructions
How To Setup Auto Tracking in Action Video
Step by Step Instructions
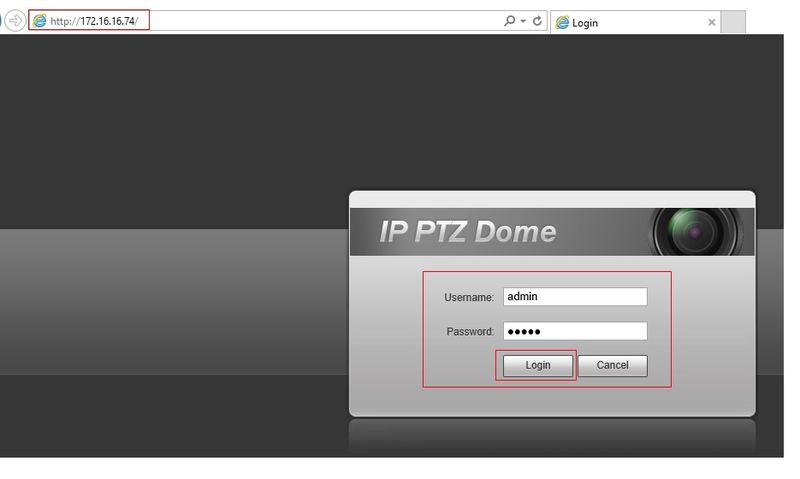
1. Login to your PTZ from the web interface.
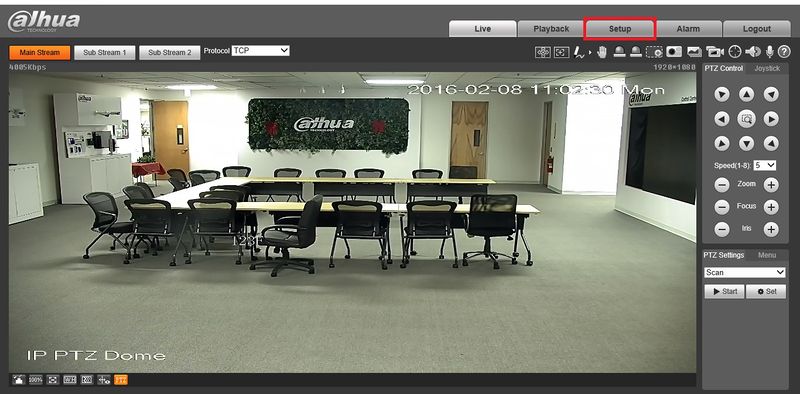
2. Click, "Setup"
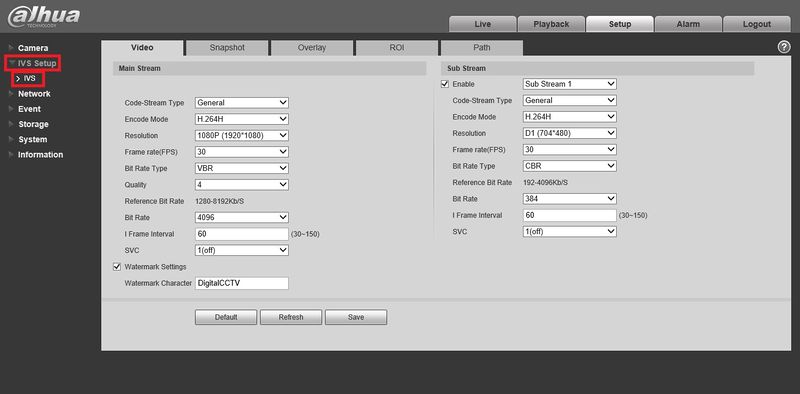
3. Click, "IVS Setup" and then, "IVS"
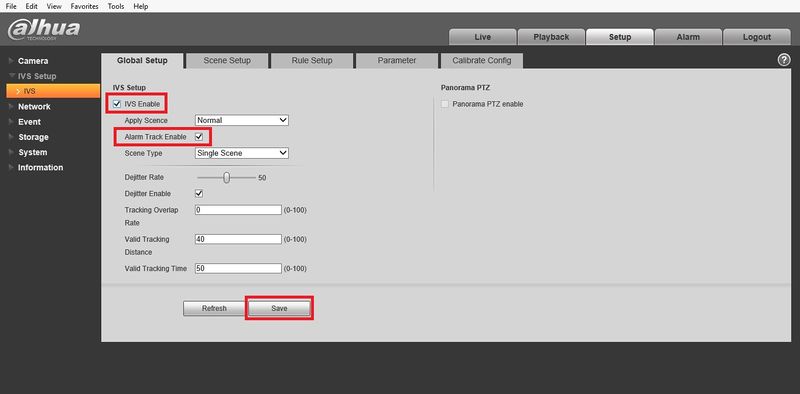
4. Check the box for, "IVS Enable" and "Alarm Track Enable" Then click, "Save"
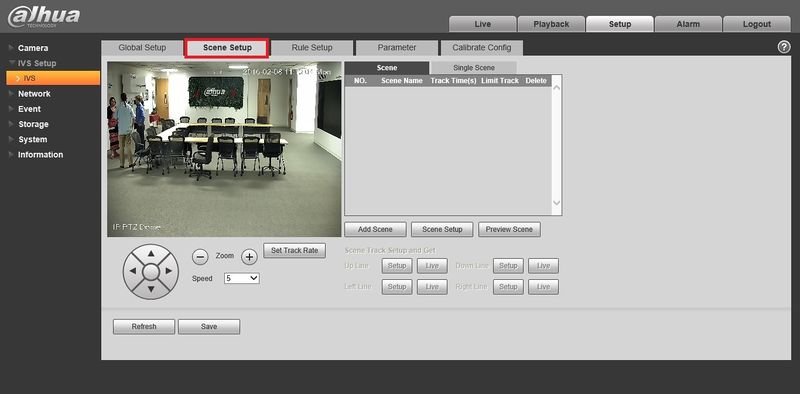
5. Click, "Scene Setup"
6. Position the PTZ, click, "Add Scene" and then, "Save"
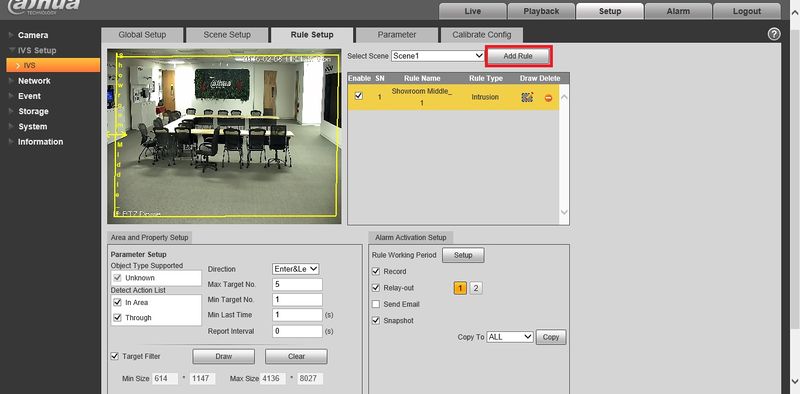
7. Click, "Rule Setup"
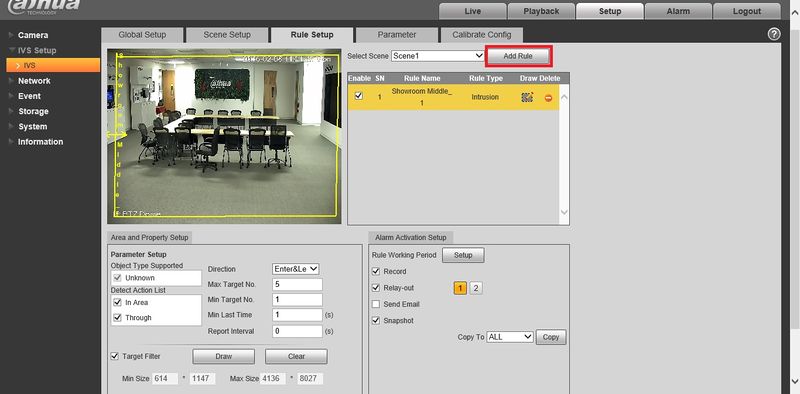
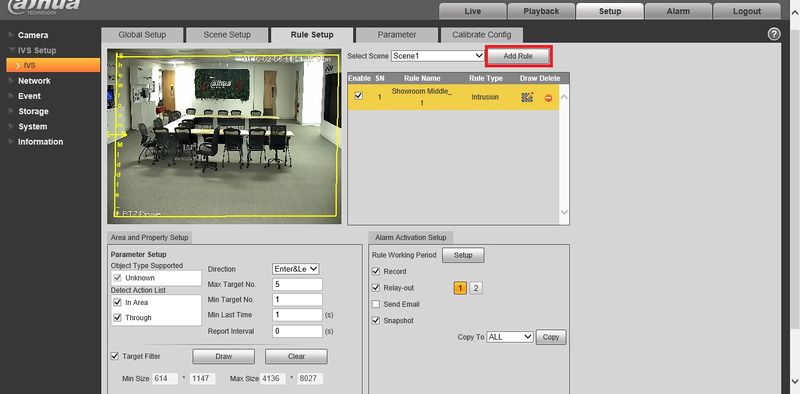
8. Click, "Add Rule"
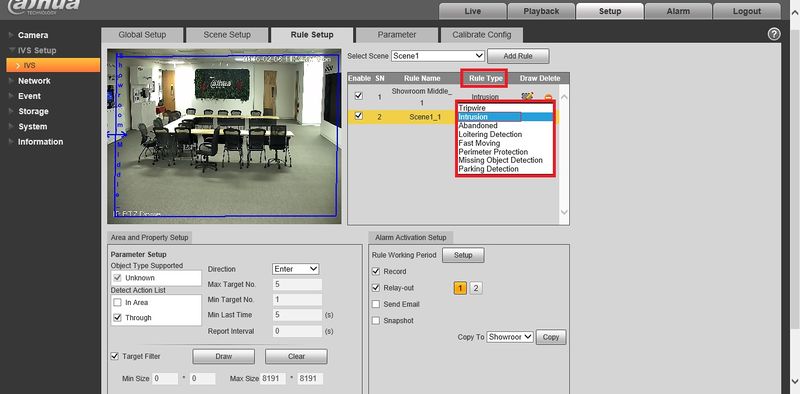
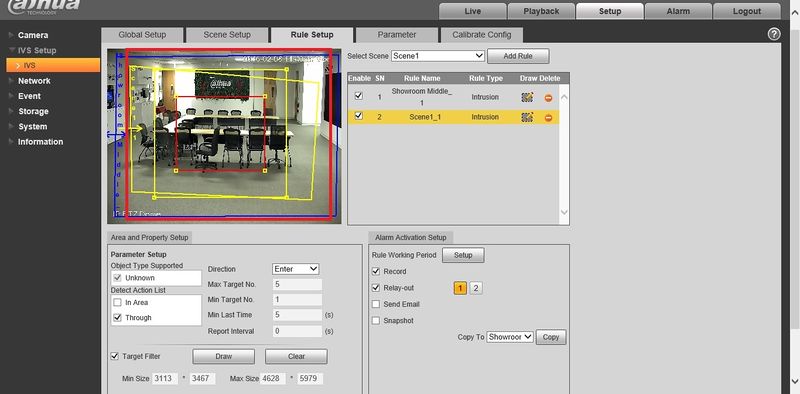
9. Click the rule under, "Rule Type" and select the type of rule you wish to create. For this example we used, "Intrusion"
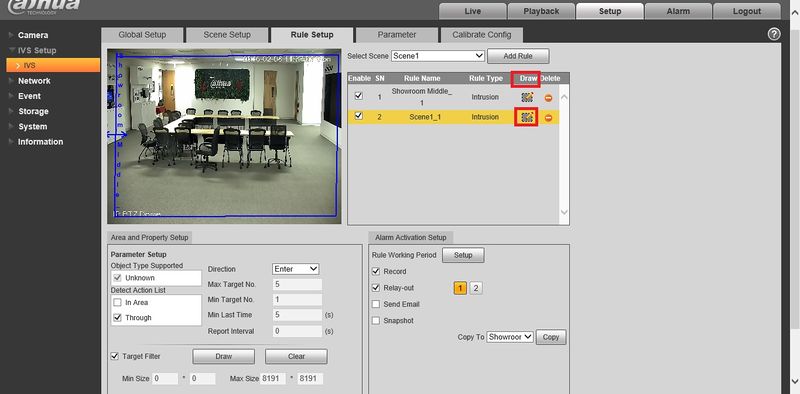
10. Click the image icon under, "Draw"
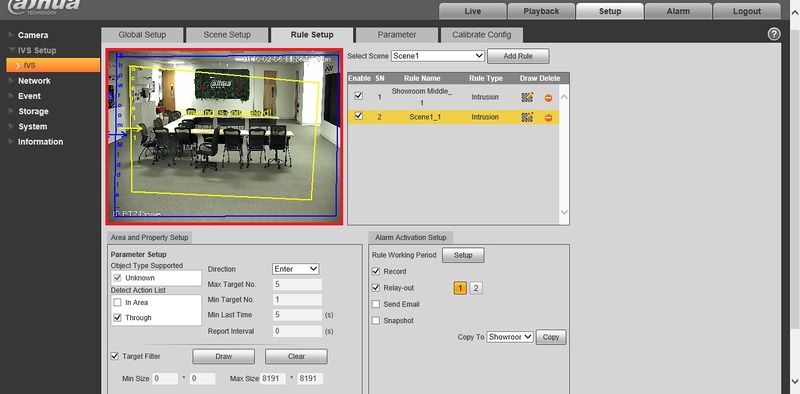
11. Draw the rule on the feed to the left.
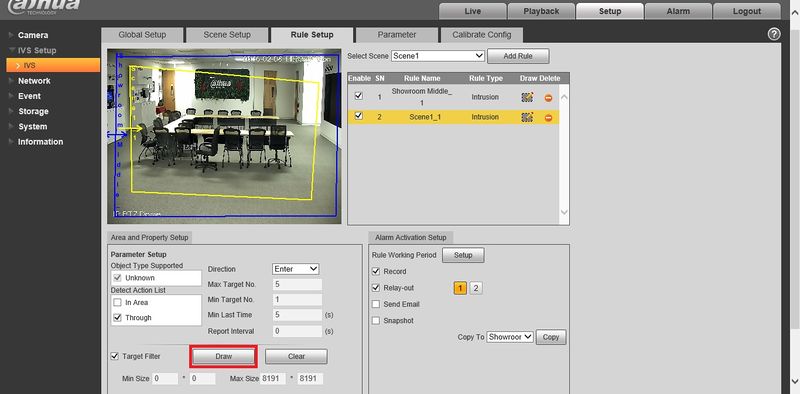
12. Next to, "Target Filter" click, "Draw"
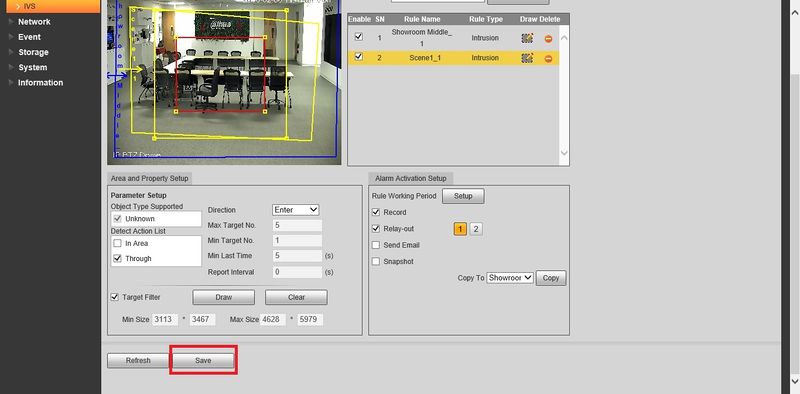
13. Create a box for the maximum (Yellow box), and the minimum (Red box) size that an object needs to be to detect.
14. Click, "Save"
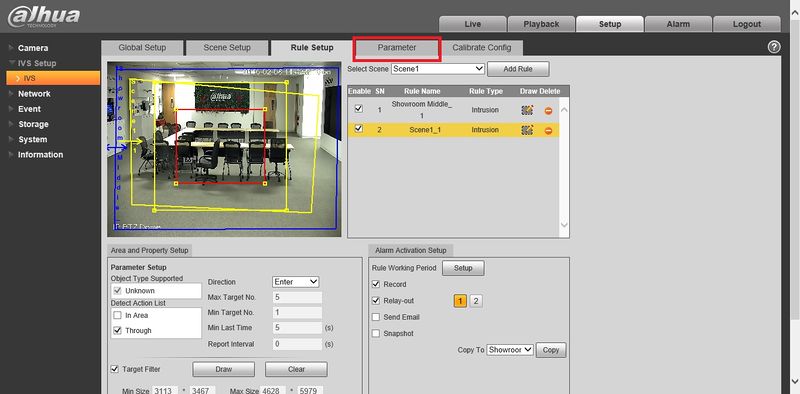
15. Click, "Parameter"
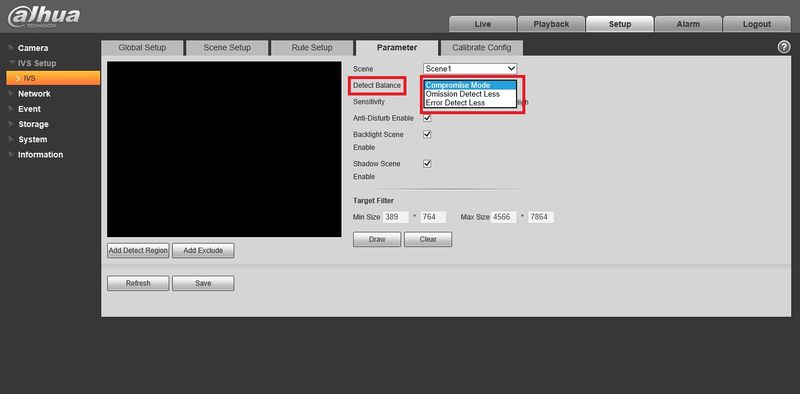
16. Select, "Compromise Mode" under, "Detect Balance"
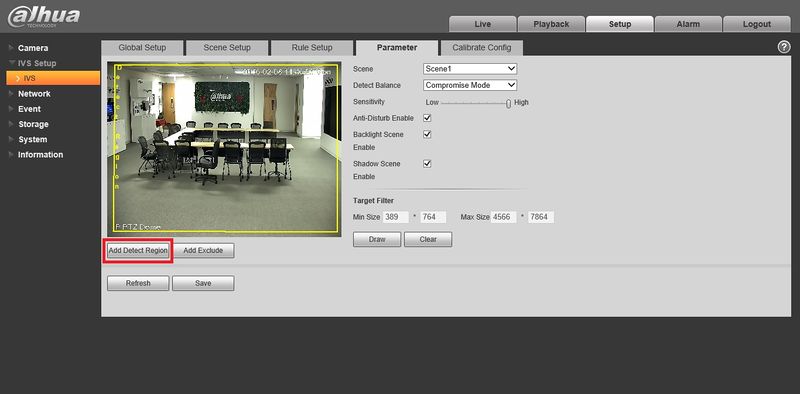
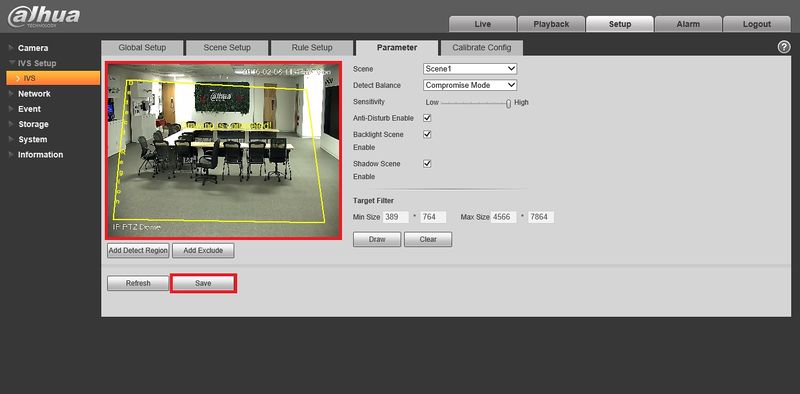
17. Click, "Add Detect Region"
18. Draw a box around the area you are to enable for the detect region, and click "Save"
How to Setup Multi Scene for SmartPSS 1.16
Video Instructions
Prerequisites
- SmartPSS version 1.16
- PTZ connected to the network
Step by Step Instructions
1. From the home menu select live view.
2. From the right hand side select to highlight the PTZ device -> Right click on highlighted PTZ -> Select IVS Channel Config.
