Difference between revisions of "PasswordReset"
| (19 intermediate revisions by 2 users not shown) | |||
| Line 1: | Line 1: | ||
| − | ===Forgot local | + | ==Password Reset on Local GUI== |
| + | |||
| + | ===Description=== | ||
| + | This article is to show user how to do password reset from local GUI. | ||
| + | |||
| + | ===Prerequisites=== | ||
| + | 1. Dahua Recorder | ||
| + | |||
| + | 2. Monitor that connected to Dahua Recorder | ||
| + | |||
| + | 3. Mouse to control local output | ||
| + | |||
| + | ===Step by step instruction=== | ||
| + | |||
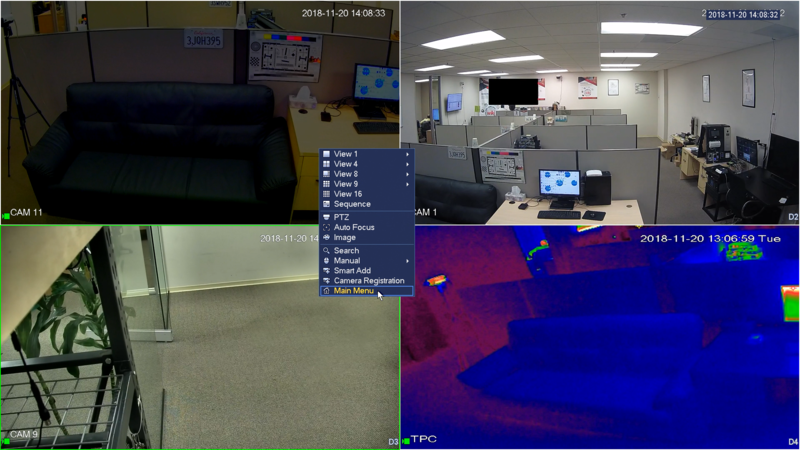
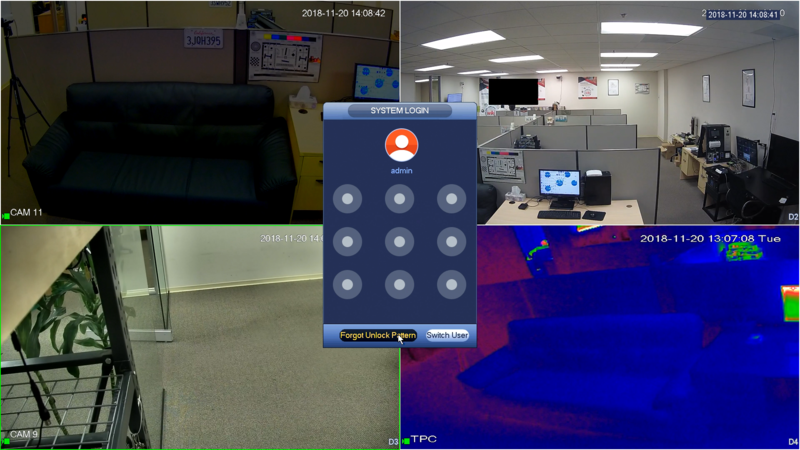
| + | 1. Right click from live view screen to locate the login screen of recorder. If you have pattern setup, Click on '''Forgot Unlock Pattern'''. | ||
| + | |||
| + | [[file:pri1.png|800px]] | ||
| + | |||
| + | [[file:pri2.png|800px]] | ||
| + | |||
| + | 2. Click on '''Forget Password''' icon. | ||
| + | |||
| + | [[file:pri3.png|800px]] | ||
| + | |||
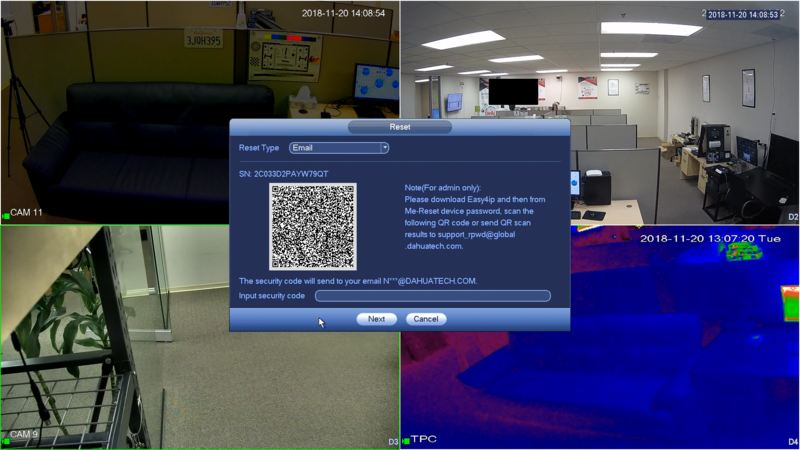
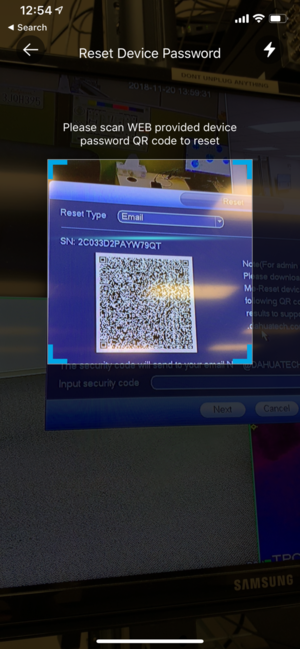
| + | 3. Using iDMSS or gDMSS app, Click '''More''' > '''Reset Device Password''' > Scan the QR code on the local recorder GUI. | ||
| + | |||
| + | [[file:pri4.png|800px]] | ||
| + | |||
| + | [[file:pri14.PNG|300px]] | ||
| + | |||
| + | [[file:pri15.PNG|300px]] | ||
| + | |||
| + | NOTE: If user never register their email to the recorder at initial setup, user then will be prompted to enter their email address. | ||
| + | |||
| + | [[file:pti12.png|800px]] | ||
| + | |||
| + | [[file:pri13.png|800px]] | ||
| + | |||
| + | 4. You will receive notification '''Successfully Reset Password''', Click '''Ok'''. And then the security code will be sent to the email that registered on the recorder. | ||
| + | |||
| + | [[file:pri16.PNG|300px]] | ||
| + | |||
| + | 5. Locate the secure code in the email. | ||
| + | |||
| + | [[file:pri17.PNG|300px]] | ||
| + | |||
| + | 6. Enter the secure code. Click '''Next'''. | ||
| + | |||
| + | [[file:pri5.png|800px]] | ||
| + | |||
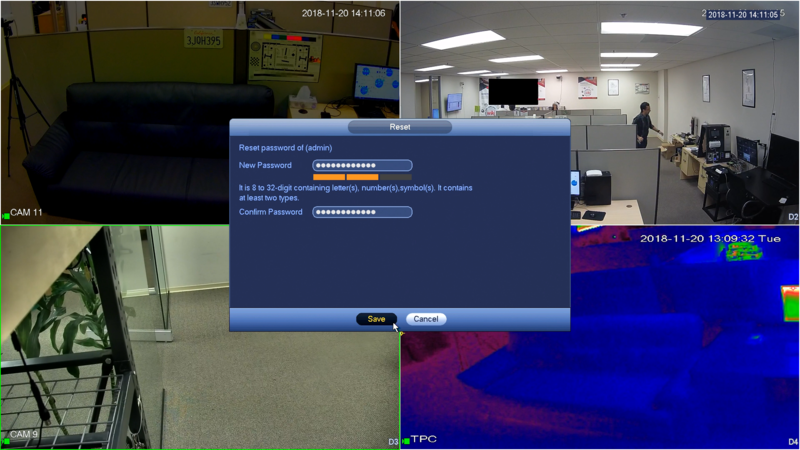
| + | 7. If the secure code is valid, the reset page will pop up, and then enter the new password for recorder and confirm. Click '''Save'''. | ||
| + | |||
| + | [[file:pri6.png|800px]] | ||
| + | |||
| + | [[file:pri7.png|800px]] | ||
| + | |||
| + | 8. User will be prompt to sync the new password to the connected camera. It is highly recommended to click Yes to ensure camera will have the uniform password and stay connected to the recorder. | ||
| + | |||
| + | [[file:pri9.png|800px]] | ||
| + | |||
| + | 9. New recorder password will be sync with the connected cameras. | ||
| + | |||
| + | [[file:pri10.png|800px]] | ||
| + | |||
| + | 10. Click '''Finished''' when it's done. New password is now applied to the recorder and connected cameras. | ||
| + | |||
| + | [[file:pri11.png|800px]] | ||
| + | |||
| + | |||
| + | |||
| + | |||
| + | |||
| + | |||
| + | |||
| + | <!-- | ||
| + | |||
Please contact your local service engineer or our sales person for help. We can guide you to solve this problem. | Please contact your local service engineer or our sales person for help. We can guide you to solve this problem. | ||
| − | |||
==Initialization== | ==Initialization== | ||
| Line 16: | Line 90: | ||
| − | |||
| Line 238: | Line 311: | ||
Refer to Chapter 1.5. | Refer to Chapter 1.5. | ||
| + | --> | ||
| − | + | [[Category:Troubleshoot]] | |
| − | + | [[Category:FAQ]] | |
| − | + | [[Category:How To]] | |
| − | + | [[Category:NVR Interface]] | |
| − | + | [[Category:Password Reset]] | |
| − | |||
| − | |||
| − | |||
| − | |||
| − | |||
| − | |||
| − | |||
| − | |||
| − | |||
| − | |||
| − | |||
| − | |||
| − | |||
| − | |||
| − | |||
| − | |||
| − | |||
| − | |||
| − | |||
| − | |||
| − | |||
| − | |||
| − | |||
| − | |||
| − | |||
| − | |||
| − | |||
| − | |||
| − | |||
| − | |||
| − | |||
| − | |||
| − | |||
Latest revision as of 19:31, 2 August 2019
Contents
Password Reset on Local GUI
Description
This article is to show user how to do password reset from local GUI.
Prerequisites
1. Dahua Recorder
2. Monitor that connected to Dahua Recorder
3. Mouse to control local output
Step by step instruction
1. Right click from live view screen to locate the login screen of recorder. If you have pattern setup, Click on Forgot Unlock Pattern.
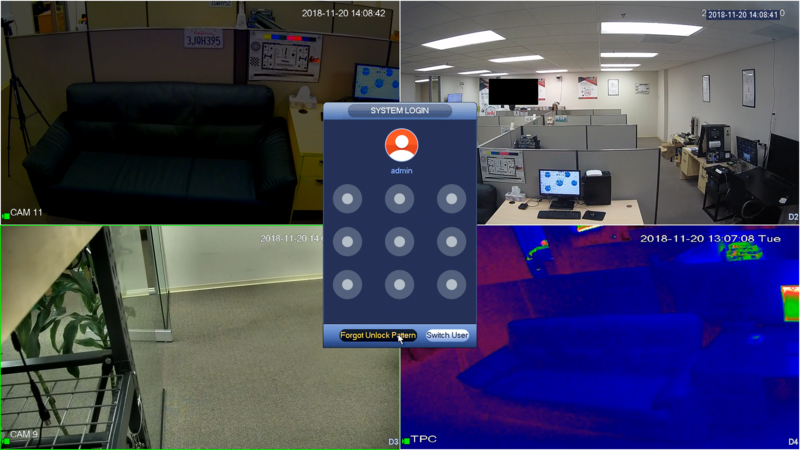
2. Click on Forget Password icon.
3. Using iDMSS or gDMSS app, Click More > Reset Device Password > Scan the QR code on the local recorder GUI.
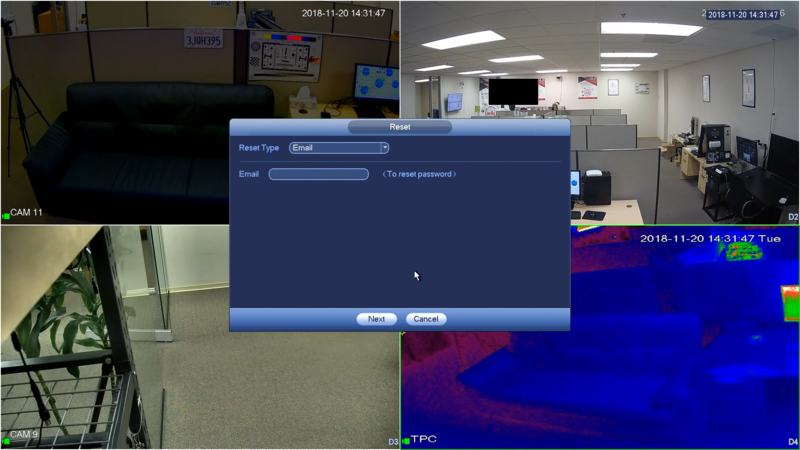
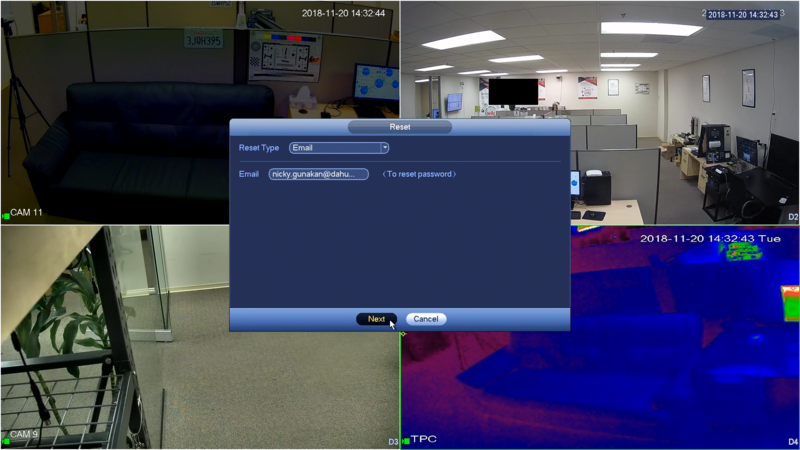
NOTE: If user never register their email to the recorder at initial setup, user then will be prompted to enter their email address.
4. You will receive notification Successfully Reset Password, Click Ok. And then the security code will be sent to the email that registered on the recorder.
5. Locate the secure code in the email.
6. Enter the secure code. Click Next.
7. If the secure code is valid, the reset page will pop up, and then enter the new password for recorder and confirm. Click Save.
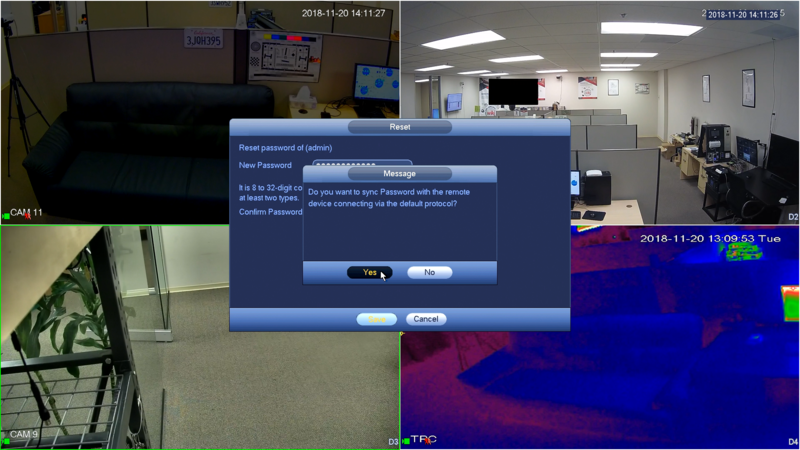
8. User will be prompt to sync the new password to the connected camera. It is highly recommended to click Yes to ensure camera will have the uniform password and stay connected to the recorder.
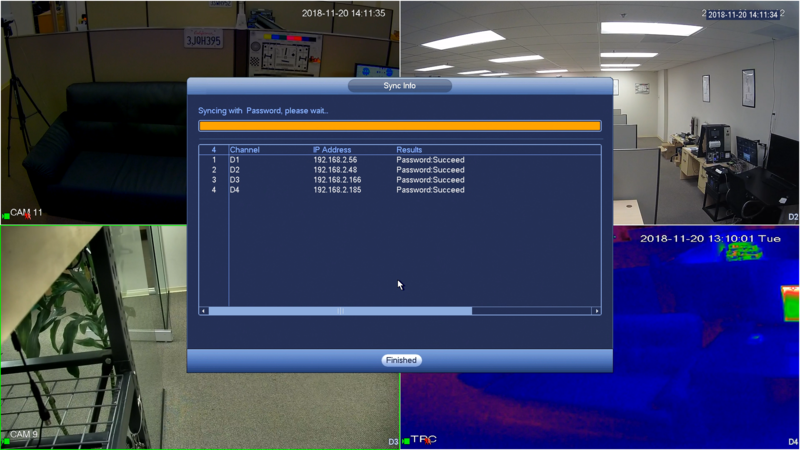
9. New recorder password will be sync with the connected cameras.
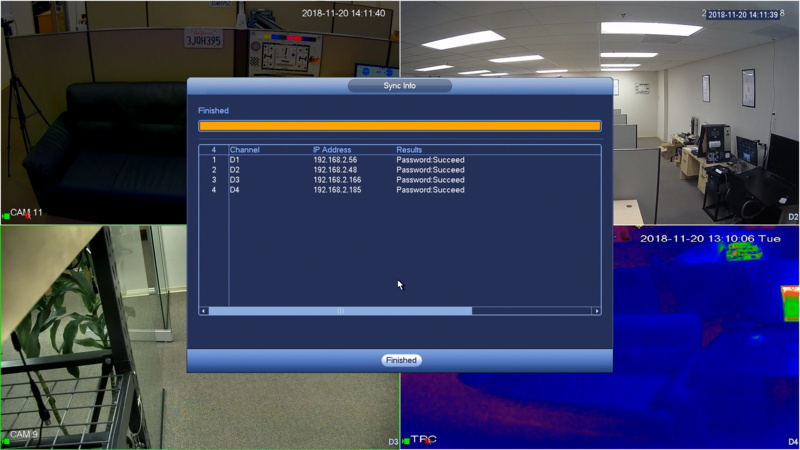
10. Click Finished when it's done. New password is now applied to the recorder and connected cameras.
