Difference between revisions of "NVR/Install CD ROM Drive"
m (JP moved page NVRCD to NVR/Install CD ROM Drive) |
|||
| (6 intermediate revisions by 3 users not shown) | |||
| Line 1: | Line 1: | ||
==How to install CD-ROM== | ==How to install CD-ROM== | ||
| − | Link to Download PDF Manual: [[Media:Burner_Installation_with_8_HDD_Bracket.doc Click Here]] | + | Link to Download PDF Manual: [[Media:Burner_Installation_with_8_HDD_Bracket.doc | Click Here]] |
===General Description=== | ===General Description=== | ||
| Line 12: | Line 12: | ||
1. First install bracket ears with the burners. | 1. First install bracket ears with the burners. | ||
| − | [[file:CDInstall1.jpg]] | + | |
| + | [[file:CDInstall1.jpg|800px]] | ||
| + | |||
| + | [[file:CDInstall2.jpg|800px]] | ||
| + | |||
| + | [[file:CDInstall3.jpg|800px]] | ||
| + | |||
| + | [[file:CDInstall4.jpg|800px]] | ||
| + | |||
| + | |||
2. Then install the burner on the bottom. Please make sure the bracket direction. | 2. Then install the burner on the bottom. Please make sure the bracket direction. | ||
| + | |||
| + | [[file:CDInstall5.jpg|800px]] | ||
| + | |||
| + | [[file:CDInstall6.jpg|800px]] | ||
| + | |||
| + | |||
3. After your installation, please check with position. You can move the burner to fit the front panel. | 3. After your installation, please check with position. You can move the burner to fit the front panel. | ||
===Further Information=== | ===Further Information=== | ||
| − | If you still have any problems about these functions, please contact with our engineer | + | If you still have any problems about these functions, please contact with our engineer. |
| + | [[Category:NVR]] | ||
Latest revision as of 19:19, 1 July 2016
Contents
How to install CD-ROM
Link to Download PDF Manual: Click Here
General Description
For our new HDD bracket, you can use it for 8 HDDs. And you can also use it for 6 HDDs and 1 burner. In the following, you can see the installation procedure.
Burner Installation
Please check with HDD bracket. You can find the ears of bracket in the accessory box.
After your confirmation, please check with the following installation procedures.
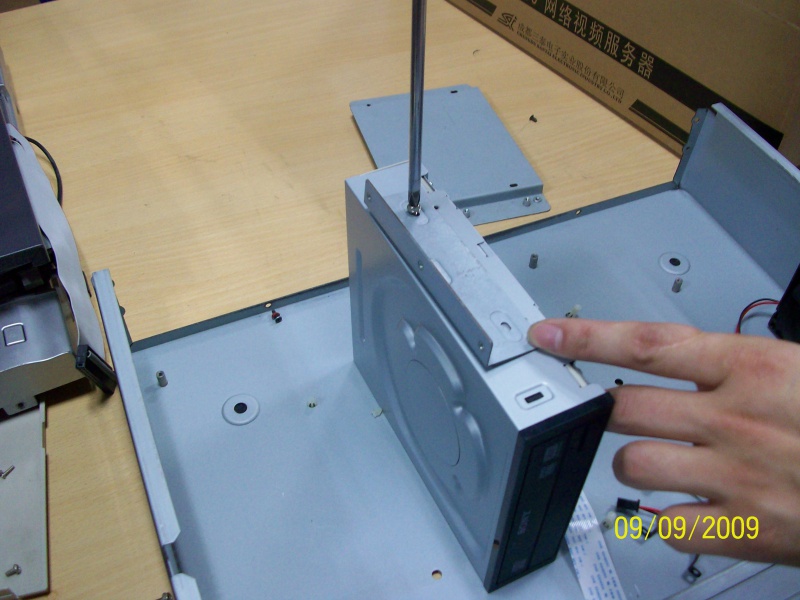
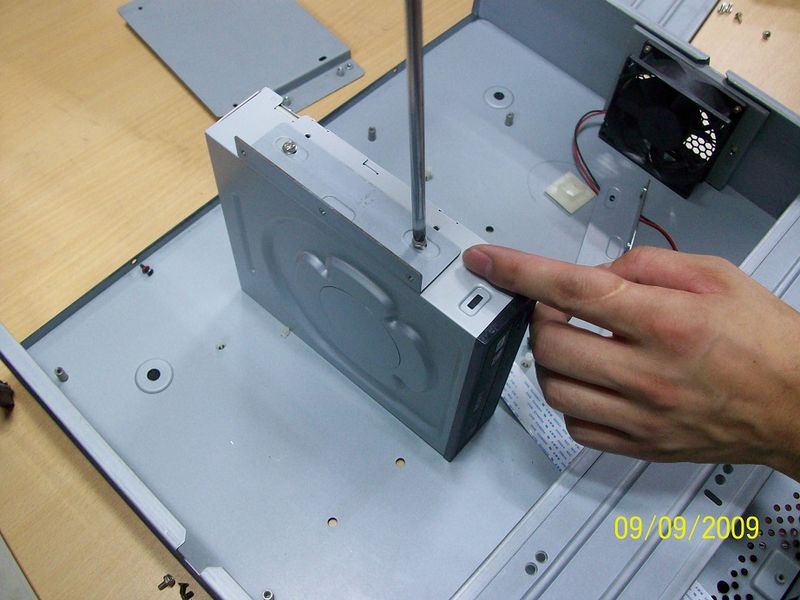
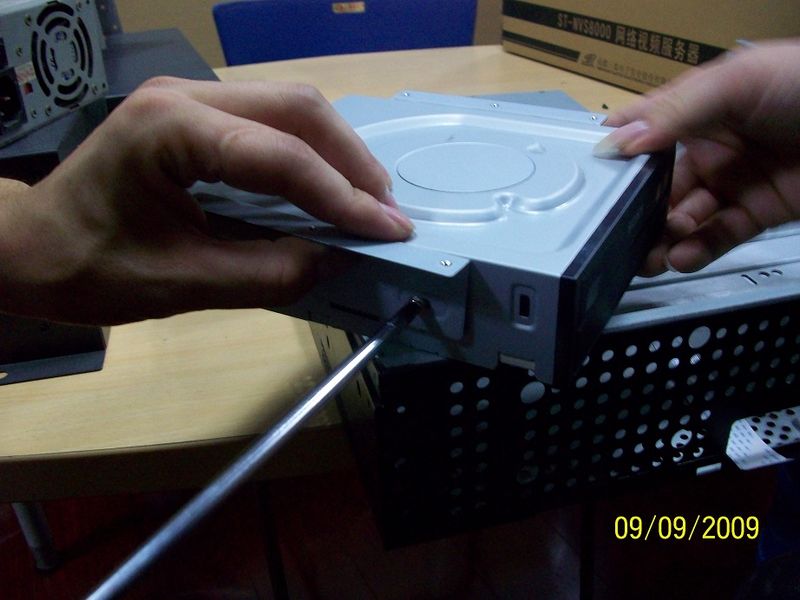
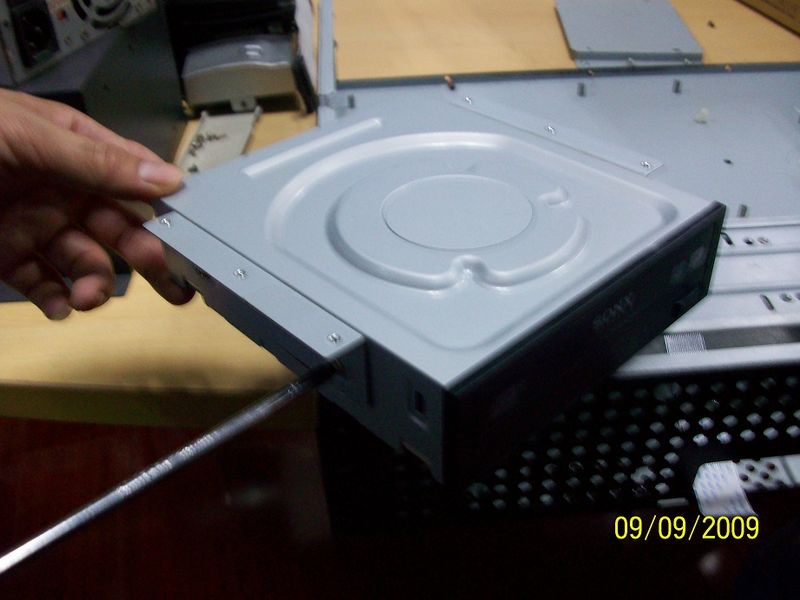
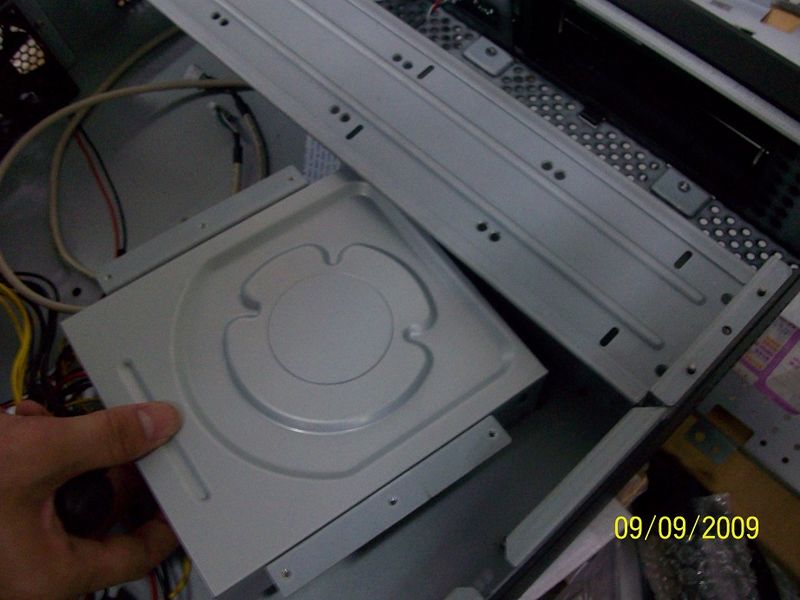
1. First install bracket ears with the burners.
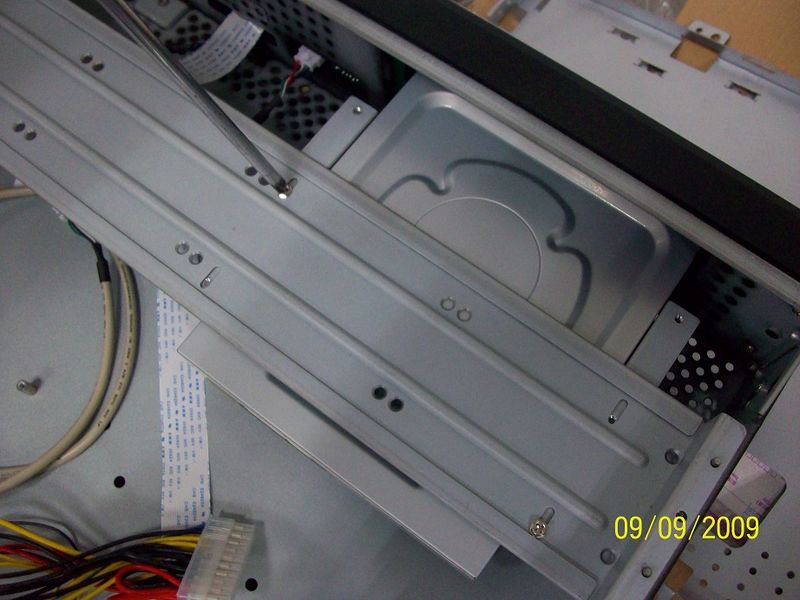
2. Then install the burner on the bottom. Please make sure the bracket direction.
3. After your installation, please check with position. You can move the burner to fit the front panel.
Further Information
If you still have any problems about these functions, please contact with our engineer.
