Difference between revisions of "DSS Windows/Express/Add User"
(Created page with "=How to Add a User to DSS Express= ==Description== ==Prerequisites== ==Video Instructions== <embedvideo service="youtube">https://www.youtube.com/watch?v=EXAMPLE</embedvideo>...") |
|||
| (2 intermediate revisions by the same user not shown) | |||
| Line 1: | Line 1: | ||
=How to Add a User to DSS Express= | =How to Add a User to DSS Express= | ||
| + | |||
==Description== | ==Description== | ||
| + | This article will cover how to add a new user to DSS Express | ||
| + | |||
==Prerequisites== | ==Prerequisites== | ||
| − | + | * DSS Express software installed on a Windows computer | |
| − | + | ||
==Step by Step Instructions== | ==Step by Step Instructions== | ||
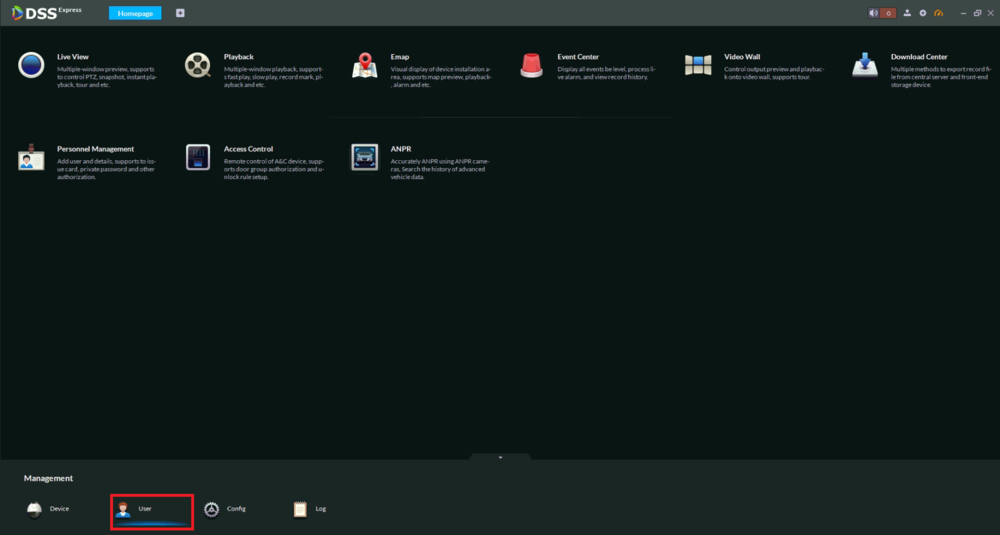
| − | 1. | + | 1. From the Homepage, select "User" at the bottom, under "Management". |
| − | [[File: | + | |
| + | [[File:DSSExpressAddUser1.png|1000px]] | ||
| + | |||
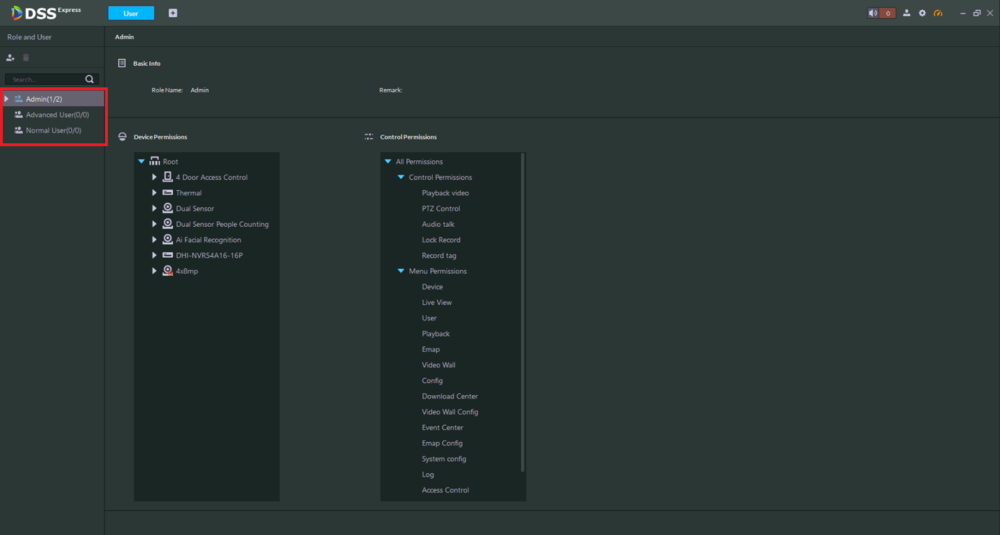
| + | 2. Select the user type from the list on the left (Admin, Advanced User, Normal User). | ||
| + | |||
| + | [[File:DSSExpressAddUser2.png|1000px]] | ||
| + | |||
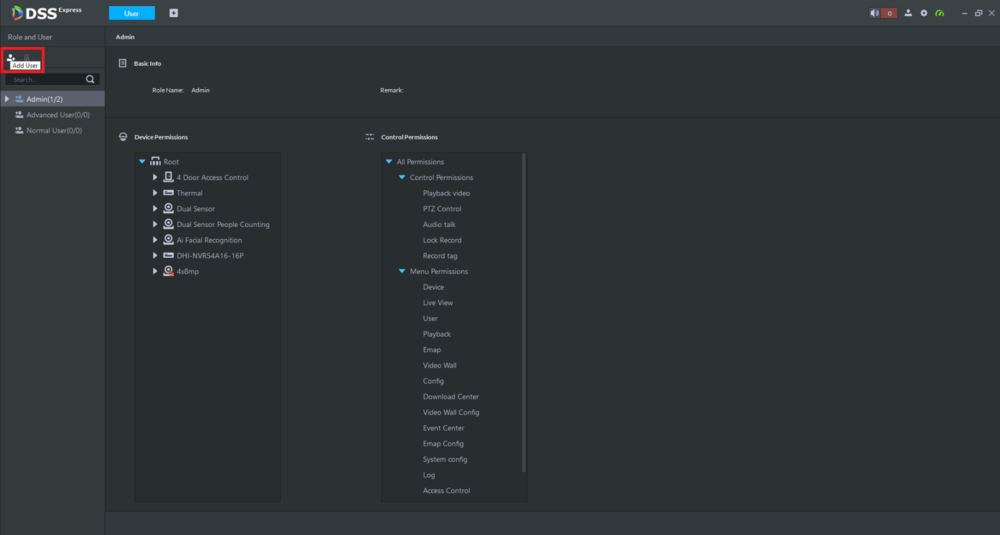
| + | 3. Select the "Add User" icon at the top left. | ||
| + | |||
| + | [[File:DSSExpressAddUser3.png|1000px]] | ||
| + | |||
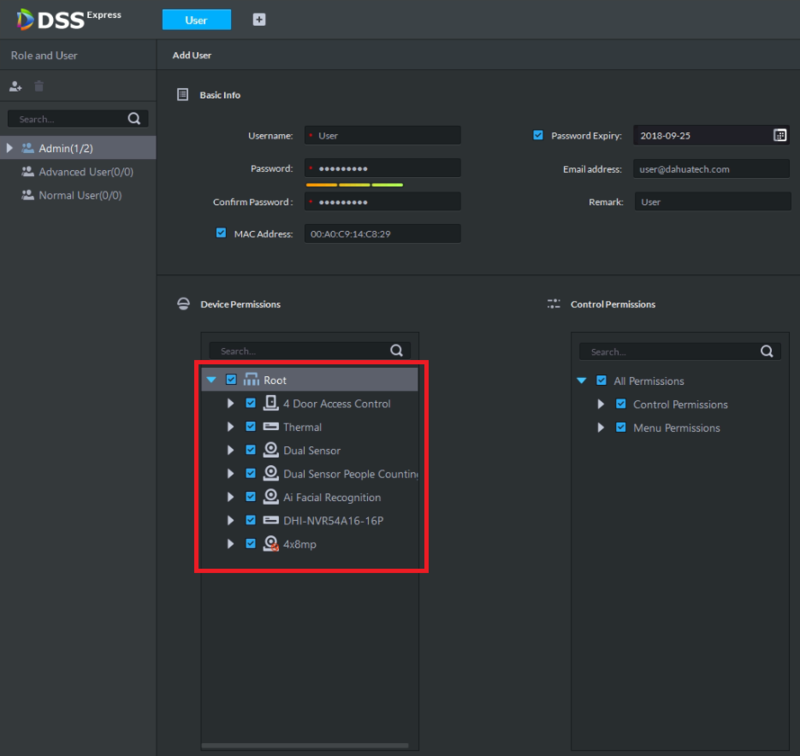
| + | 4. Fill in the required fields of "Username", "Password", and "Confirm Password". | ||
| + | <br>To ensure a higher level of security please use passwords with these requirements: | ||
| + | *At least 8 characters long | ||
| + | *At least one lower case letter, e.g. "a" | ||
| + | *At least one upper case letter, e.g. "A" | ||
| + | *At least one number, e.g. "1" | ||
| + | *At least one symbol, e.g. "!" | ||
| + | |||
| + | Example: HIgh91!? | ||
| + | |||
| + | You can check the box for "Password Expiry" if you want to force the user to change their password on or after a certain date. Select a date by clicking on the calendar button. | ||
| + | <br>You can also input the user's MAC address of the computer they will be using the access DSS Express from, by checking the "MAC Address" box and filling in their MAC address. | ||
| + | <br>Additionally, you can add the user's email address in the "Email address" field and a note about the user's account in the "Remark" field. | ||
| + | |||
| + | [[File:DSSExpressAddUser4.png|800px]] | ||
| + | |||
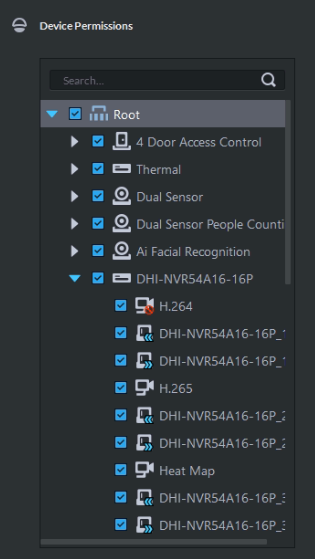
| + | 5. Under "Device Permissions" check the boxes next to each device you want this account to have access to. (Select the arrow next to each device to see the list of devices within that device.) | ||
| + | |||
| + | [[File:DSSExpressAddUser5.png|800px]] | ||
| + | |||
| + | [[File:DSSExpressAddUser6.png|400px]] | ||
| + | |||
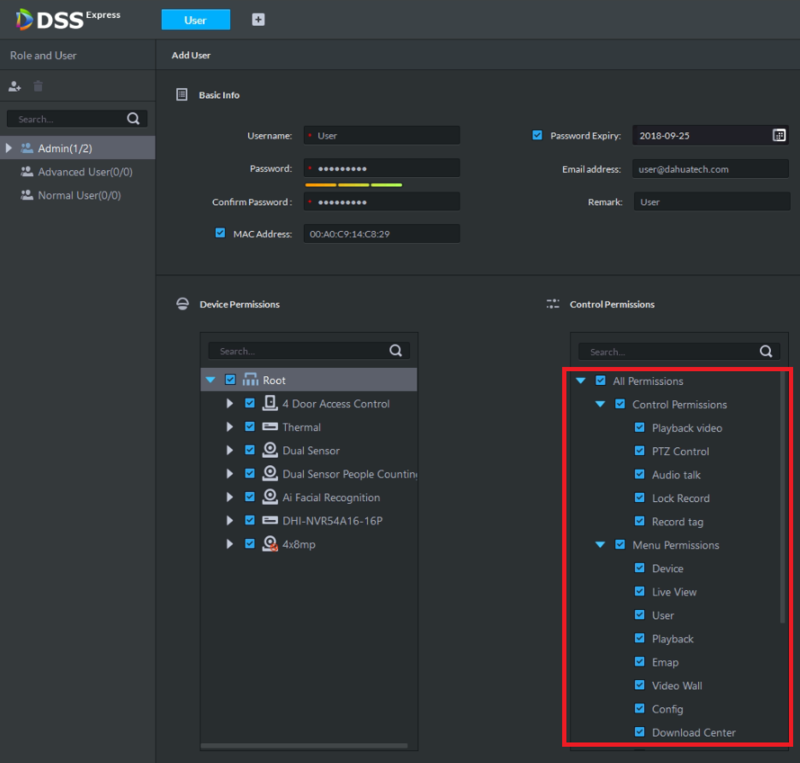
| + | 6. Under "Control Permissions" check the boxes next to each permission you want the user to have. | ||
| + | |||
| + | [[File:DSSExpressAddUser7.png|800px]] | ||
| + | |||
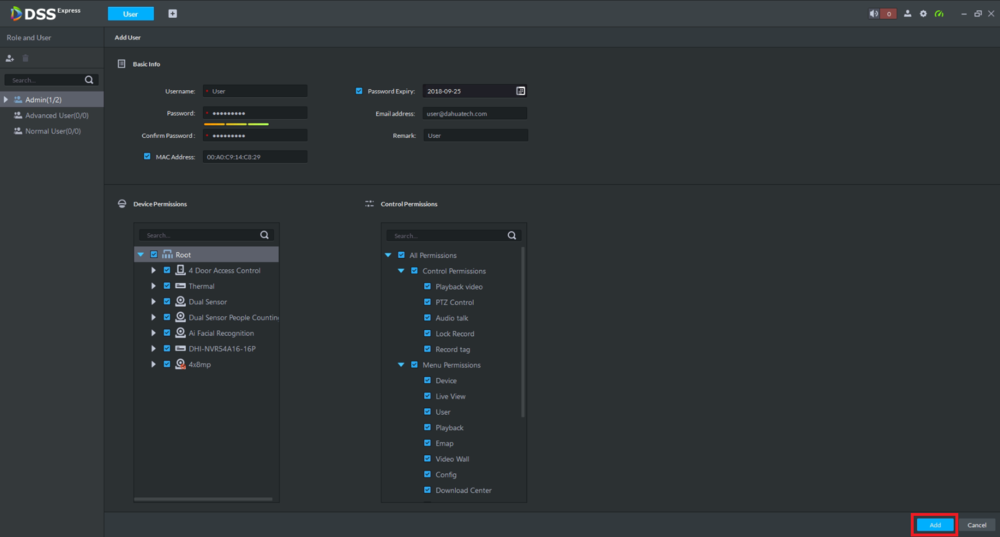
| + | 7. Select "Add" at the bottom of the page to save the new user. | ||
| + | |||
| + | [[File:DSSExpressAddUser8.png|1000px]] | ||
| + | |||
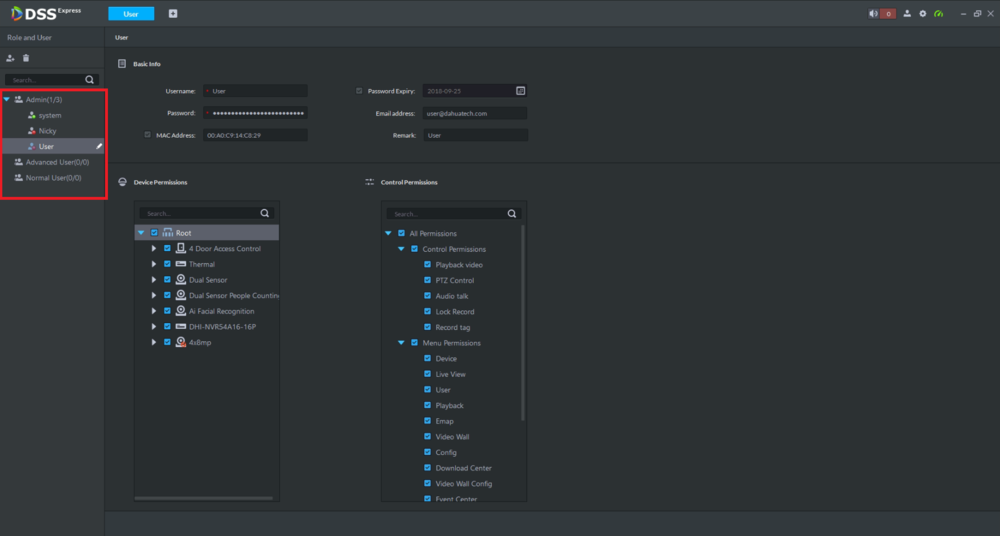
| + | 8. You should see the newly added user on the left in the user list. | ||
| + | |||
| + | [[File:DSSExpressAddUser9.png|1000px]] | ||
Latest revision as of 23:59, 11 July 2018
Contents
How to Add a User to DSS Express
Description
This article will cover how to add a new user to DSS Express
Prerequisites
- DSS Express software installed on a Windows computer
Step by Step Instructions
1. From the Homepage, select "User" at the bottom, under "Management".
2. Select the user type from the list on the left (Admin, Advanced User, Normal User).
3. Select the "Add User" icon at the top left.
4. Fill in the required fields of "Username", "Password", and "Confirm Password".
To ensure a higher level of security please use passwords with these requirements:
- At least 8 characters long
- At least one lower case letter, e.g. "a"
- At least one upper case letter, e.g. "A"
- At least one number, e.g. "1"
- At least one symbol, e.g. "!"
Example: HIgh91!?
You can check the box for "Password Expiry" if you want to force the user to change their password on or after a certain date. Select a date by clicking on the calendar button.
You can also input the user's MAC address of the computer they will be using the access DSS Express from, by checking the "MAC Address" box and filling in their MAC address.
Additionally, you can add the user's email address in the "Email address" field and a note about the user's account in the "Remark" field.
5. Under "Device Permissions" check the boxes next to each device you want this account to have access to. (Select the arrow next to each device to see the list of devices within that device.)
6. Under "Control Permissions" check the boxes next to each permission you want the user to have.
7. Select "Add" at the bottom of the page to save the new user.
8. You should see the newly added user on the left in the user list.
