Difference between revisions of "DSS Windows/Express/Emap"
(Created page with "=How use EMap= ==Description== ==Prerequisites== ==Video Instructions== <embedvideo service="youtube">https://www.youtube.com/watch?v=EXAMPLE</embedvideo> ==Step by Step Instr...") |
|||
| (One intermediate revision by the same user not shown) | |||
| Line 1: | Line 1: | ||
=How use EMap= | =How use EMap= | ||
| + | |||
==Description== | ==Description== | ||
| + | This article will cover how to setup and use an Emap in DSS Express | ||
| + | |||
==Prerequisites== | ==Prerequisites== | ||
| − | + | * DSS Express software installed on a Windows computer | |
| − | + | ||
==Step by Step Instructions== | ==Step by Step Instructions== | ||
| − | 1. | + | 1. From the Homepage, select "Emap". |
| − | [[File: | + | |
| + | [[File:DSSExpressEmap1.png|1000px]] | ||
| + | |||
| + | 2. Either select the Plus "+" button on the left or the word "here" in the center | ||
| + | |||
| + | [[File:DSSExpressEmap2.png|1000px]] | ||
| + | |||
| + | 3. Enter the name of the location in the "Name" field | ||
| + | <br>Select the folder icon in the "Picture" field and navigate to the image you want to use for the map | ||
| + | <br>(Note: Images can only be PNG, JPG, or JPEG format) | ||
| + | <br>Select "OK" when you are done | ||
| + | |||
| + | [[File:DSSExpressEmap3.png|400px]] | ||
| + | |||
| + | 4. Select the cameras for this location on the left and drag them onto the map where they are physically located | ||
| + | |||
| + | [[File:DSSExpressEmap4.png|1000px]] | ||
| + | |||
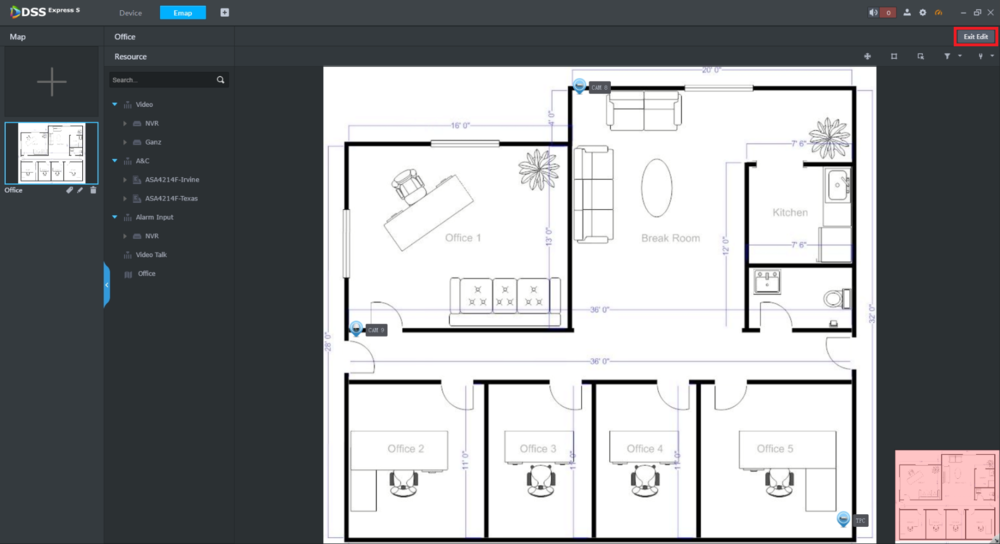
| + | 5. When you are done adding cameras to the map, select "Exit Edit" at the top right | ||
| + | |||
| + | [[File:DSSExpressEmap5.png|1000px]] | ||
| + | |||
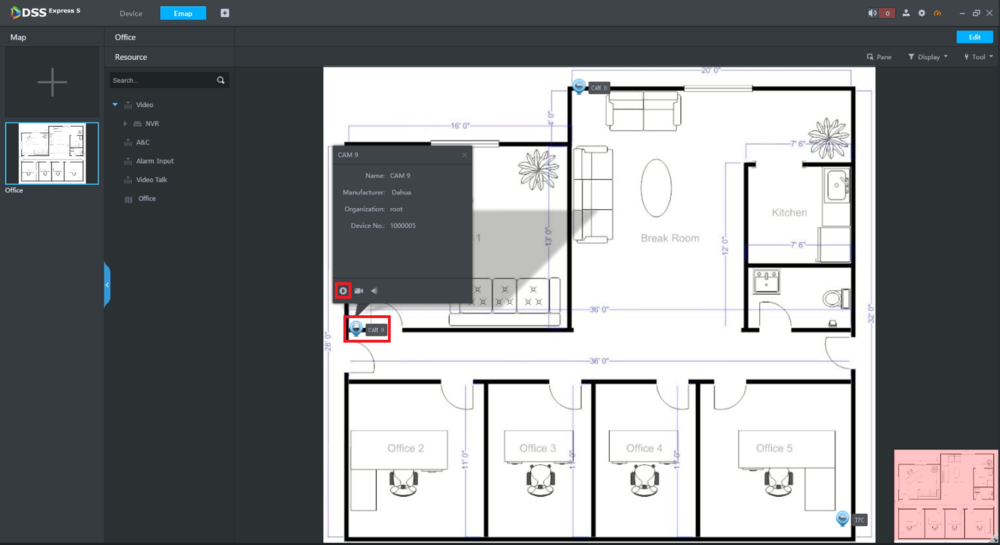
| + | 6. To view a camera feed, click on its icon on the map and select the Live Preview button | ||
| + | |||
| + | [[File:DSSExpressEmap6.png|1000px]] | ||
| + | |||
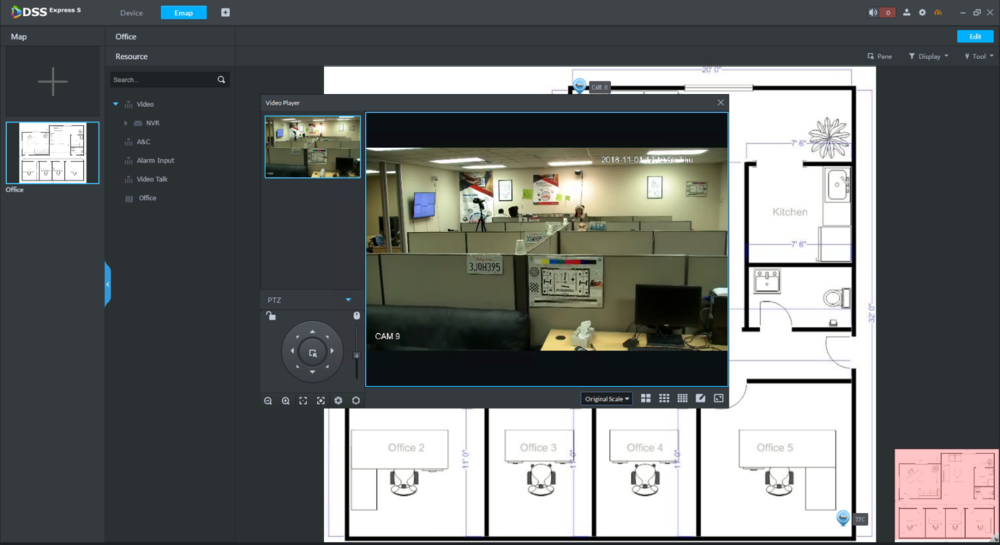
| + | 7. You will see a live preview of the selected camera | ||
| + | |||
| + | [[File:DSSExpressEmap7.png|1000px]] | ||
Latest revision as of 18:58, 2 November 2018
How use EMap
Description
This article will cover how to setup and use an Emap in DSS Express
Prerequisites
- DSS Express software installed on a Windows computer
Step by Step Instructions
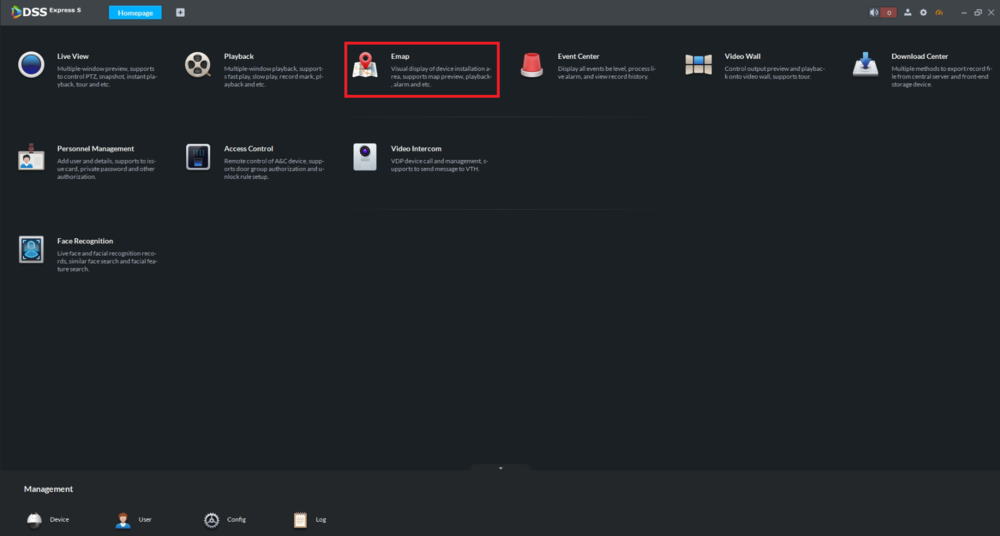
1. From the Homepage, select "Emap".
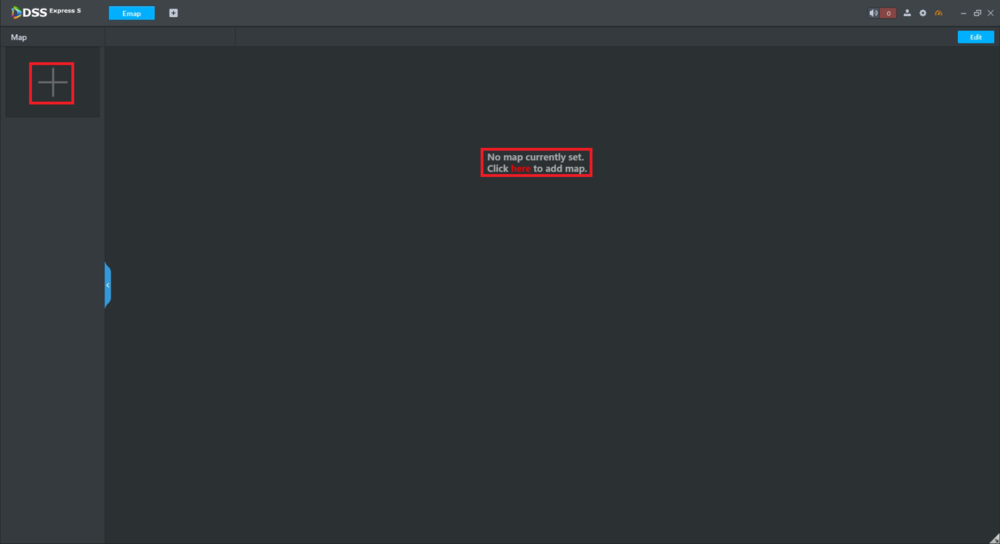
2. Either select the Plus "+" button on the left or the word "here" in the center
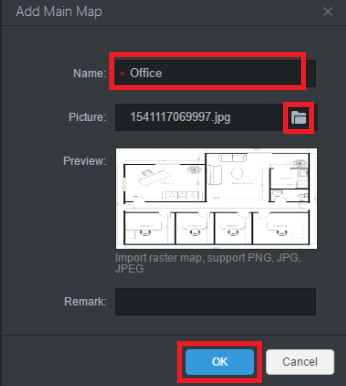
3. Enter the name of the location in the "Name" field
Select the folder icon in the "Picture" field and navigate to the image you want to use for the map
(Note: Images can only be PNG, JPG, or JPEG format)
Select "OK" when you are done
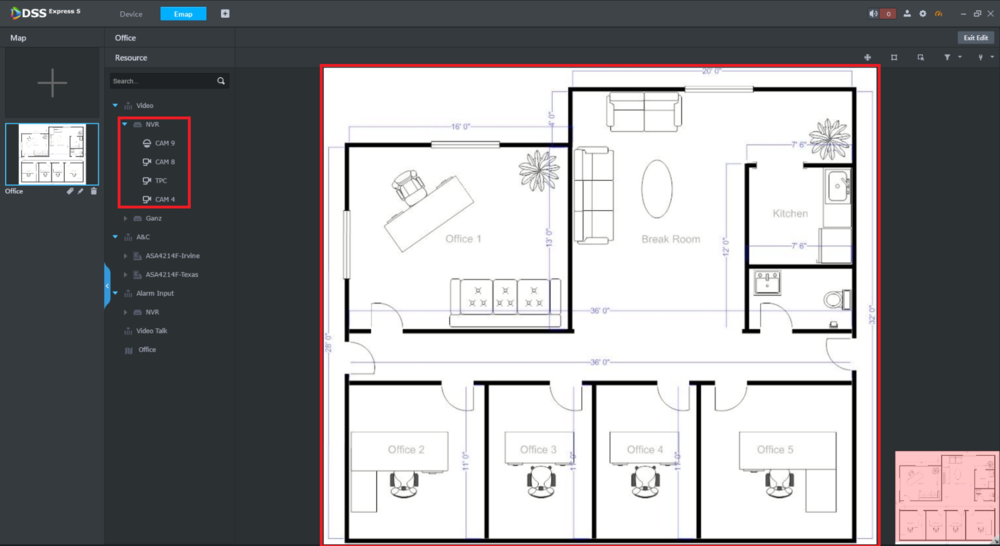
4. Select the cameras for this location on the left and drag them onto the map where they are physically located
5. When you are done adding cameras to the map, select "Exit Edit" at the top right
6. To view a camera feed, click on its icon on the map and select the Live Preview button
7. You will see a live preview of the selected camera
