Difference between revisions of "Date and Time/NTP"
(→Step by Step Instructions) |
|||
| (One intermediate revision by one other user not shown) | |||
| Line 16: | Line 16: | ||
* NTP server information (if other than default NTP) | * NTP server information (if other than default NTP) | ||
* Dahua device connected to network with active Internet connection | * Dahua device connected to network with active Internet connection | ||
| − | == | + | ==NTP Settings== |
| − | |||
<gallery> | <gallery> | ||
File:NTPSetupOldUI.jpg|Old UI | File:NTPSetupOldUI.jpg|Old UI | ||
Latest revision as of 19:29, 5 November 2019
Date and Time-NTP
Description
This guide will show how to adjust NTP (Network Time Protocol) settings on a Dahua device.
The NTP function allows a device that is connected to the Internet to sync time with a NTP server
By default most Dahua devices will use the following default NTP server information:
- Server - time.windows.com
- Port - 123
- Interval - sets how often to sync time with NTP server
Warning!
If you have video that needs to be backed up, please be sure to backup your recorded video before modifying the Date & Time on your recorder or cameras. It is strongly recommended that you format the hard drive after modifying the date and time to ensure accurate playback and recording.
Prerequisites
- Dahua device
- NTP server information (if other than default NTP)
- Dahua device connected to network with active Internet connection
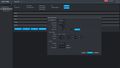
NTP Settings
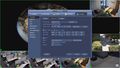
Old UI
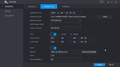
New UI
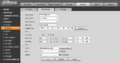
Web UI (Old)
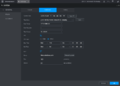
Web UI (New)
SmartPSS


