Difference between revisions of "SmartPSS/E-Map"
(→How to use E-Map) |
|||
| (8 intermediate revisions by 3 users not shown) | |||
| Line 1: | Line 1: | ||
| + | =='''NOTICE'''== | ||
| + | [https://dahuawiki.com/Discontinuation_of_SmartPSS Notice of Discontinuation of SmartPSS] | ||
| + | |||
==How to use E-Map== | ==How to use E-Map== | ||
| − | + | ===Prerequisites=== | |
| + | *SmartPSS V1.13 or higher | ||
| + | *PC | ||
| + | *Internet Connection | ||
| − | + | ===Video Instructions=== | |
| + | <embedvideo service="youtube">https://youtu.be/Ex71YA68HUk</embedvideo> | ||
| + | ===Step by Step Instructions=== | ||
| + | |||
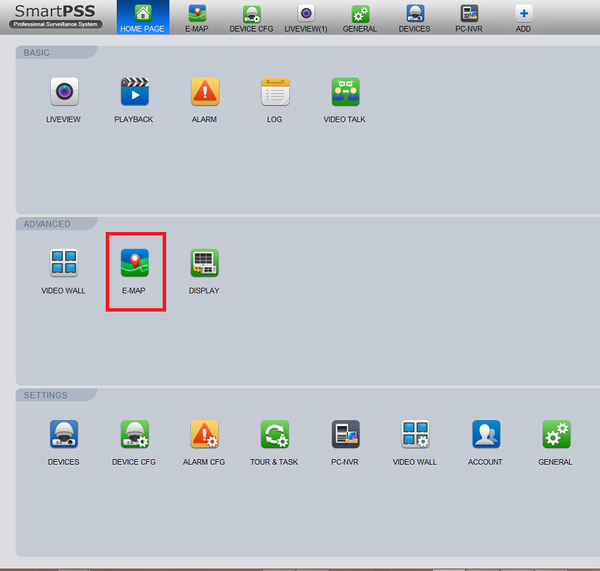
| + | 1) Select E-Map from Home Page | ||
[[File:emap_1.png|600px]] | [[File:emap_1.png|600px]] | ||
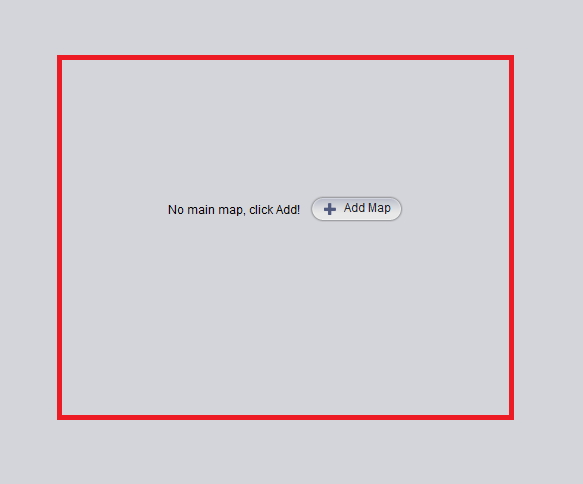
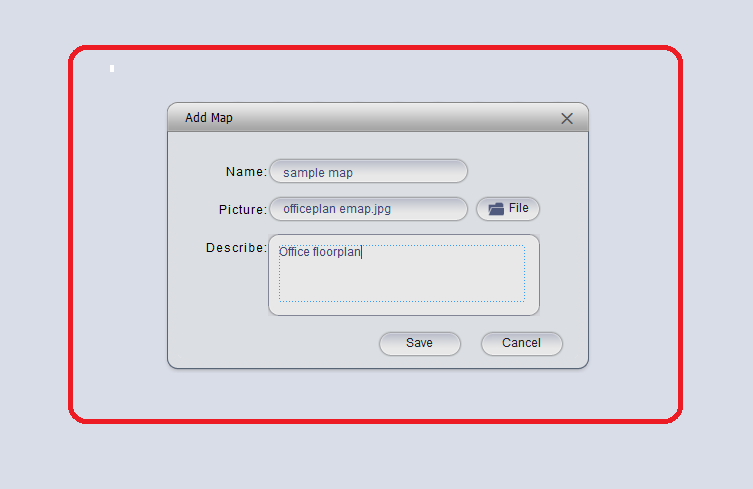
| − | + | 2) Select "Add Map" → Name Map → Find File of Map to be used → Map description → click "Save" and Map will be come into view. | |
[[File:emap_2.png|600px]] | [[File:emap_2.png|600px]] | ||
| Line 13: | Line 23: | ||
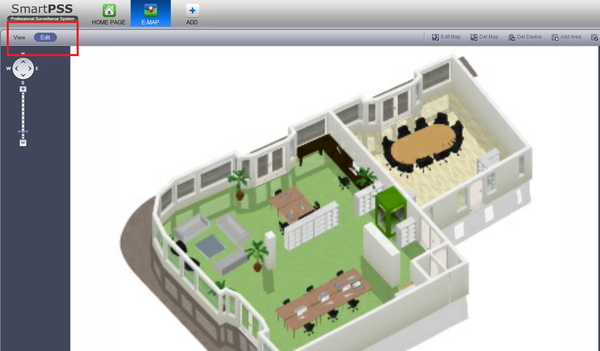
| − | + | 3) On the top left select the "Edit tab". This will allow to add cameras to the E-Map | |
[[File:emap_4.png|600px]] | [[File:emap_4.png|600px]] | ||
| − | + | 4) On the right-hand side you will see a list of recorders and cameras to select. Choose recorder → choose cameras → click on camera to highlight. You may now drag the chosen camera to any part of the map or floor plan. '''Note:''' you must be on the edit tab to select cameras to drag onto the map. | |
[[File:emap_5.png|600px]] | [[File:emap_5.png|600px]] | ||
| − | + | 5) From the "View" tab, on the map you can double click on the cameras to view live stream. You may view multiple cameras simultaneously. | |
[[File:emap_6.png|600px]] | [[File:emap_6.png|600px]] | ||
[[File:emap_7.png|700px]] | [[File:emap_7.png|700px]] | ||
| + | |||
| + | |||
| + | |||
| + | |||
| + | [[Category:SmartPSS]] | ||
Latest revision as of 19:18, 2 October 2024
Contents
NOTICE
Notice of Discontinuation of SmartPSS
How to use E-Map
Prerequisites
- SmartPSS V1.13 or higher
- PC
- Internet Connection
Video Instructions
Step by Step Instructions
1) Select E-Map from Home Page
2) Select "Add Map" → Name Map → Find File of Map to be used → Map description → click "Save" and Map will be come into view.
3) On the top left select the "Edit tab". This will allow to add cameras to the E-Map
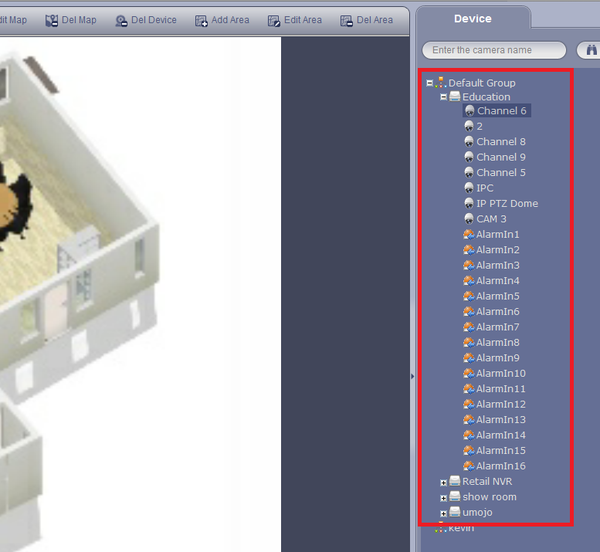
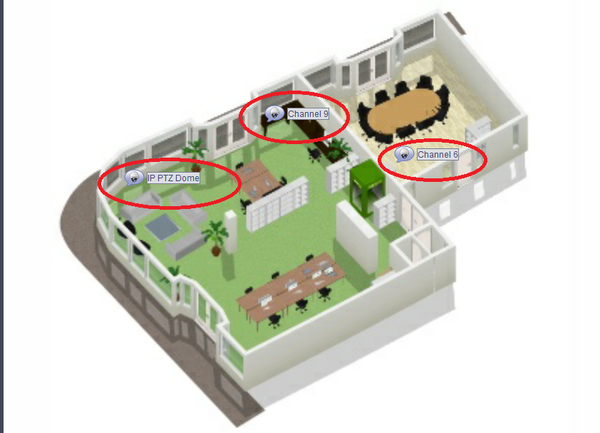
4) On the right-hand side you will see a list of recorders and cameras to select. Choose recorder → choose cameras → click on camera to highlight. You may now drag the chosen camera to any part of the map or floor plan. Note: you must be on the edit tab to select cameras to drag onto the map.
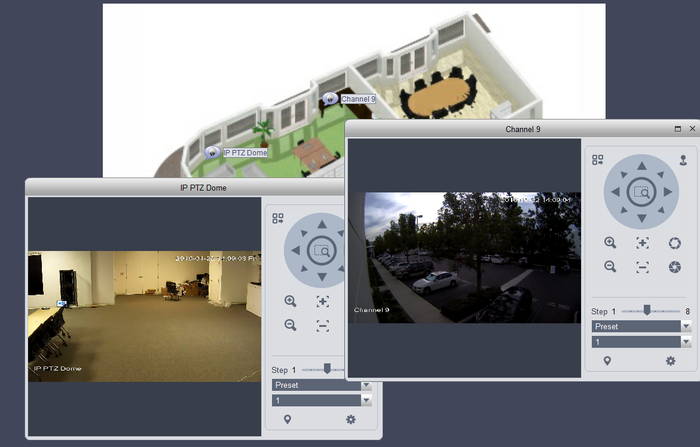
5) From the "View" tab, on the map you can double click on the cameras to view live stream. You may view multiple cameras simultaneously.
