Difference between revisions of "Template:IVS Perimeter WebUI New"
| (One intermediate revision by the same user not shown) | |||
| Line 8: | Line 8: | ||
===Step By Step Instructions=== | ===Step By Step Instructions=== | ||
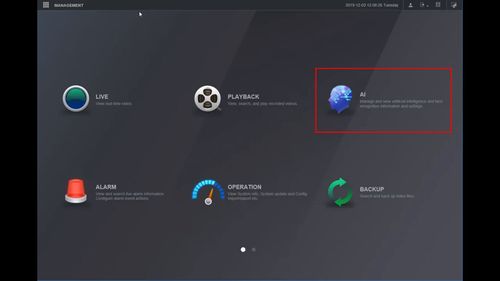
| + | 1. From the Main Menu of the WebUI | ||
| + | |||
| + | Click AI | ||
| + | |||
| + | [[File:Perimeter_-_WebUI_New_-_1.jpg|500px]] | ||
| + | |||
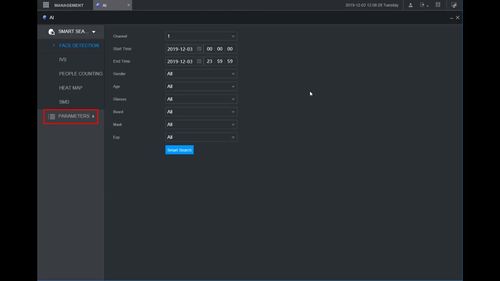
| + | 2. Click Parameters | ||
| + | |||
| + | [[File:Perimeter_-_WebUI_New_-_2.jpg|500px]] | ||
| + | |||
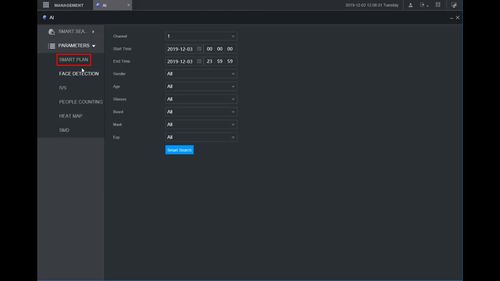
| + | 3. Click Smart Plan | ||
| + | |||
| + | [[File:Perimeter_-_WebUI_New_-_3.jpg|500px]] | ||
| + | |||
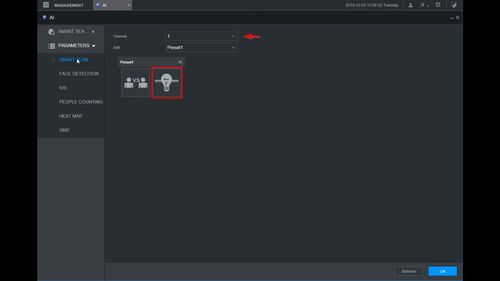
| + | 4. Use the dropdown box to select the Channel | ||
| + | |||
| + | Click the IVS icon (light bulb) to enable the IVS rule | ||
| + | |||
| + | [[File:Perimeter_-_WebUI_New_-_4.jpg|500px]] | ||
| + | |||
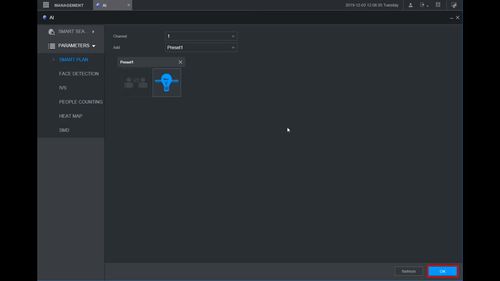
| + | 5. Click OK to save | ||
| + | |||
| + | [[File:Perimeter_-_WebUI_New_-_5.jpg|500px]] | ||
| + | |||
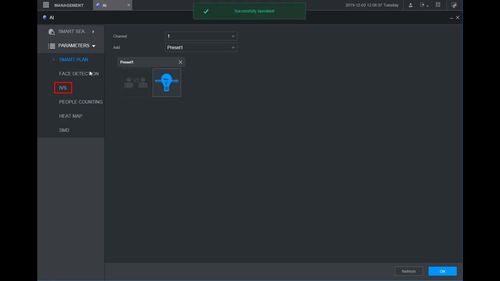
| + | 6. Click IVS | ||
| + | |||
| + | [[File:Perimeter_-_WebUI_New_-_6.jpg|500px]] | ||
| + | |||
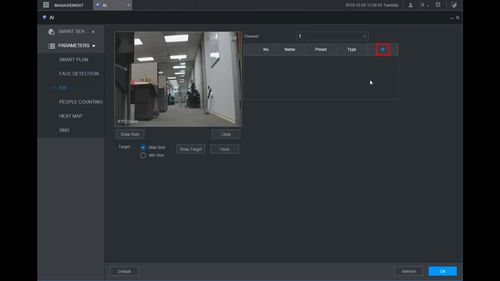
| + | 7. Click the + to create a new IVS rule | ||
| + | |||
| + | [[File:Perimeter_-_WebUI_New_-_7.jpg|500px]] | ||
| + | |||
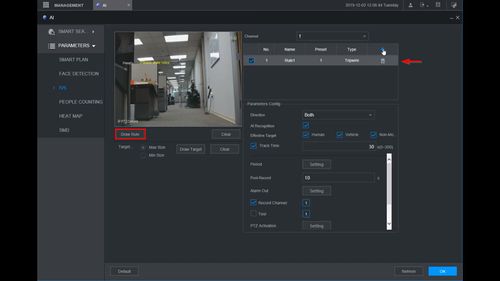
| + | 8. The IVS rule will appear in the list | ||
| + | |||
| + | Click Draw Rule to begin drawing the IVS rule | ||
| + | |||
| + | [[File:Perimeter_-_WebUI_New_-_8.jpg|500px]] | ||
| + | |||
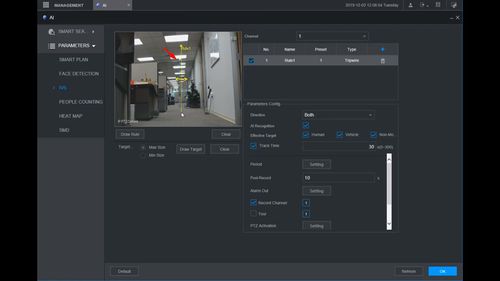
| + | 9. Left click inside the video frame to begin drawing the rule | ||
| + | |||
| + | [[File:Perimeter_-_WebUI_New_-_9.jpg|500px]] | ||
| + | |||
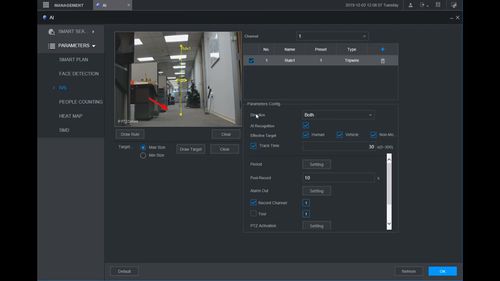
| + | Right click to finish drawing | ||
| + | |||
| + | [[File:Perimeter_-_WebUI_New_-_10.jpg|500px]] | ||
| + | |||
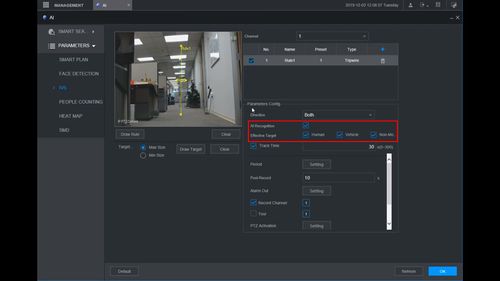
| + | 10. Use the AI recognition interface to enable and set which Effective objects(targets that will be valid) for the IVS rule | ||
| + | |||
| + | [[File:Perimeter_-_WebUI_New_-_11.jpg|500px]] | ||
| + | |||
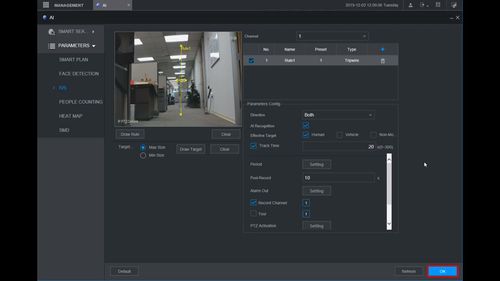
| + | 11. Click OK to save all settings | ||
| + | |||
| + | [[File:Perimeter_-_WebUI_New_-_12.jpg|500px]] | ||
Latest revision as of 21:51, 4 December 2019
Description
This guide will show how to set up the Perimeter IVS function in the WebUI with NewGUI
Prerequisites
- Dahua device with Perimeter IVS function
Video Instructions
Step By Step Instructions
1. From the Main Menu of the WebUI
Click AI
2. Click Parameters
3. Click Smart Plan
4. Use the dropdown box to select the Channel
Click the IVS icon (light bulb) to enable the IVS rule
5. Click OK to save
6. Click IVS
7. Click the + to create a new IVS rule
8. The IVS rule will appear in the list
Click Draw Rule to begin drawing the IVS rule
9. Left click inside the video frame to begin drawing the rule
Right click to finish drawing
10. Use the AI recognition interface to enable and set which Effective objects(targets that will be valid) for the IVS rule
11. Click OK to save all settings
