Difference between revisions of "Template:PTZ Tour WebUI New"
| (9 intermediate revisions by the same user not shown) | |||
| Line 1: | Line 1: | ||
| − | |||
| − | |||
| − | |||
| − | + | ==How to Setup Tour in Camera OSD== | |
| + | |||
| + | These instructions will show how to set up a Tour for a HDCVI PTZ camera connected to a Dahua XVR through the WebUI of the XVR by bringing up the OSD (On Screen Display) of the PTZ camera directly for configuration. | ||
| + | |||
===Prerequisites=== | ===Prerequisites=== | ||
| − | * Dahua | + | * Dahua HDCVI PTZ and XVR |
| + | * PTZ Presets created - [[PTZPreset|How To Setup PTZ Presets]] | ||
| + | |||
| + | ===Step by Step Instructions=== | ||
| + | |||
| + | 1. Enter the IP of the XVR into a browser | ||
| + | |||
| + | At the Web Login | ||
| + | |||
| + | Enter the Username and Password | ||
| + | |||
| + | Click Login | ||
| + | |||
| + | [[File:OSD_-_WebUI_New_-_1.jpg|600px]] | ||
| + | |||
| + | 2. Click Live | ||
| + | |||
| + | [[File:OSD_-_WebUI_New_-_2.jpg|600px]] | ||
| + | |||
| + | 3. Left click the camera from the channel list on the left side of the screen to load it into live view | ||
| + | |||
| + | [[File:HDCVI_PTZ_Tour_OSD_Setup_1.jpg|600px]] | ||
| + | |||
| + | 4. To open the Camera's OSD - On Screen Display | ||
| + | |||
| + | Click PTZ Menu | ||
| + | |||
| + | Click Open | ||
| + | |||
| + | OSD will appear on screen | ||
| + | |||
| + | [[File:HDCVI_PTZ_Tour_OSD_Setup_2.jpg|600px]] | ||
| + | |||
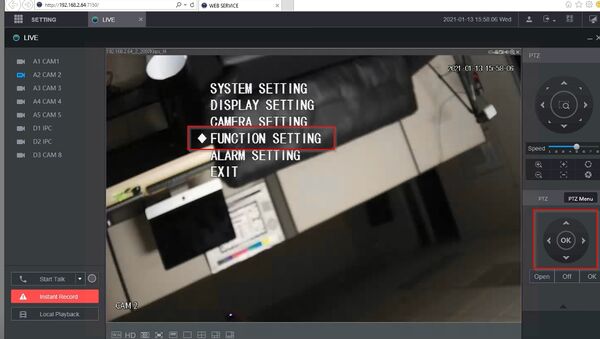
| + | 5. Use the navigation wheel / arrows to move between menu options. Clicking OK will select the menu option | ||
| + | |||
| + | To create a Tour: | ||
| + | |||
| + | Select '''Function Setting''' | ||
| + | |||
| + | [[File:HDCVI_PTZ_Tour_OSD_Setup_3.jpg|600px]] | ||
| + | |||
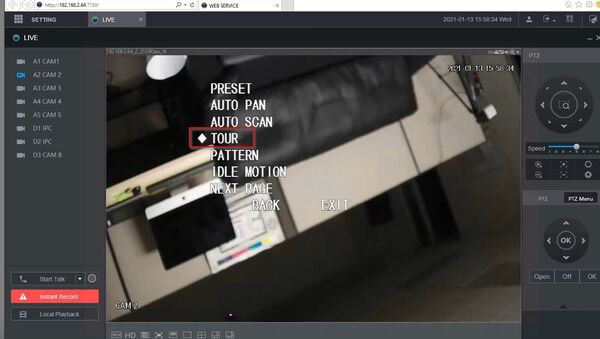
| + | Select '''Tour''' | ||
| + | |||
| + | [[File:HDCVI_PTZ_Tour_OSD_Setup_4.jpg|600px]] | ||
| + | |||
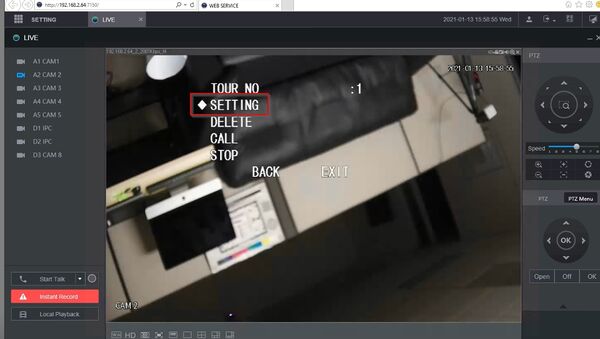
| + | Select a Tour number to edit, for example 1 | ||
| + | |||
| + | Select Setting | ||
| + | |||
| + | [[File:HDCVI_PTZ_Tour_OSD_Setup_5.jpg|600px]] | ||
| + | |||
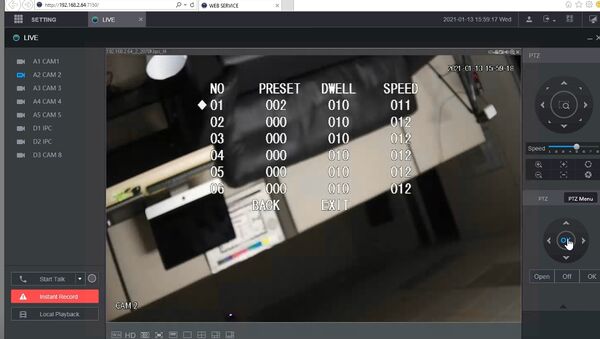
| + | The Tour information will be displayed | ||
| + | |||
| + | [[File:HDCVI_PTZ_Tour_OSD_Setup_6.jpg|600px]] | ||
| + | |||
| + | Click OK to select a step of the Tour, then change the Preset , Dwell , and Speed settings as desired for each step | ||
| + | |||
| + | [[File:HDCVI_PTZ_Tour_OSD_Setup_7.jpg|600px]] | ||
| + | |||
| + | Select Exit to exit the menu | ||
| + | |||
| + | [[File:HDCVI_PTZ_Tour_OSD_Setup_8.jpg|600px]] | ||
| + | |||
| + | ==How to Setup Tour through XVR== | ||
| + | ===Prerequisites=== | ||
| + | * Dahua PTZ | ||
* PTZ Presets created - [[PTZPreset|How To Setup PTZ Presets]] | * PTZ Presets created - [[PTZPreset|How To Setup PTZ Presets]] | ||
===Video Instructions=== | ===Video Instructions=== | ||
<embedvideo service="youtube">https://www.youtube.com/watch?v=4NgAlGymn68</embedvideo> | <embedvideo service="youtube">https://www.youtube.com/watch?v=4NgAlGymn68</embedvideo> | ||
===Step by Step Instructions=== | ===Step by Step Instructions=== | ||
| − | 1. From Live View | + | 1. From Live View |
| − | Click PTZ | + | Click PTZ Setup on the right side of the screen |
[[File:PTZ_Tour_-_WebUI_New_-_1.jpg|600px]] | [[File:PTZ_Tour_-_WebUI_New_-_1.jpg|600px]] | ||
| + | |||
| + | 2. Use the dropdown box to select Tour | ||
[[File:PTZ_Tour_-_WebUI_New_-_2.jpg|600px]] | [[File:PTZ_Tour_-_WebUI_New_-_2.jpg|600px]] | ||
[[File:PTZ_Tour_-_WebUI_New_-_3.jpg|600px]] | [[File:PTZ_Tour_-_WebUI_New_-_3.jpg|600px]] | ||
| + | |||
| + | 3. To add steps to the Tour | ||
| + | |||
| + | * Enter the Preset # | ||
| + | * Click Add Preset | ||
[[File:PTZ_Tour_-_WebUI_New_-_4.jpg|600px]] | [[File:PTZ_Tour_-_WebUI_New_-_4.jpg|600px]] | ||
| + | |||
| + | Repeat this procedure for every step you wish to add to the Tour | ||
| + | |||
| + | 4. To test the created Tour | ||
| + | |||
| + | * Enter the Tour # | ||
| + | * Click Start | ||
[[File:PTZ_Tour_-_WebUI_New_-_5.jpg|600px]] | [[File:PTZ_Tour_-_WebUI_New_-_5.jpg|600px]] | ||
| + | |||
| + | 5. The Tour will begin and display the current preset/position | ||
[[File:PTZ_Tour_-_WebUI_New_-_6.jpg|600px]] | [[File:PTZ_Tour_-_WebUI_New_-_6.jpg|600px]] | ||
Latest revision as of 00:12, 14 January 2021
Contents
How to Setup Tour in Camera OSD
These instructions will show how to set up a Tour for a HDCVI PTZ camera connected to a Dahua XVR through the WebUI of the XVR by bringing up the OSD (On Screen Display) of the PTZ camera directly for configuration.
Prerequisites
- Dahua HDCVI PTZ and XVR
- PTZ Presets created - How To Setup PTZ Presets
Step by Step Instructions
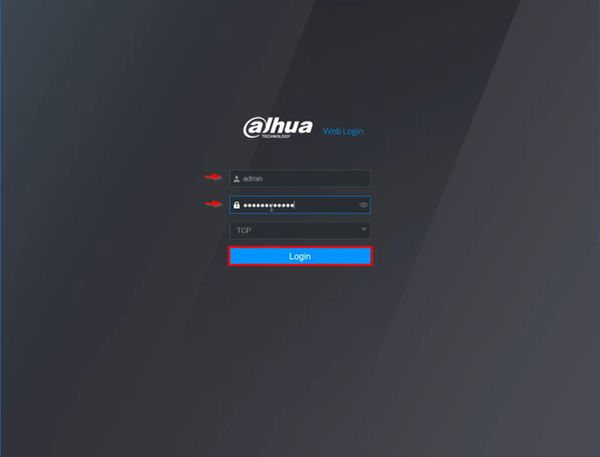
1. Enter the IP of the XVR into a browser
At the Web Login
Enter the Username and Password
Click Login
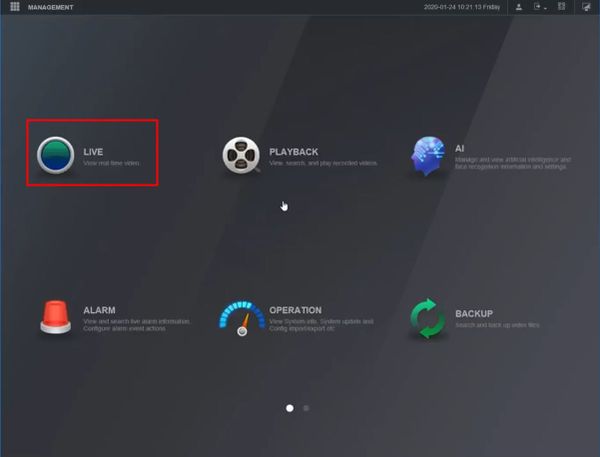
2. Click Live
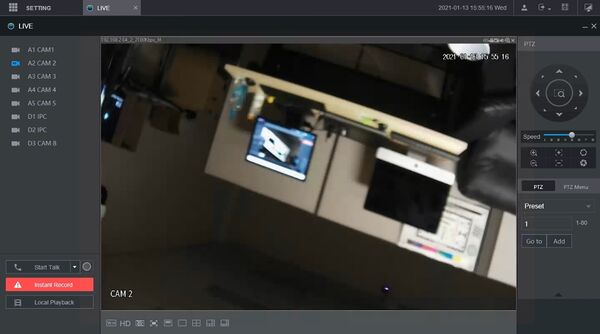
3. Left click the camera from the channel list on the left side of the screen to load it into live view
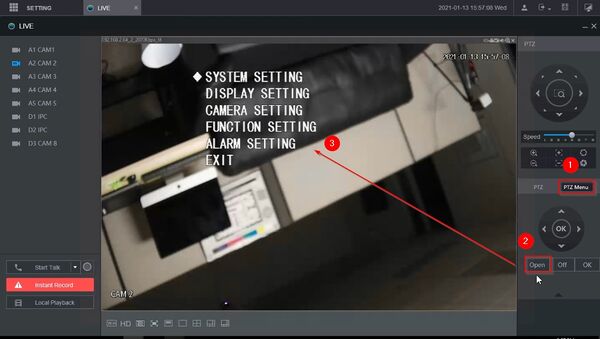
4. To open the Camera's OSD - On Screen Display
Click PTZ Menu
Click Open
OSD will appear on screen
5. Use the navigation wheel / arrows to move between menu options. Clicking OK will select the menu option
To create a Tour:
Select Function Setting
Select Tour
Select a Tour number to edit, for example 1
Select Setting
The Tour information will be displayed
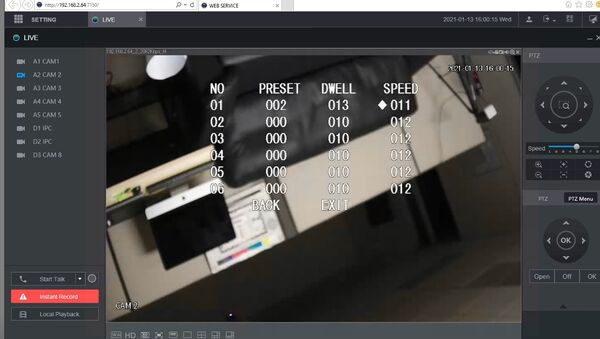
Click OK to select a step of the Tour, then change the Preset , Dwell , and Speed settings as desired for each step
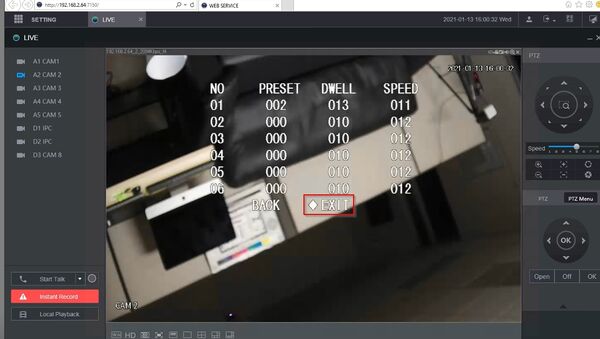
Select Exit to exit the menu
How to Setup Tour through XVR
Prerequisites
- Dahua PTZ
- PTZ Presets created - How To Setup PTZ Presets
Video Instructions
Step by Step Instructions
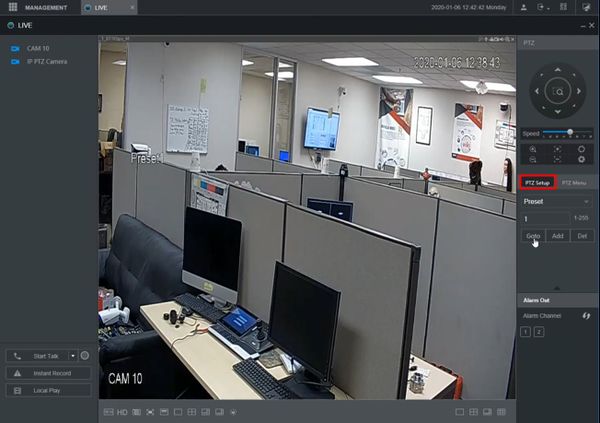
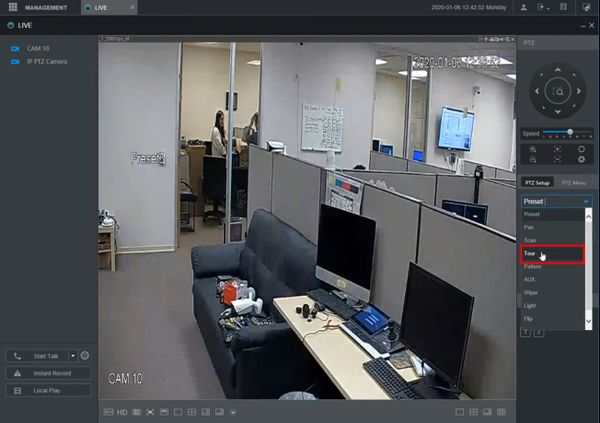
1. From Live View
Click PTZ Setup on the right side of the screen
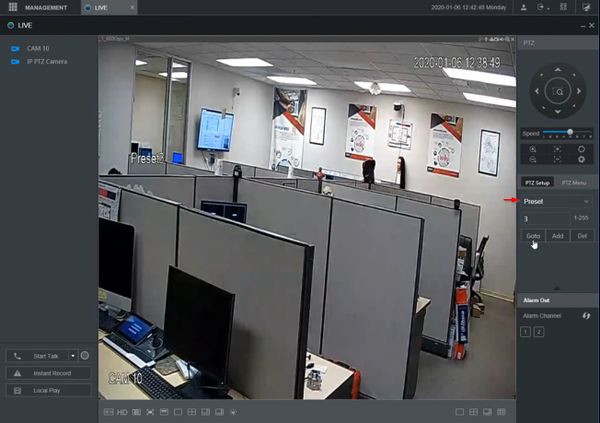
2. Use the dropdown box to select Tour
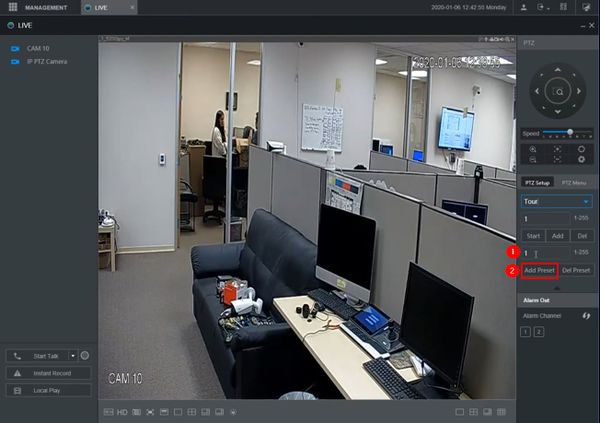
3. To add steps to the Tour
- Enter the Preset #
- Click Add Preset
Repeat this procedure for every step you wish to add to the Tour
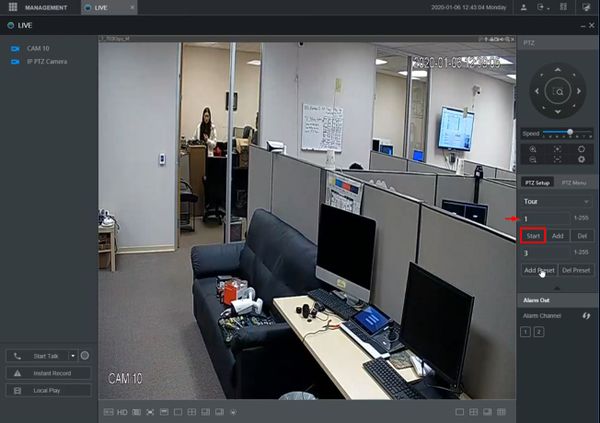
4. To test the created Tour
- Enter the Tour #
- Click Start
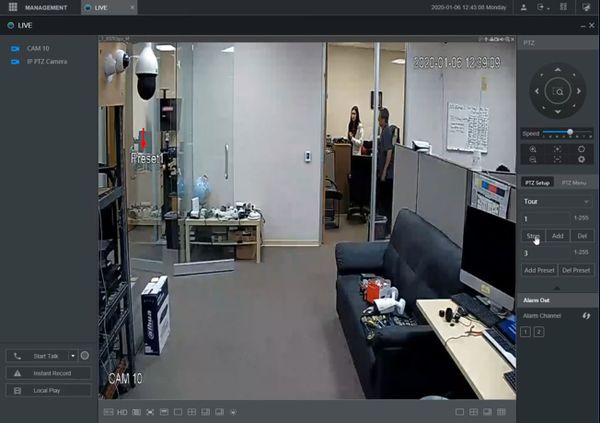
5. The Tour will begin and display the current preset/position
