Difference between revisions of "PTZ/Instructions/OSD"
| (4 intermediate revisions by 2 users not shown) | |||
| Line 1: | Line 1: | ||
=On Screen Display-OSD= | =On Screen Display-OSD= | ||
| + | __NOTOC__ | ||
==Description== | ==Description== | ||
| + | For an HDCVI camera, you can use the coaxial cable to control the OSD menu. | ||
| + | |||
*All the menu paths in this chapter are for reference only, there is slight difference between different menus, please refer to the actual interface for more details. | *All the menu paths in this chapter are for reference only, there is slight difference between different menus, please refer to the actual interface for more details. | ||
*There are mainly 10 kinds of camera menu, please select according to the actual product. | *There are mainly 10 kinds of camera menu, please select according to the actual product. | ||
| Line 23: | Line 26: | ||
[[File:Infograph_for_OSD.png]] | [[File:Infograph_for_OSD.png]] | ||
| − | == | + | ==Instructions== |
<div class="toccolours mw-collapsible mw-collapsed"> | <div class="toccolours mw-collapsible mw-collapsed"> | ||
[[File:Icon_for_type_SystemUI_Old.png|250px]]<span style="font-size:180%;">'''SystemUI Old'''</span> | [[File:Icon_for_type_SystemUI_Old.png|250px]]<span style="font-size:180%;">'''SystemUI Old'''</span> | ||
| − | <div class="mw-collapsible-content">{{Template: | + | <div class="mw-collapsible-content">{{Template:PTZ_OSD_SystemUI_OldGUI}}</div> |
</div> | </div> | ||
<div class="toccolours mw-collapsible mw-collapsed"> | <div class="toccolours mw-collapsible mw-collapsed"> | ||
[[File:Icon_for_type_SystemUI_New.png|250px]]<span style="font-size:180%;">'''SystemUI New'''</span> | [[File:Icon_for_type_SystemUI_New.png|250px]]<span style="font-size:180%;">'''SystemUI New'''</span> | ||
| − | <div class="mw-collapsible-content">{{Template: | + | <div class="mw-collapsible-content">{{Template:PTZ_OSD_SystemUI_NewGUI}}</div> |
</div> | </div> | ||
| Line 50: | Line 53: | ||
<div class="toccolours mw-collapsible mw-collapsed"> | <div class="toccolours mw-collapsible mw-collapsed"> | ||
| − | [[File:Icon_for_type_DSS_Express_S.png|250px]]<span style="font-size:180%;">'''DSS Express | + | [[File:Icon_for_type_DSS_Express_S.png|250px]]<span style="font-size:180%;">'''DSS Express'''</span> |
<div class="mw-collapsible-content">{{Template:PTZ_OSD_DSS_Express}}</div> | <div class="mw-collapsible-content">{{Template:PTZ_OSD_DSS_Express}}</div> | ||
</div> | </div> | ||
Latest revision as of 22:44, 1 April 2021
On Screen Display-OSD
Description
For an HDCVI camera, you can use the coaxial cable to control the OSD menu.
- All the menu paths in this chapter are for reference only, there is slight difference between different menus, please refer to the actual interface for more details.
- There are mainly 10 kinds of camera menu, please select according to the actual product.
- It is advised to find corresponding menu path type via main menu.
Prerequisites
- HD-CVI Dahua PTZ connected to Dahua recorder
or
- Dahua IP PTZ
Instructions
OSD Menu Examples
Recorder Icons Infographic
Instructions
On Screen Display
Prerequisites
- Dahua HDCVI camera
- Dahua Recorder
Video Instructions
Step by Step Instructions
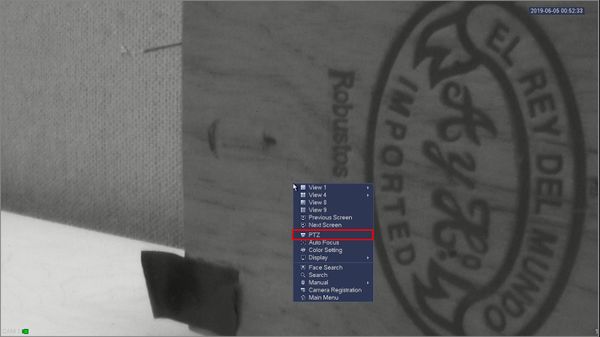
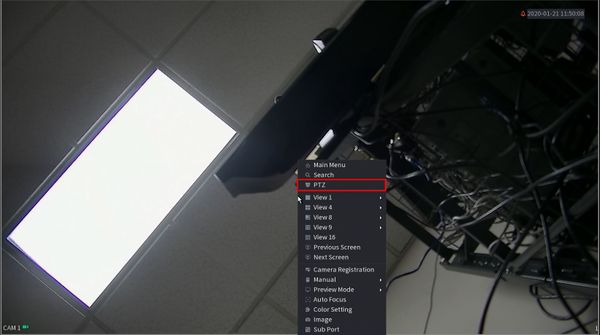
1. From Live View right click to open the Menu
Select PTZ
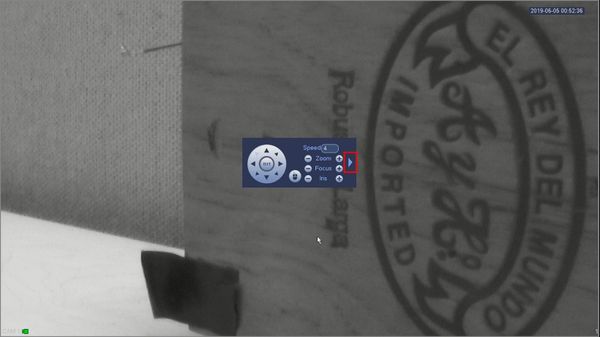
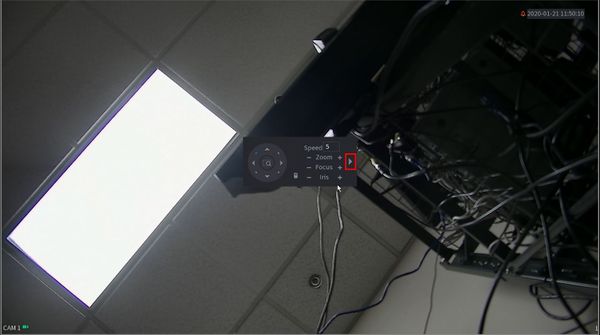
2. Click the arrow to expand the PTZ menu
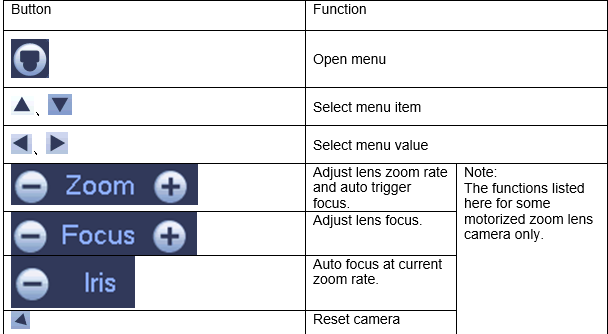
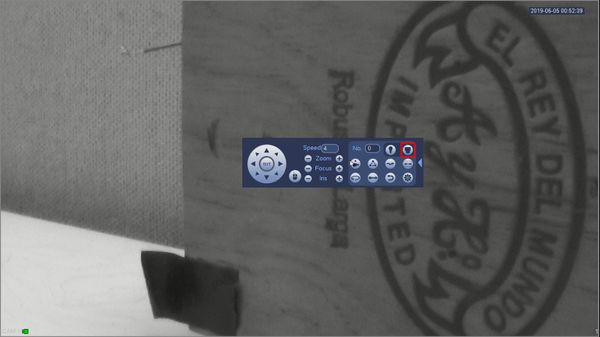
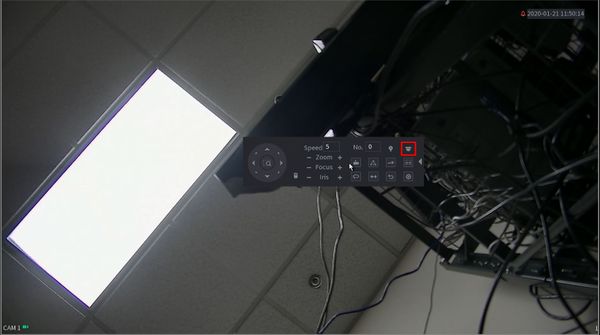
3. Click the Open Menu button
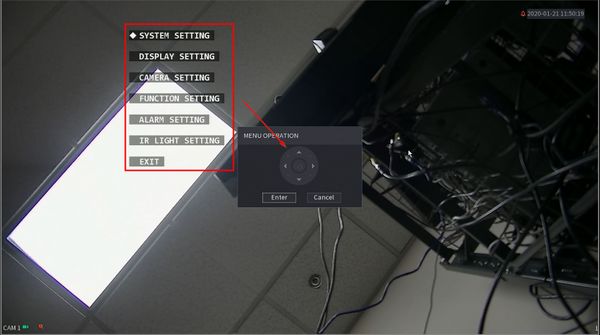
4. The On Screen Display menu will appear as an overlay on top of the camera's image
Use the onscreen controls to navigate through the menu
5. Click Enter / Cancel to enter and exit submenus until the desired parameters are set
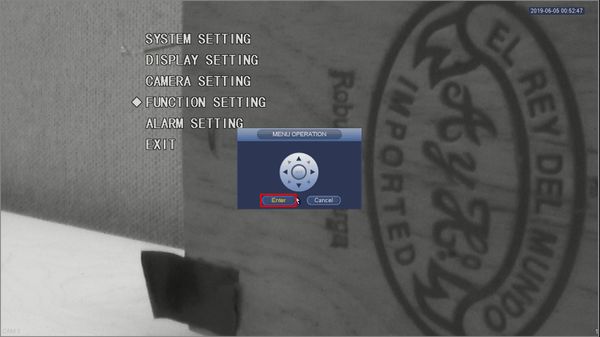
On Screen Display
Prerequisites
- Dahua HDCVI PTZ
- Dahua Recorder
Video Instructions
Step by Step Instructions
1. From Live View right click to open the Menu
Select PTZ
2. Click to expand the PTZ menu
3. Click the Open Menu button
4. The On Screen Display menu will appear as an overlay on top of the camera's image
Use the onscreen controls to navigate through the menu
5. Click Enter / Cancel to enter and exit submenus until the desired parameters are set
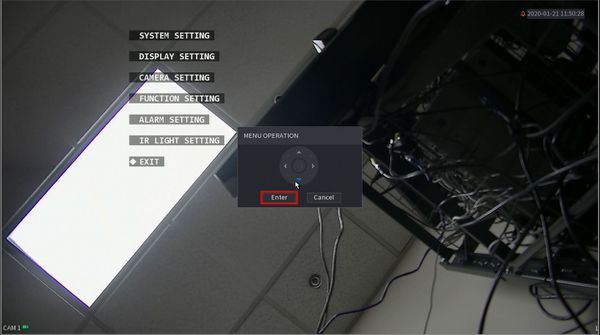
On Screen Display
Prerequisites
- Dahua HDCVI PTZ
- Dahua Recorder
- Network connection for recorder
Video Instructions
Step by Step Instructions
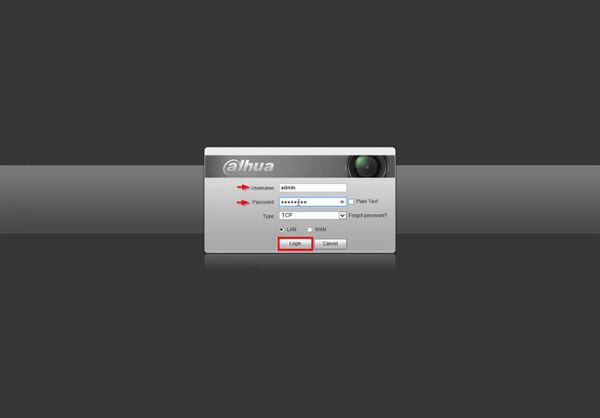
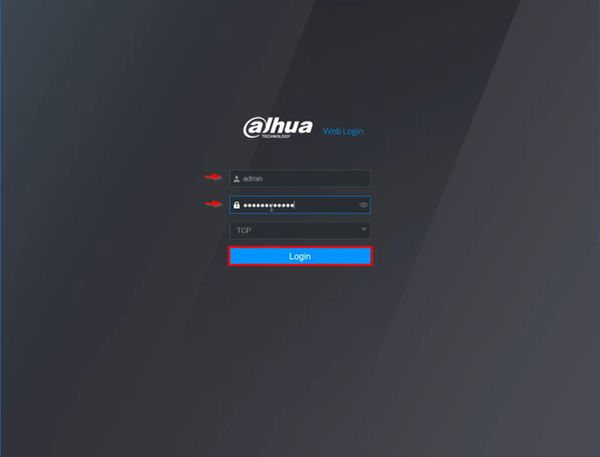
1. Enter the IP of the device into a browser
At the Web Login
Enter the Username and Password
Click Login
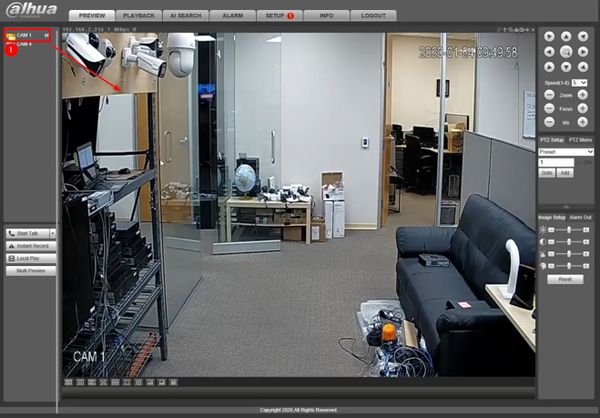
2. Left click the camera from the channel list on the left side of the screen to load it into live view
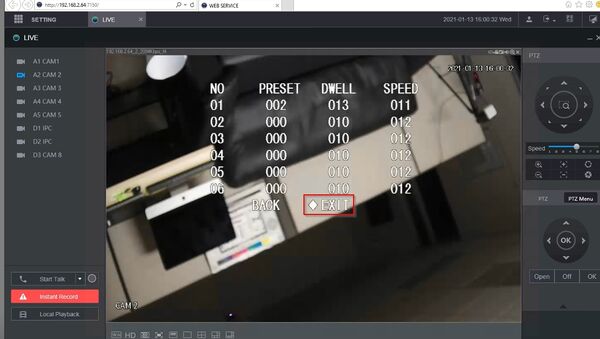
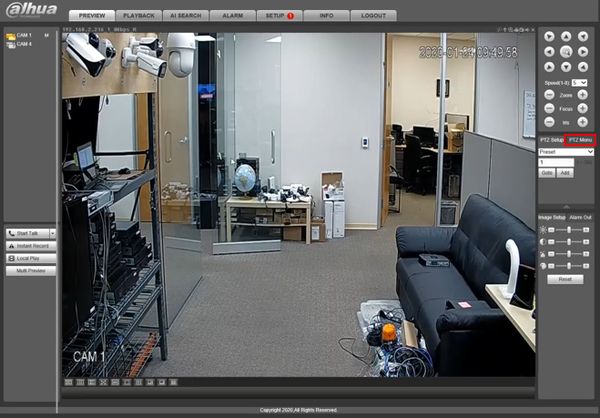
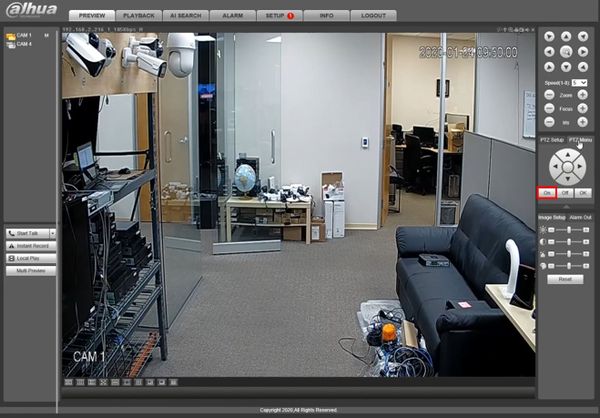
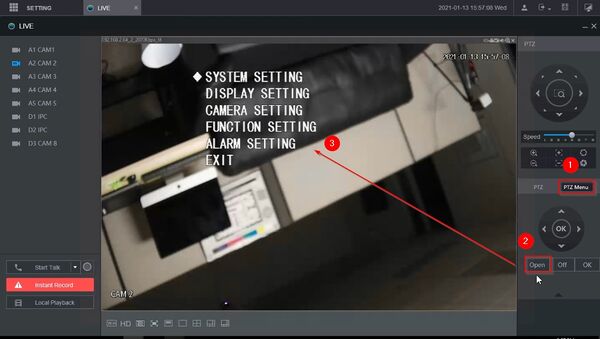
3. Click PTZ Menu
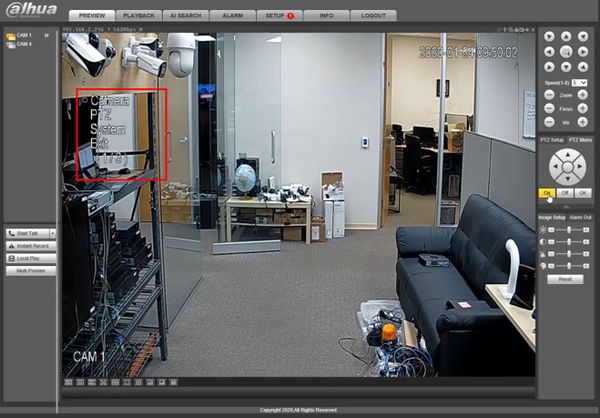
4. Click On
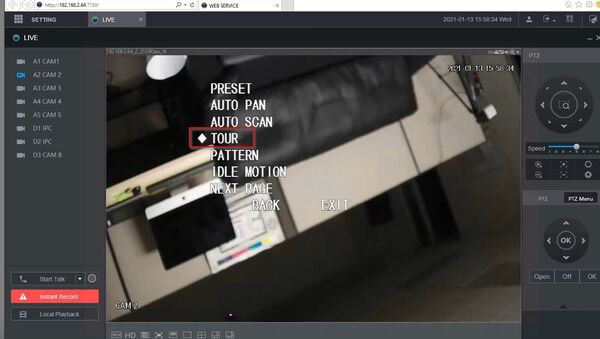
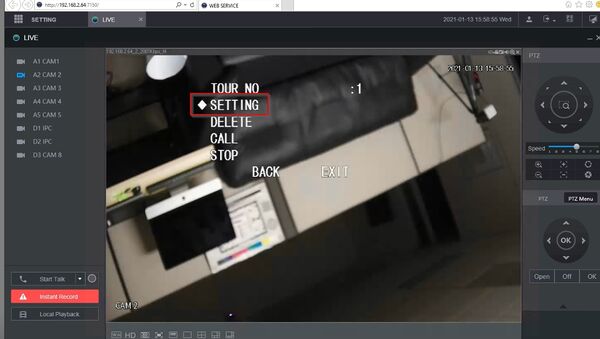
5. The camera's On Screen Display menu will appear
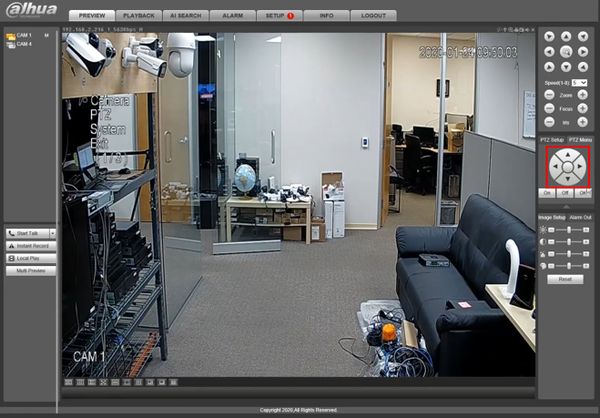
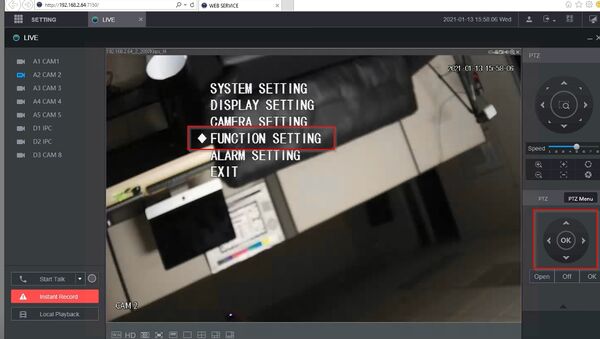
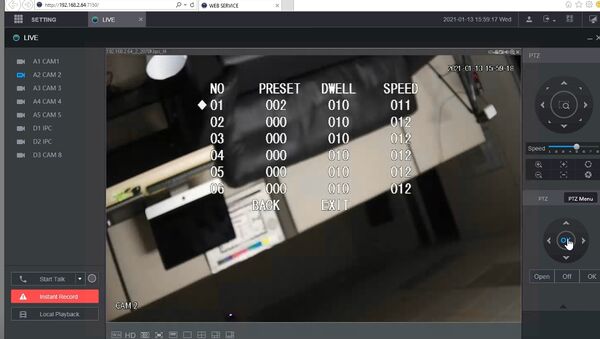
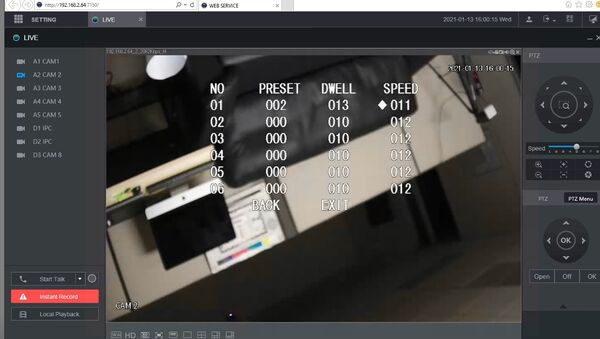
6. Use the onscreen controls to navigate through the menus
7. Use the center button to enter menu options
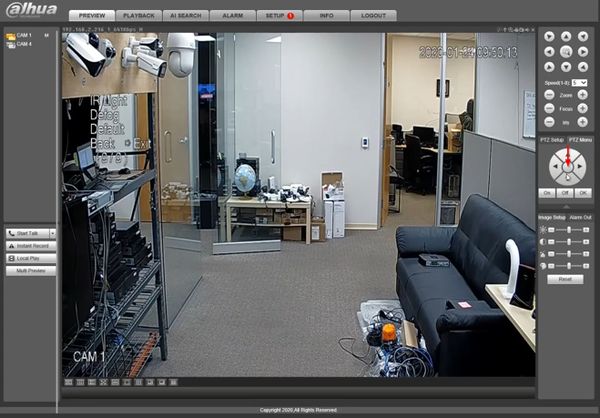
On Screen Display
Prerequisites
- Dahua HDCVI PTZ
- Dahua Recorder
- Network connection for recorder
Video Instructions
Step by Step Instructions
1. Enter the IP of the device into a browser
At the Web Login
Enter the Username and Password
Click Login
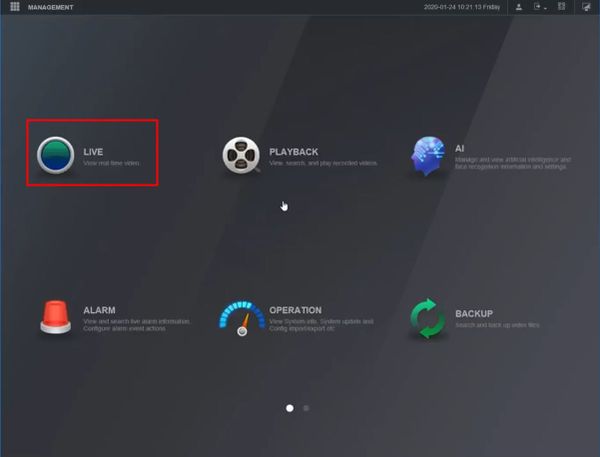
2. Click Live
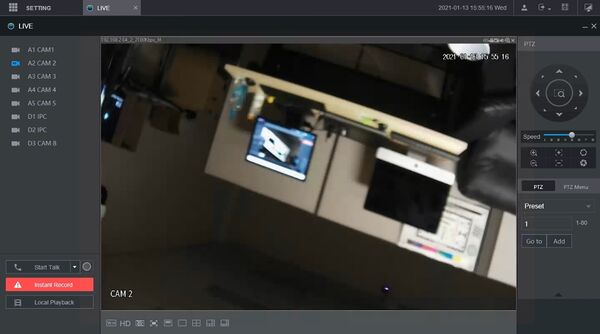
3. Left click the camera from the channel list on the left side of the screen to load it into live view
4. Click PTZ Menu
