Difference between revisions of "Template:SMD WebUI New"
(Created page with " ==Prerequisites== ==Video Instructions== <embedvideo service="youtube">https://youtu.be/2UhYauzUDt8</embedvideo> ==Step by Step Instructions==") |
|||
| (One intermediate revision by the same user not shown) | |||
| Line 1: | Line 1: | ||
==Prerequisites== | ==Prerequisites== | ||
| + | * Dahua device that supports SMD | ||
==Video Instructions== | ==Video Instructions== | ||
<embedvideo service="youtube">https://youtu.be/2UhYauzUDt8</embedvideo> | <embedvideo service="youtube">https://youtu.be/2UhYauzUDt8</embedvideo> | ||
==Step by Step Instructions== | ==Step by Step Instructions== | ||
| + | 1. Enter the username and password for the device | ||
| + | |||
| + | Click Login | ||
| + | |||
| + | [[File:SMD_-_WebUI_New_-_1.jpg|600px]] | ||
| + | |||
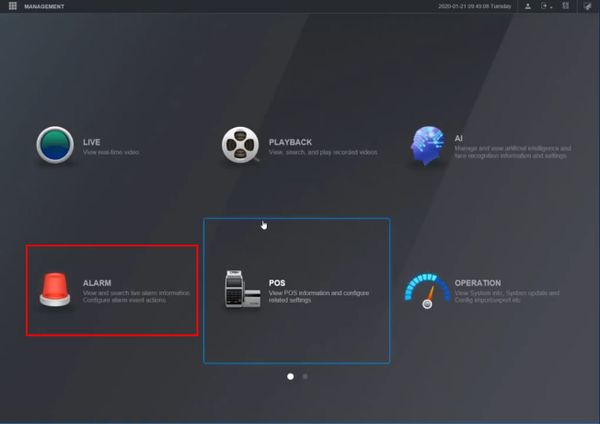
| + | 2. Click Alarm | ||
| + | |||
| + | [[File:SMD_-_WebUI_New_-_2.jpg|600px]] | ||
| + | |||
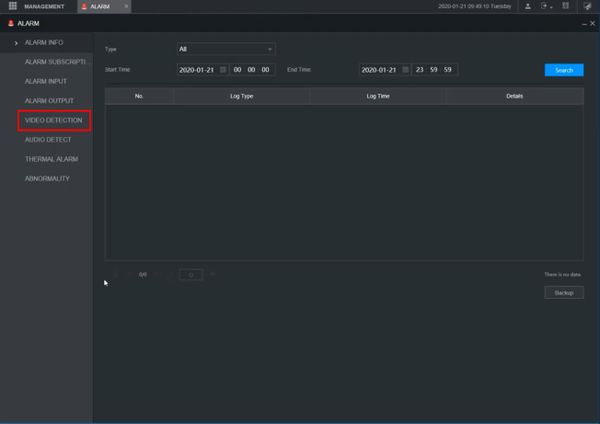
| + | 3. Click Video Detection | ||
| + | |||
| + | [[File:SMD_-_WebUI_New_-_3.jpg|600px]] | ||
| + | |||
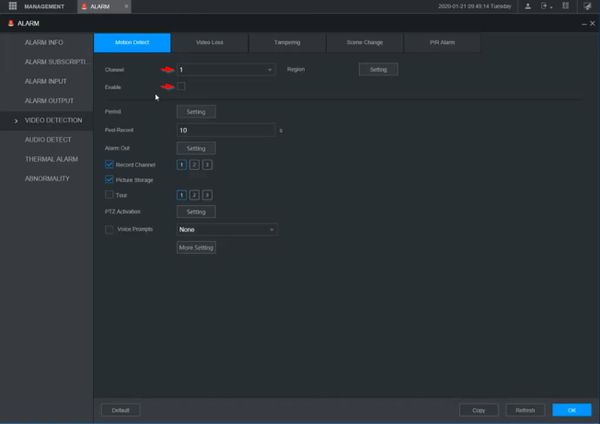
| + | 4. Use the dropdown box to select the channel | ||
| + | |||
| + | Check the box to enable the motion detection | ||
| + | |||
| + | [[File:SMD_-_WebUI_New_-_4.jpg|600px]] | ||
| + | |||
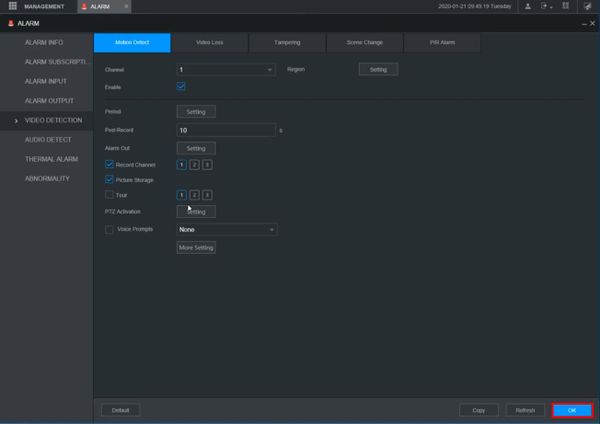
| + | Configure any additional motion detection parameters | ||
| + | |||
| + | Click OK to save | ||
| + | |||
| + | [[File:SMD_-_WebUI_New_-_5.jpg|600px]] | ||
| + | |||
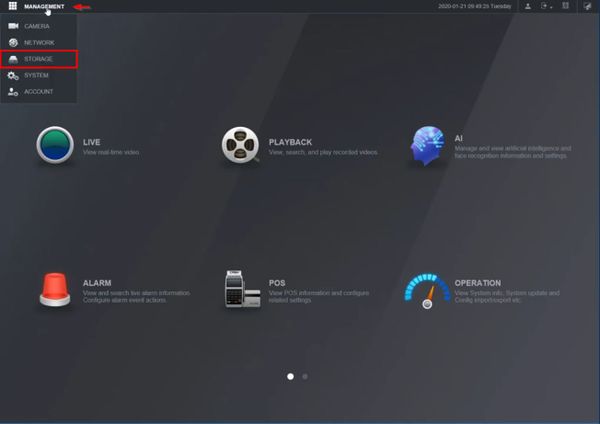
| + | 5. Click Management in the top left corner of the screen | ||
| + | |||
| + | Select Storage | ||
| + | |||
| + | [[File:SMD_-_WebUI_New_-_6.jpg|600px]] | ||
| + | |||
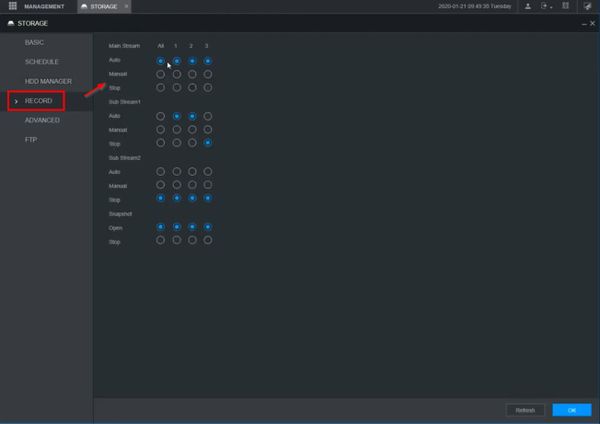
| + | 6. Click Record | ||
| + | |||
| + | Confirm the record settings are enabled for the desired streams | ||
| + | |||
| + | [[File:SMD_-_WebUI_New_-_7.jpg|600px]] | ||
| + | |||
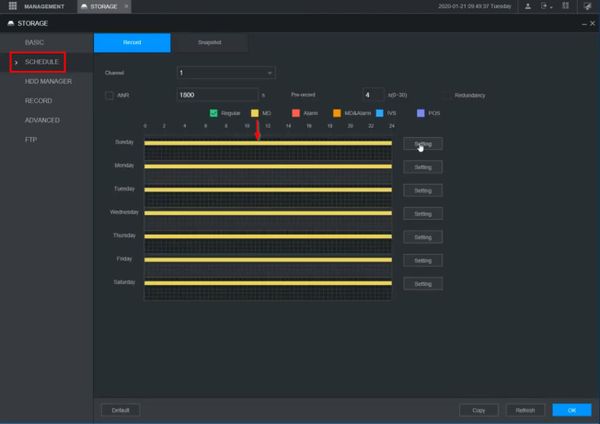
| + | 7. Click Schedule | ||
| + | |||
| + | Review the on screen schedule, make sure motion detection (MD) is enabled | ||
| + | |||
| + | [[File:SMD_-_WebUI_New_-_8.jpg|600px]] | ||
| + | |||
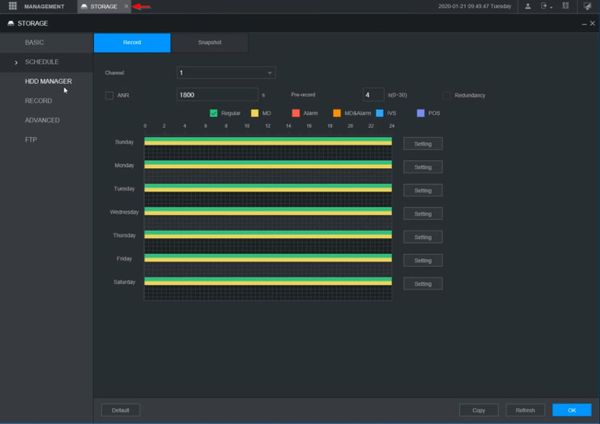
| + | 8. Return to the menu by clicking the X next to the Storage tab at the top of the screen | ||
| + | |||
| + | [[File:SMD_-_WebUI_New_-_9.jpg|600px]] | ||
| + | |||
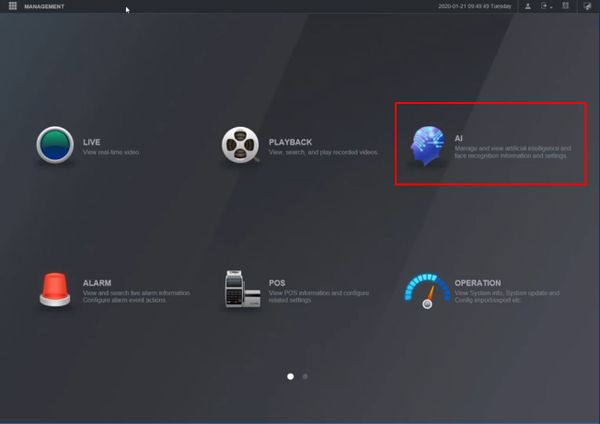
| + | 9. Click AI | ||
| + | |||
| + | [[File:SMD_-_WebUI_New_-_10.jpg|600px]] | ||
| + | |||
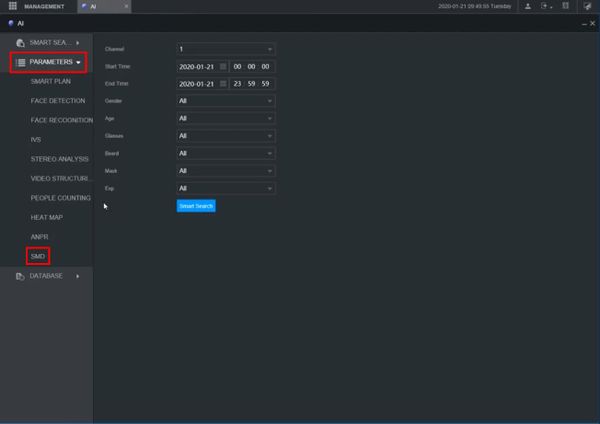
| + | 10. Click Parameters > SMD | ||
| + | |||
| + | [[File:SMD_-_WebUI_New_-_11.jpg|600px]] | ||
| + | |||
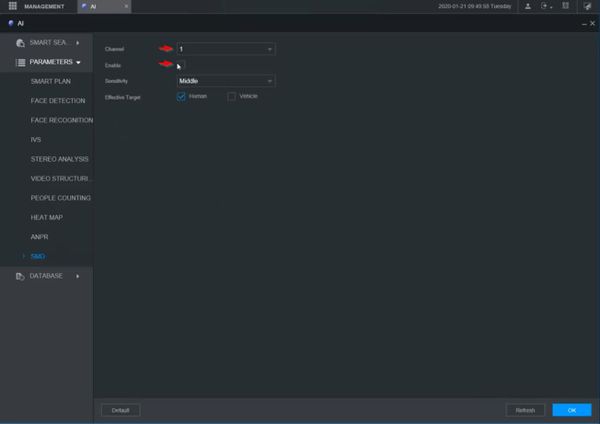
| + | 11. Use the dropdown box to select the channel | ||
| + | |||
| + | Check the box to enable SMD | ||
| + | |||
| + | [[File:SMD_-_WebUI_New_-_12.jpg|600px]] | ||
| + | |||
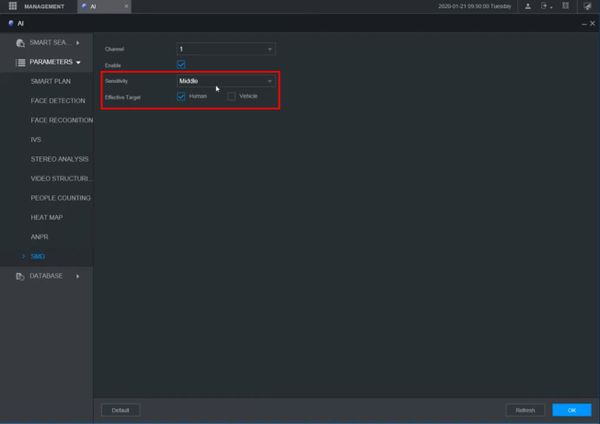
| + | 12. Use the additional options to configure the parameters of SMD: | ||
| + | |||
| + | * Sensitivity | ||
| + | * Effective Target - Human, Vehicle, or Both | ||
| + | |||
| + | [[File:SMD_-_WebUI_New_-_13.jpg|600px]] | ||
| + | |||
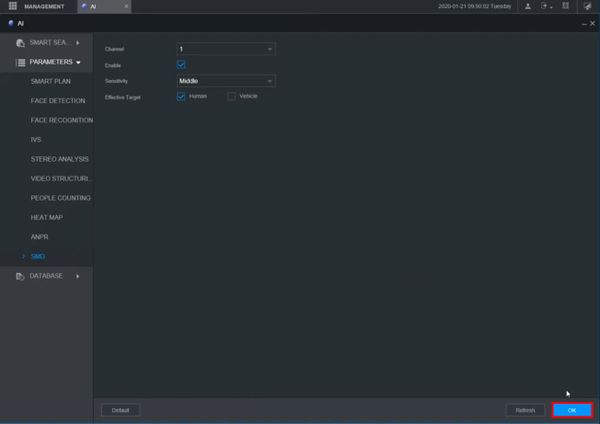
| + | 13. Click OK to save | ||
| + | |||
| + | [[File:SMD_-_WebUI_New_-_14.jpg|600px]] | ||
Latest revision as of 18:38, 24 January 2020
Prerequisites
- Dahua device that supports SMD
Video Instructions
Step by Step Instructions
1. Enter the username and password for the device
Click Login
2. Click Alarm
3. Click Video Detection
4. Use the dropdown box to select the channel
Check the box to enable the motion detection
Configure any additional motion detection parameters
Click OK to save
5. Click Management in the top left corner of the screen
Select Storage
6. Click Record
Confirm the record settings are enabled for the desired streams
7. Click Schedule
Review the on screen schedule, make sure motion detection (MD) is enabled
8. Return to the menu by clicking the X next to the Storage tab at the top of the screen
9. Click AI
10. Click Parameters > SMD
11. Use the dropdown box to select the channel
Check the box to enable SMD
12. Use the additional options to configure the parameters of SMD:
- Sensitivity
- Effective Target - Human, Vehicle, or Both
13. Click OK to save

