Difference between revisions of "Template:SD Card Record WebUI Old"
(Created page with " ==Prerequisites== ==Video Instructions== <embedvideo service="youtube">https://youtu.be/mJEQcP4qLTY</embedvideo> ==Step by Step Instructions==") |
(→Step by Step Instructions) |
||
| (3 intermediate revisions by one other user not shown) | |||
| Line 5: | Line 5: | ||
<embedvideo service="youtube">https://youtu.be/mJEQcP4qLTY</embedvideo> | <embedvideo service="youtube">https://youtu.be/mJEQcP4qLTY</embedvideo> | ||
==Step by Step Instructions== | ==Step by Step Instructions== | ||
| + | 1. Enter the IP of the device into a browser | ||
| + | |||
| + | At the Web Login | ||
| + | |||
| + | Enter the Username and Password | ||
| + | |||
| + | Click Login | ||
| + | |||
| + | [[File:RS485_-_WebUI_Old_-_1.jpg|600px]] | ||
| + | |||
| + | 1. Click Setting | ||
| + | |||
| + | [[File:SD_Card_Recording_-_WebUI_Old_-_1.jpg|600px]] | ||
| + | |||
| + | 2. Click Storage | ||
| + | |||
| + | Click Schedule | ||
| + | |||
| + | [[File:SD_Card_Recording_-_WebUI_Old_-_2.jpg|600px]] | ||
| + | |||
| + | 3. Click Record tab | ||
| + | |||
| + | Click the Setting button | ||
| + | |||
| + | [[File:SD_Card_Recording_-_WebUI_Old_-_3.jpg|600px]] | ||
| + | |||
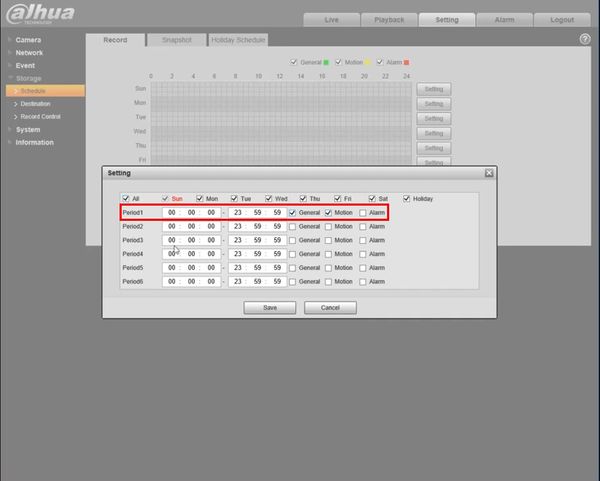
| + | 4. Use the Schedule Setting window to set the record schedule | ||
| + | |||
| + | [[File:SD_Card_Recording_-_WebUI_Old_-_4.jpg|600px]] | ||
| + | |||
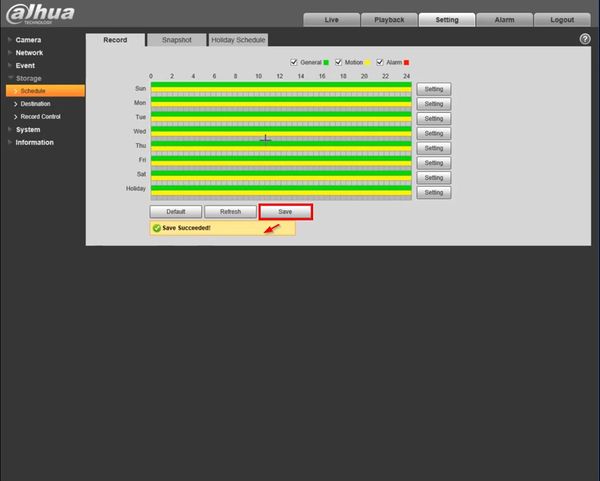
| + | Click Save | ||
| + | |||
| + | A prompt will appear to confirm | ||
| + | |||
| + | [[File:SD_Card_Recording_-_WebUI_Old_-_5.jpg|600px]] | ||
| + | |||
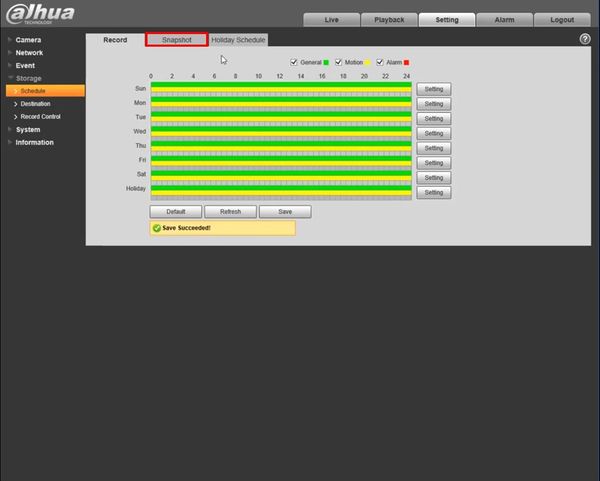
| + | 5. Click Snapshot | ||
| + | |||
| + | [[File:SD_Card_Recording_-_WebUI_Old_-_6.jpg|600px]] | ||
| + | |||
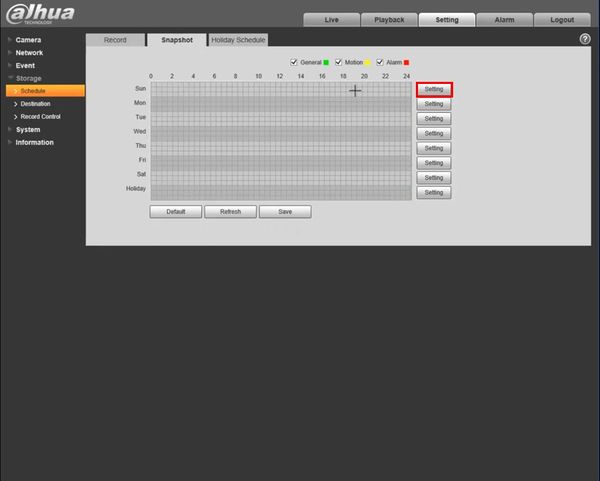
| + | Click the Setting button | ||
| + | |||
| + | [[File:SD_Card_Recording_-_WebUI_Old_-_7.jpg|600px]] | ||
| + | |||
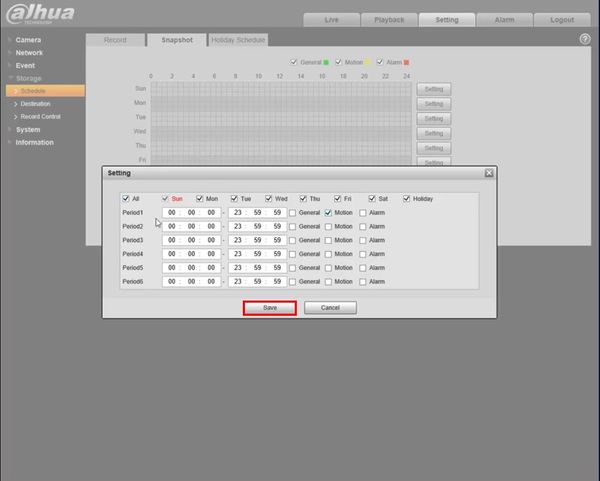
| + | Use the Schedule Setting window to set the snapshot schedule | ||
| + | |||
| + | [[File:SD_Card_Recording_-_WebUI_Old_-_8.jpg|600px]] | ||
| + | |||
| + | Click Save | ||
| + | |||
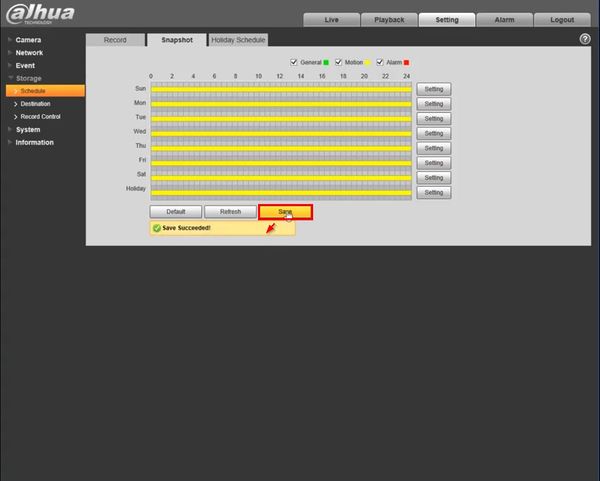
| + | A prompt will appear to confirm | ||
| + | |||
| + | [[File:SD_Card_Recording_-_WebUI_Old_-_9.jpg|600px]] | ||
| + | |||
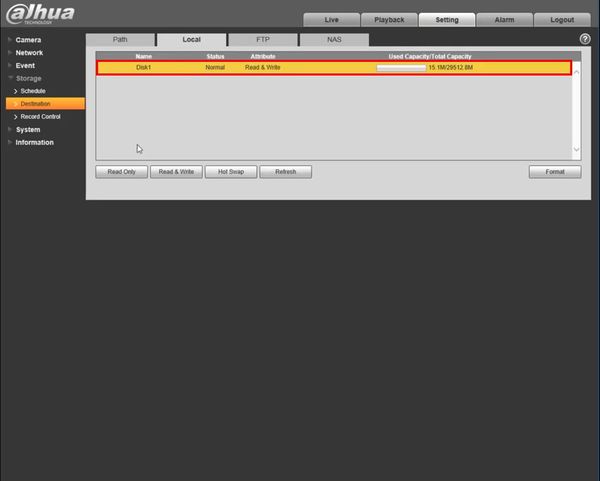
| + | Choose you options, Read only, Read & Write, Hot Swap. | ||
| + | |||
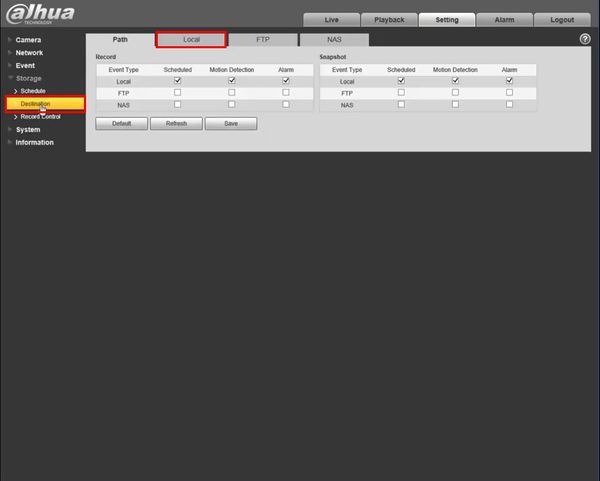
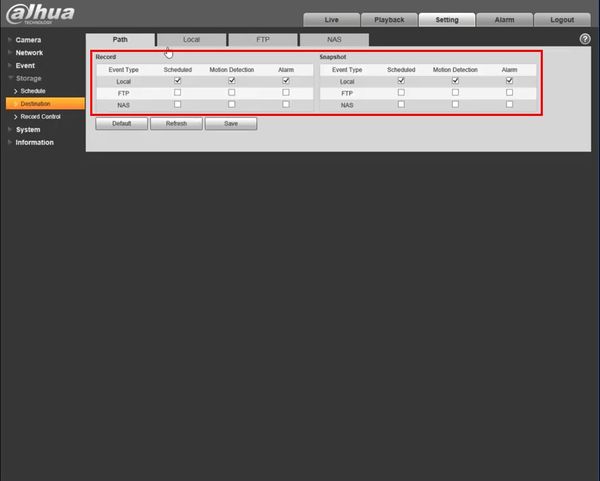
| + | Click on Destination and check the local choices. | ||
| + | |||
| + | [[File:SD_Card_Recording_-_WebUI_Old_-_10.jpg|600px]] | ||
| + | |||
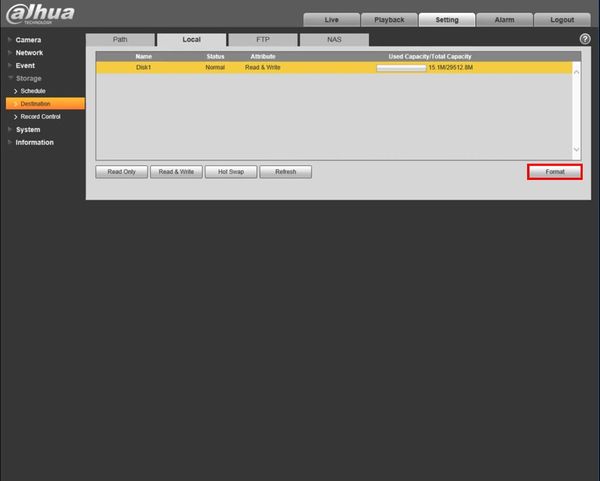
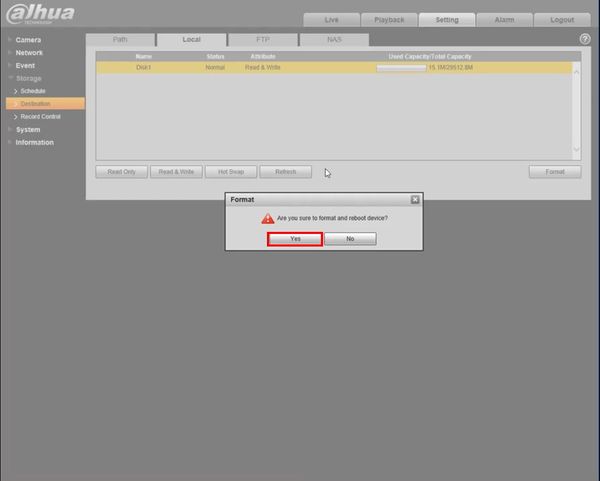
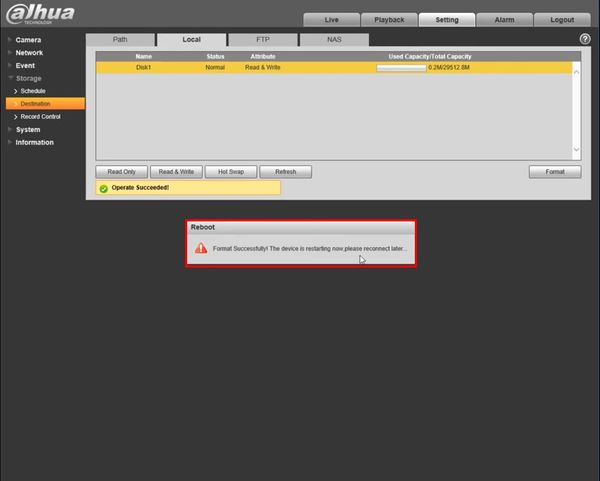
| + | You can also format the SD card. | ||
| + | |||
| + | [[File:SD_Card_Recording_-_WebUI_Old_-_11.jpg|600px]] | ||
| + | |||
| + | [[File:SD_Card_Recording_-_WebUI_Old_-_12.jpg|600px]] | ||
| + | |||
| + | [[File:SD_Card_Recording_-_WebUI_Old_-_13.jpg|600px]] | ||
| + | |||
| + | [[File:SD_Card_Recording_-_WebUI_Old_-_14.jpg|600px]] | ||
| + | |||
| + | [[File:SD_Card_Recording_-_WebUI_Old_-_15.jpg|600px]] | ||
Latest revision as of 20:02, 5 February 2020
Prerequisites
Video Instructions
Step by Step Instructions
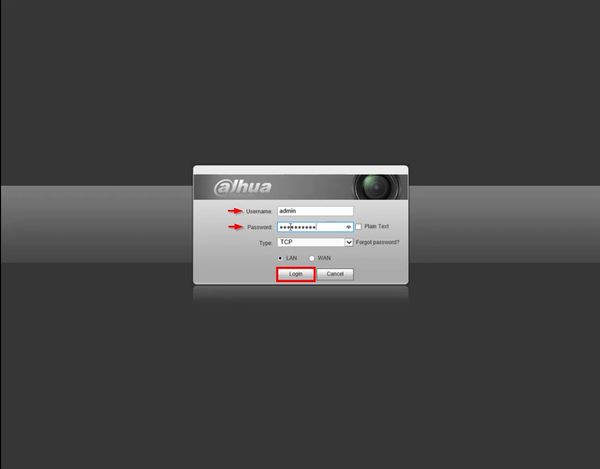
1. Enter the IP of the device into a browser
At the Web Login
Enter the Username and Password
Click Login
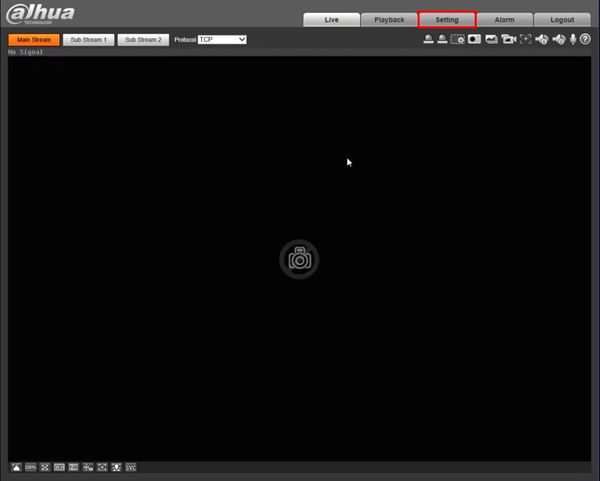
1. Click Setting
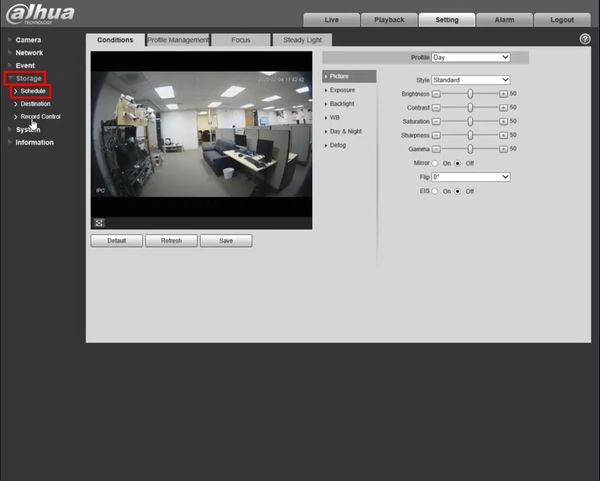
2. Click Storage
Click Schedule
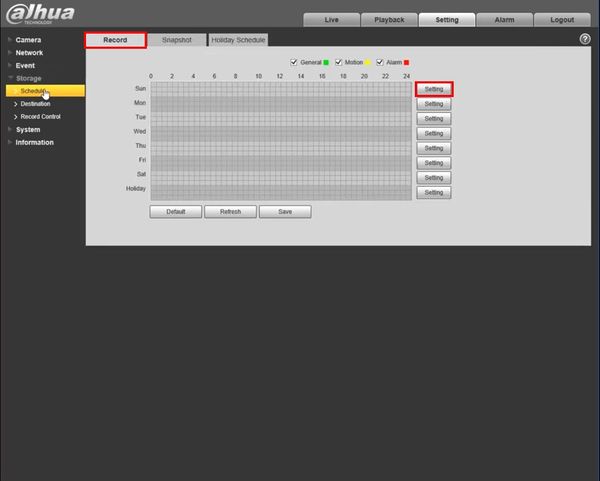
3. Click Record tab
Click the Setting button
4. Use the Schedule Setting window to set the record schedule
Click Save
A prompt will appear to confirm
5. Click Snapshot
Click the Setting button
Use the Schedule Setting window to set the snapshot schedule
Click Save
A prompt will appear to confirm
Choose you options, Read only, Read & Write, Hot Swap.
Click on Destination and check the local choices.
You can also format the SD card.
